Smoky Ancho Chicken Chili Flavorful and Hearty Dish
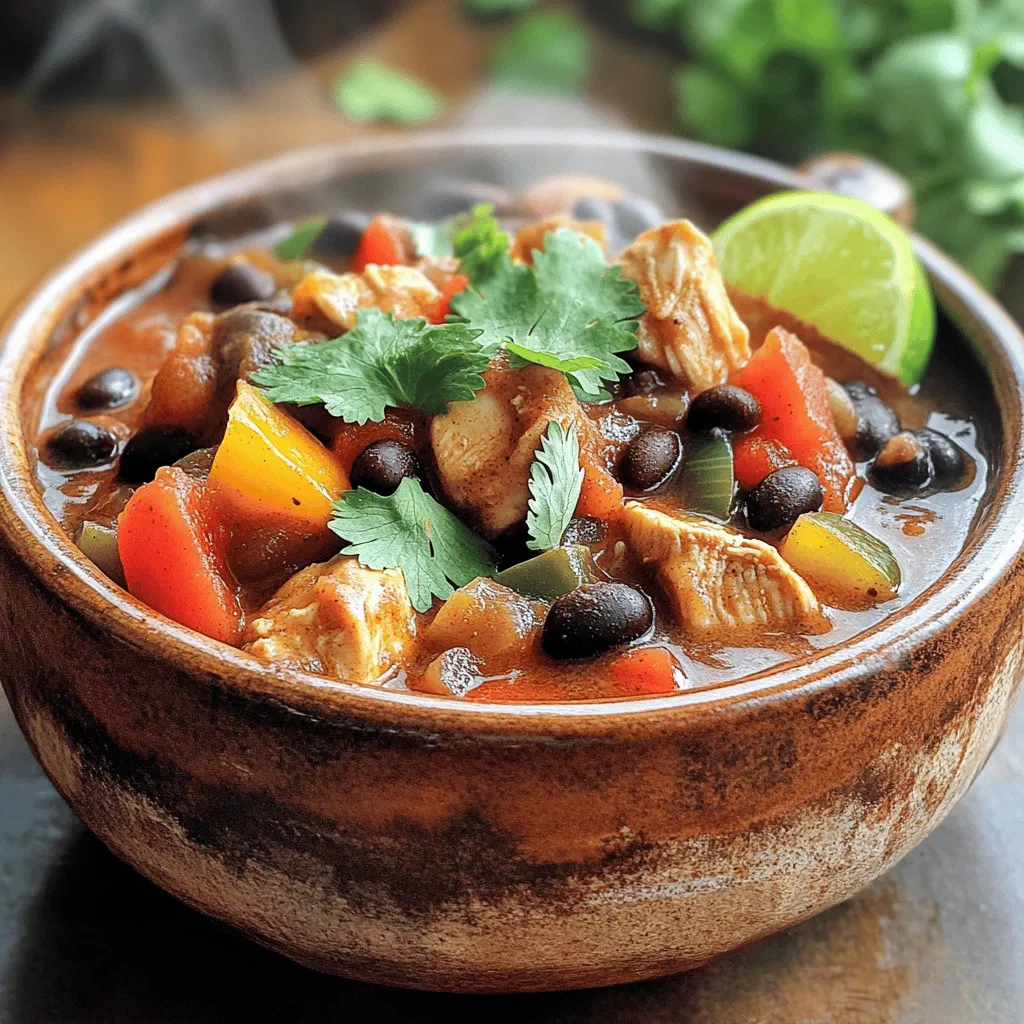
Looking for a dish that warms your heart and tickles your taste buds? Smoky Ancho Chicken Chili hits the spot! This flavorful and hearty recipe is perfect for cozy nights …
Looking for a dish that warms your heart and tickles your taste buds? Smoky Ancho Chicken Chili hits the spot! This flavorful and hearty recipe is perfect for cozy nights …

Are you looking for a quick and tasty dinner idea? This Easy Baked Chicken Parmesan recipe is perfect for busy nights. You’ll love the crispy coating, rich marinara, and gooey …
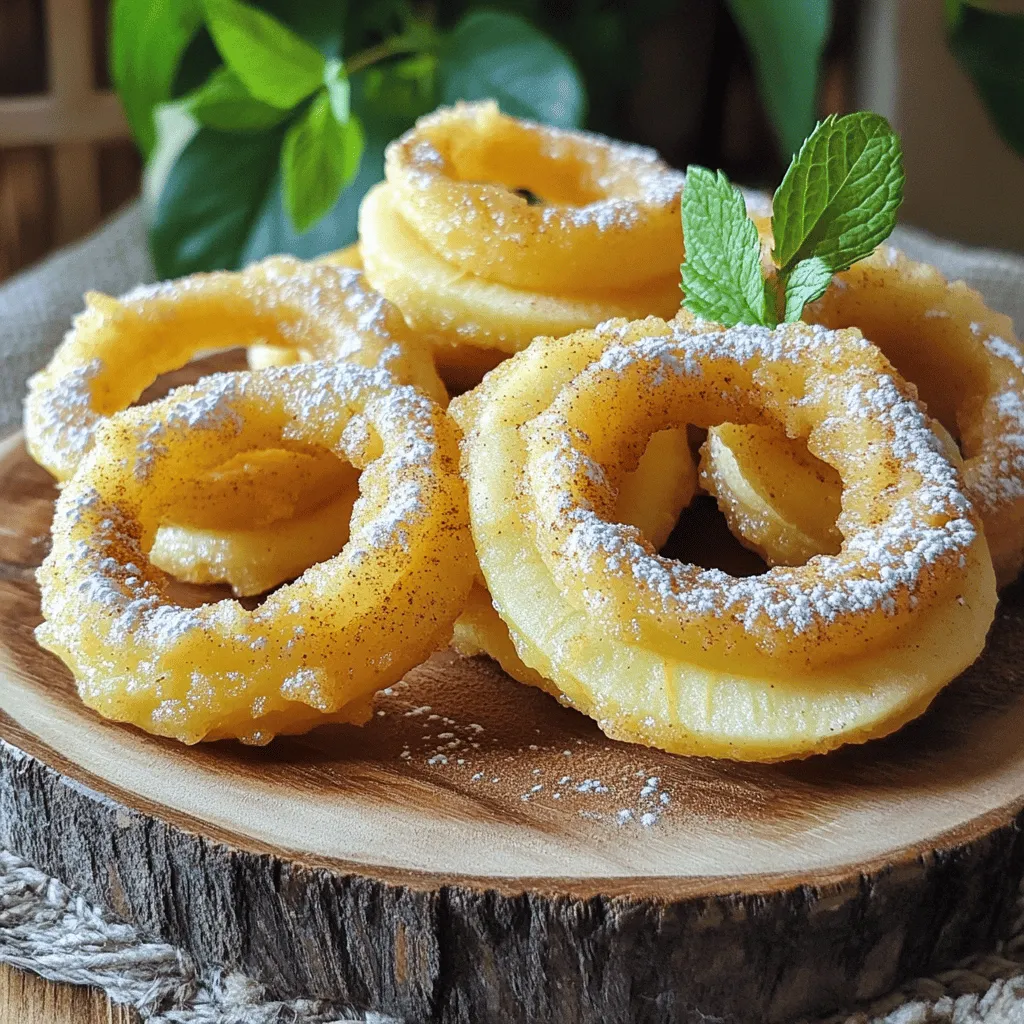
Are you ready for a treat that sings with flavor? Fried Apple Rings are the perfect crispy snack for everyone! Imagine biting into a sweet, juicy apple surrounded by a …

Get ready for a treat that combines two favorites: strawberry cheesecake and cinnamon rolls! In this blog post, I’ll guide you through making Strawberry Cheesecake Cinnamon Rolls, a fun twist …

As autumn rolls in, there’s nothing better than the warm, fragrant scent of freshly baked spiced pumpkin muffins. These delightful treats are easy to make and bursting with flavors like …
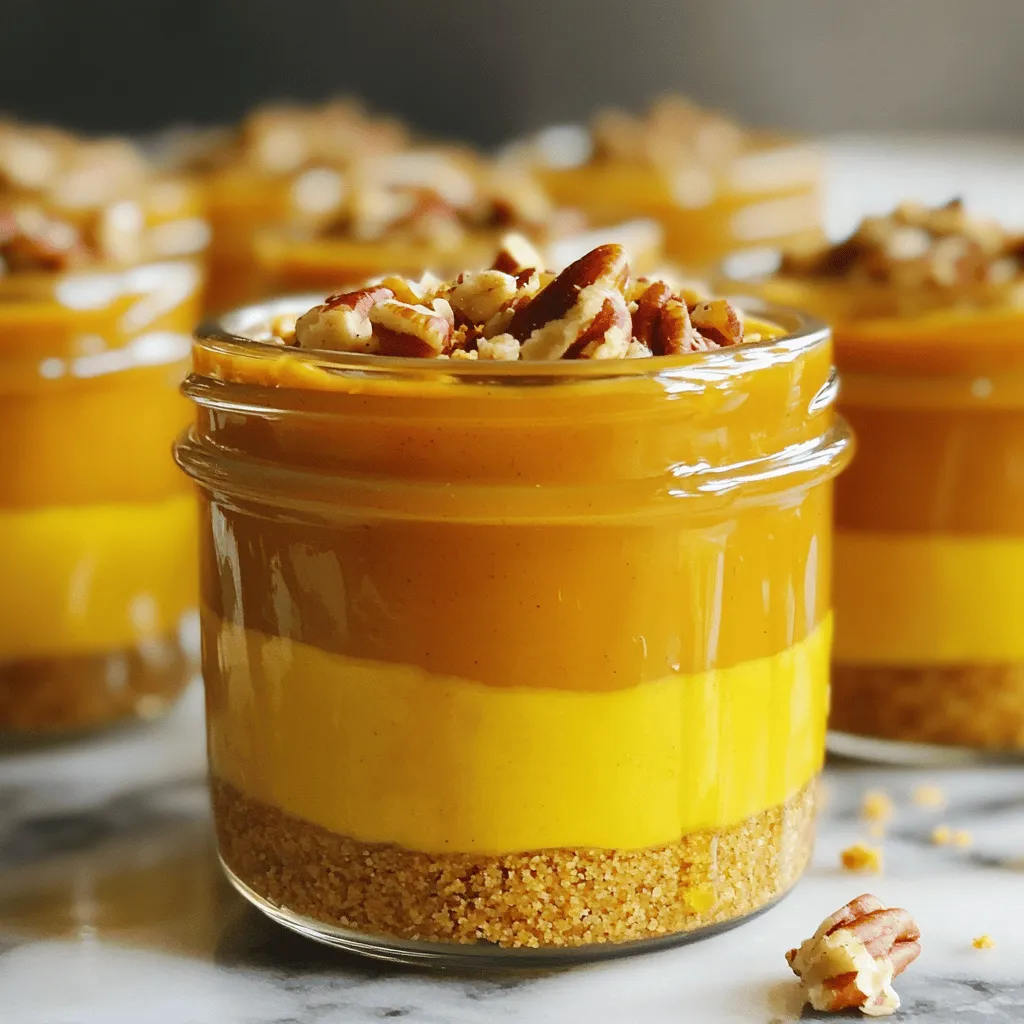
Are you ready to enjoy a creamy and delicious treat this fall? These No-Bake Pumpkin Pie Cups are simple, fun, and full of flavors that capture the season. With just …
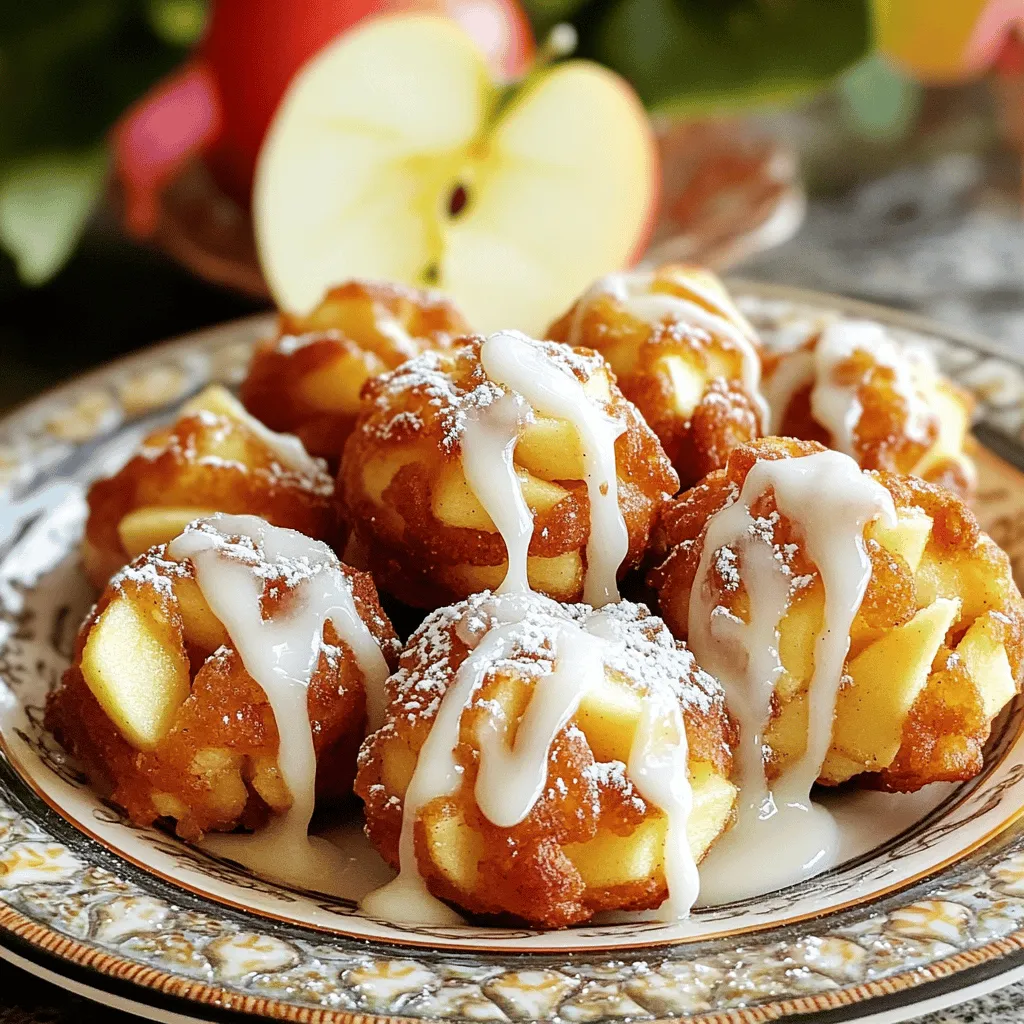
Get ready to savor the best Air Fryer Apple Fritter Bites you’ve ever tasted! This simple recipe combines tender apples, warm spices, and a crispy texture that’s hard to resist. …
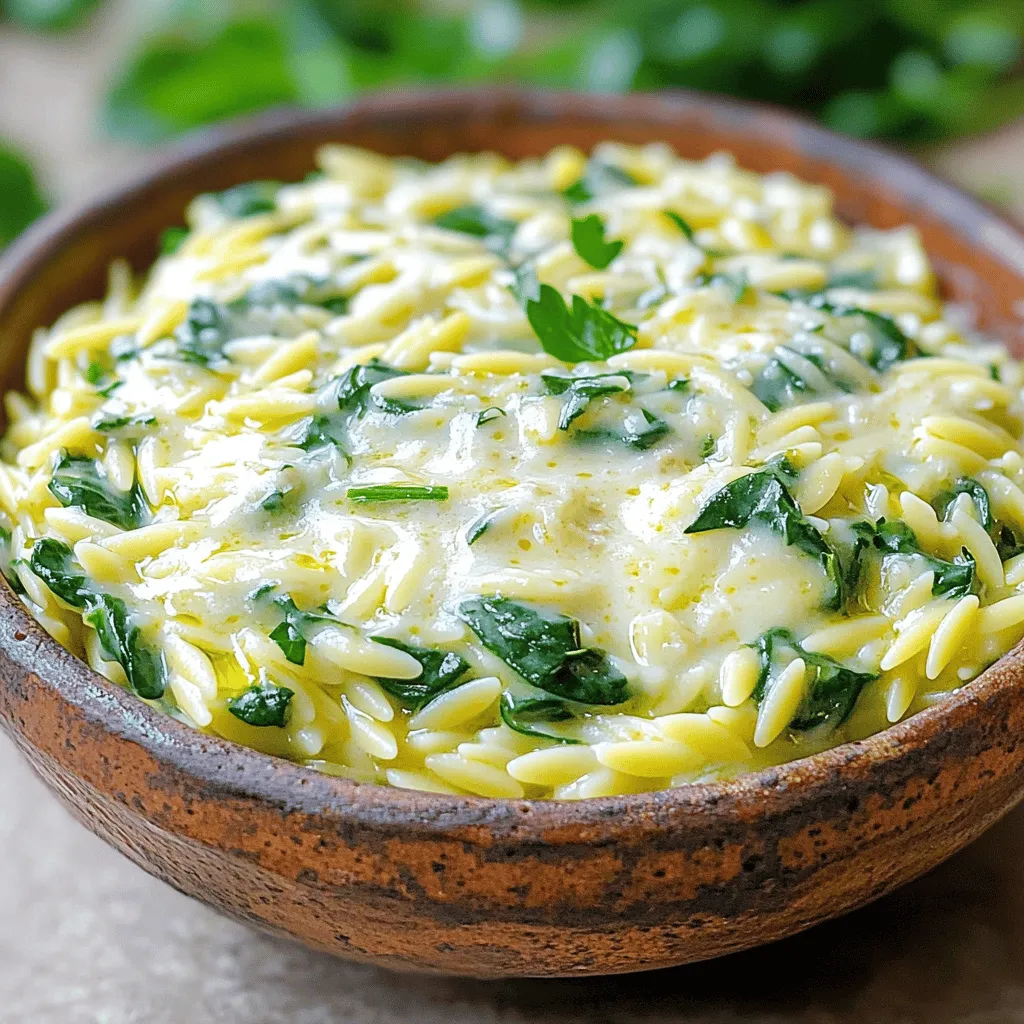
If you love easy, tasty meals, you’re in for a treat! Creamy Garlic Parmesan Orzo is a rich dish that’s simple to make and bursting with flavor. I’ll share a …

Get ready for an easy and delicious meal with my One-Pan Tuscan Chicken! This creamy dish combines juicy chicken, fresh veggies, and bold flavors—all in one pan. Perfect for busy …
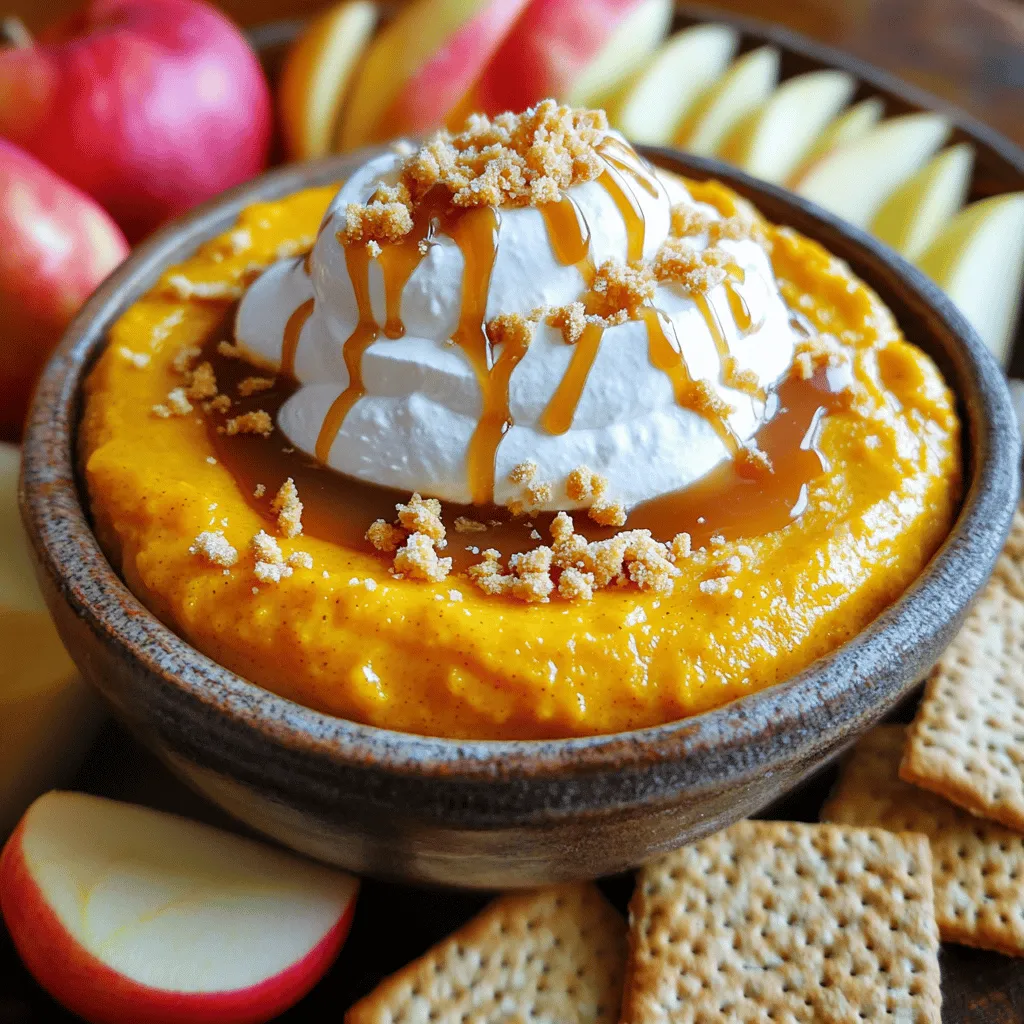
Get ready to indulge in the ultimate fall treat: Salted Caramel Pumpkin Cheesecake Dip! This creamy, sweet dip combines rich pumpkin, smooth cream cheese, and a touch of salted caramel. …