Teriyaki Salmon Rice Bowls Quick and Flavorful Meal
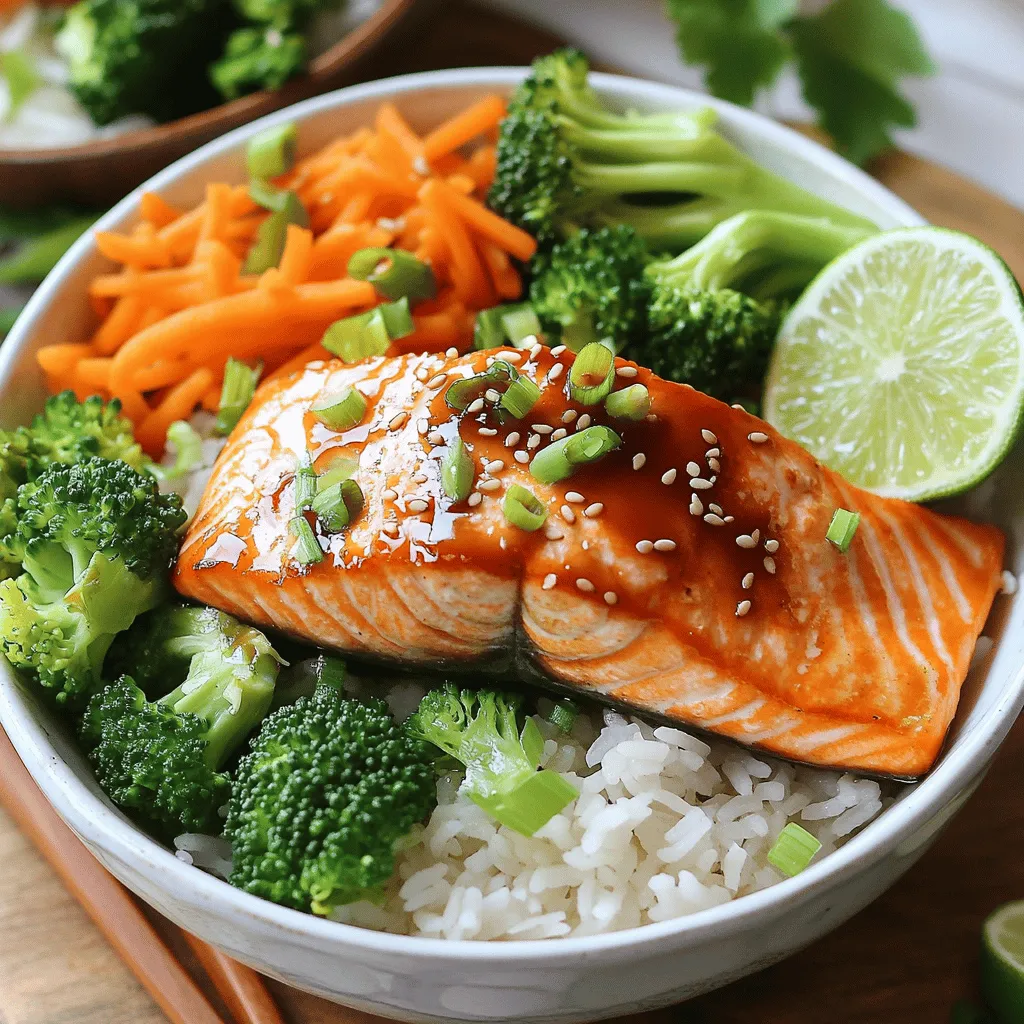
Looking for a quick and tasty dinner? I’ve got you covered with Teriyaki Salmon Rice Bowls! In just 15 minutes, you can whip up a meal packed with flavor and …
Looking for a quick and tasty dinner? I’ve got you covered with Teriyaki Salmon Rice Bowls! In just 15 minutes, you can whip up a meal packed with flavor and …
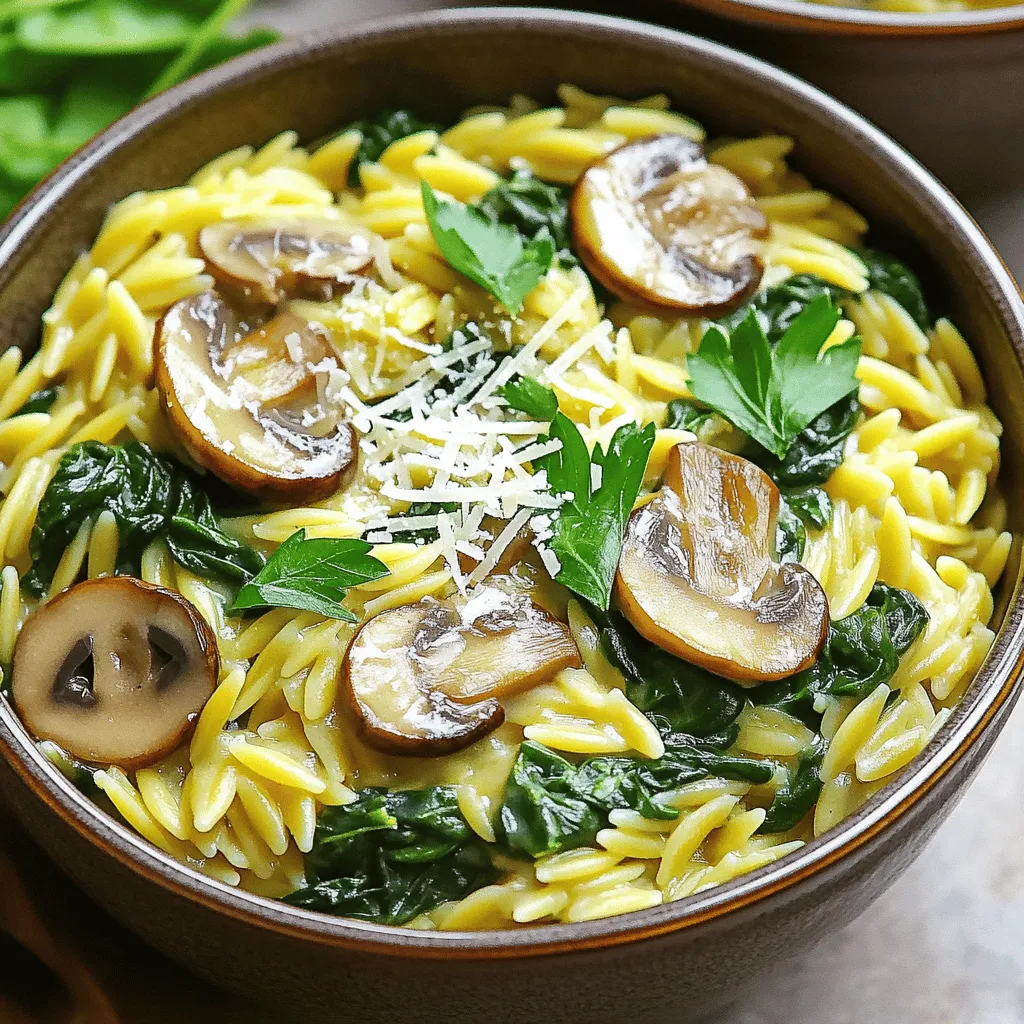
Are you ready to spice up your dinner routine? This One Pot Creamy Mushroom Spinach Orzo will be a game-changer. It combines rich flavors with easy prep, making mealtime a …
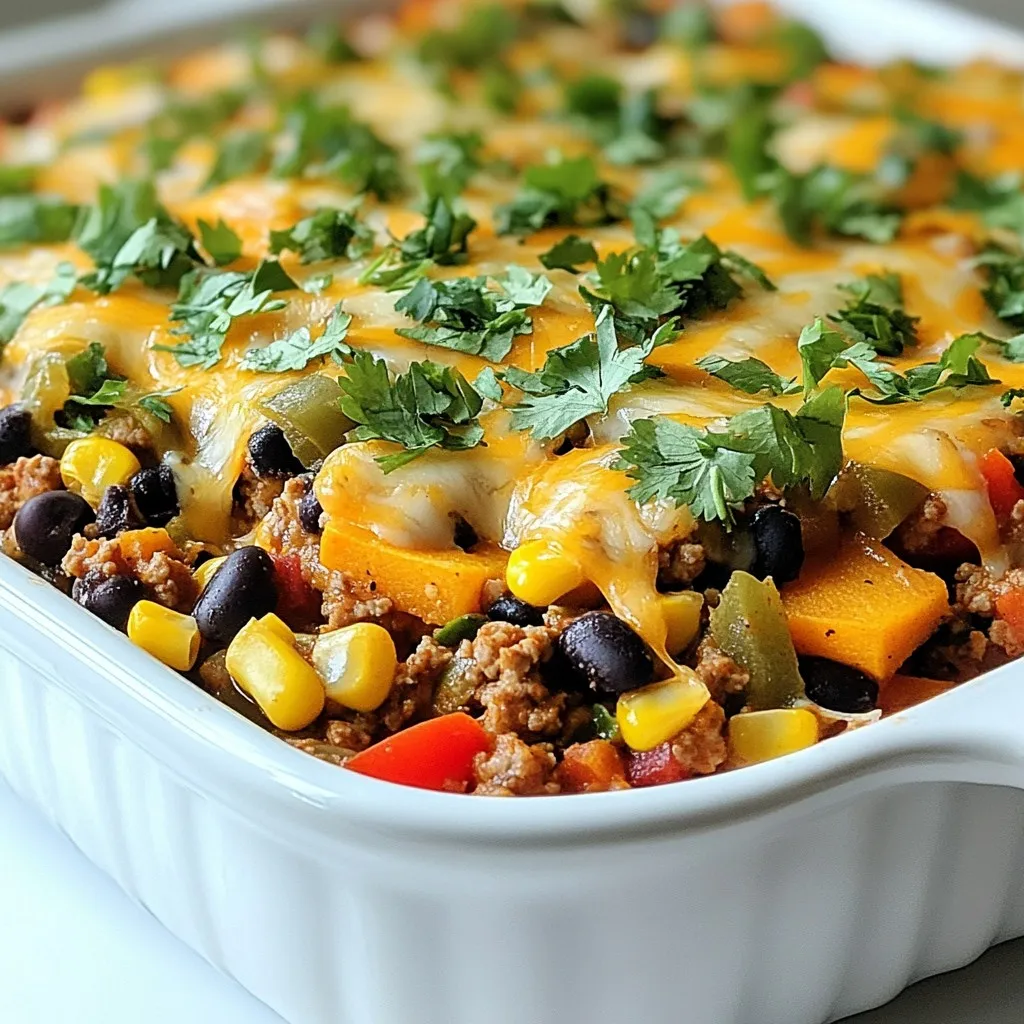
Looking for a cozy meal that warms your heart and your belly? Join me as we whip up a delicious Ground Turkey Sweet Potato Casserole. This dish is not only …
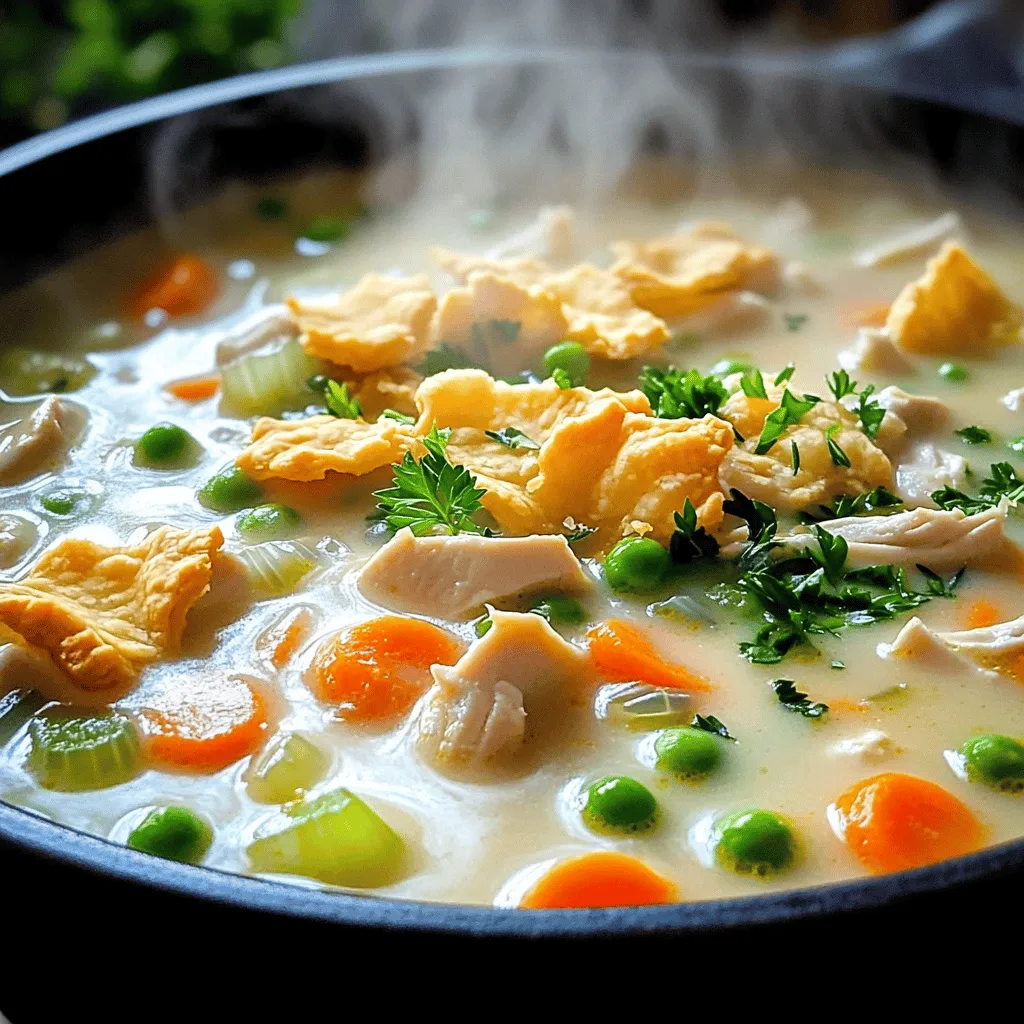
Cozy up with a bowl of Classic Chicken Pot Pie Soup, the ultimate comfort food. This dreamy soup combines tender chicken, fresh veggies, and a rich, creamy broth. It’s warm …
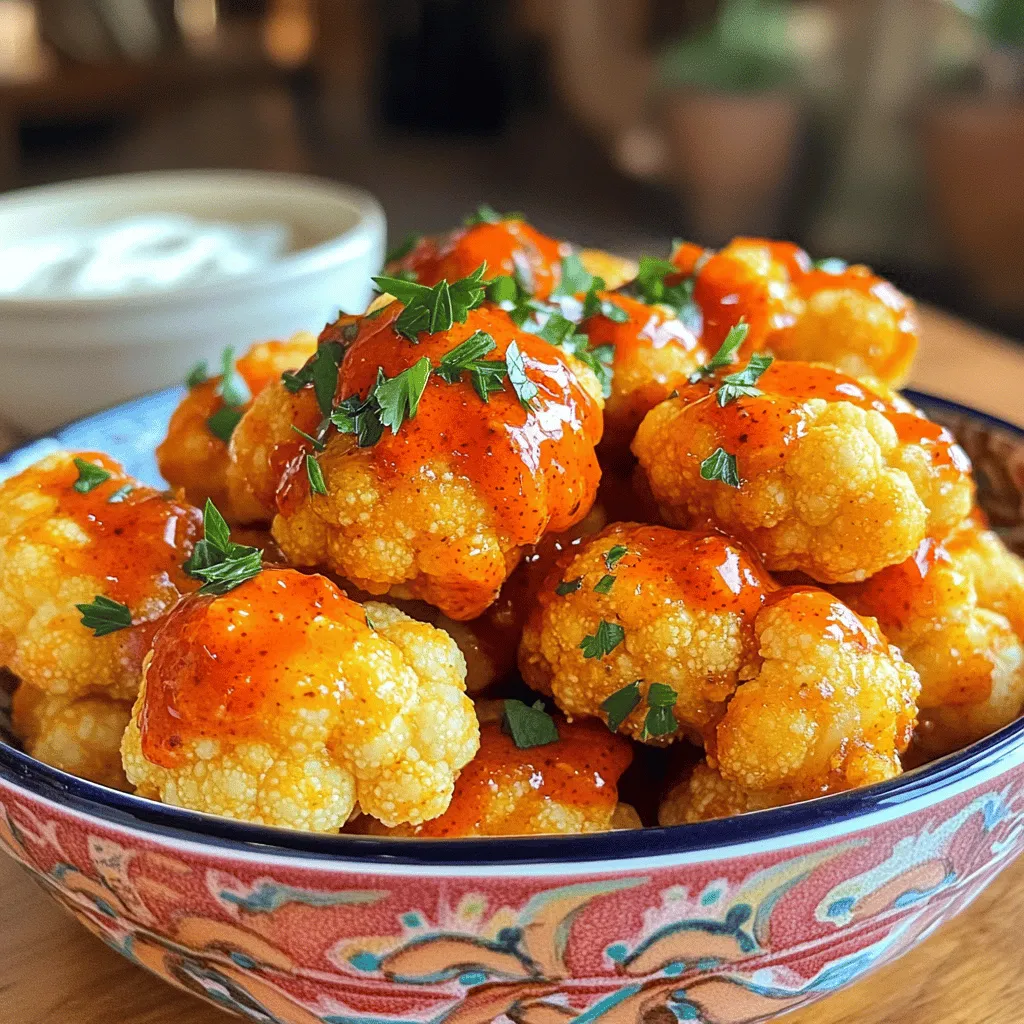
Get ready to spice up your snack game with my Spicy Buffalo Cauliflower Bites! These crispy and flavorful bites are a fun twist on traditional buffalo wings. You’ll love how …
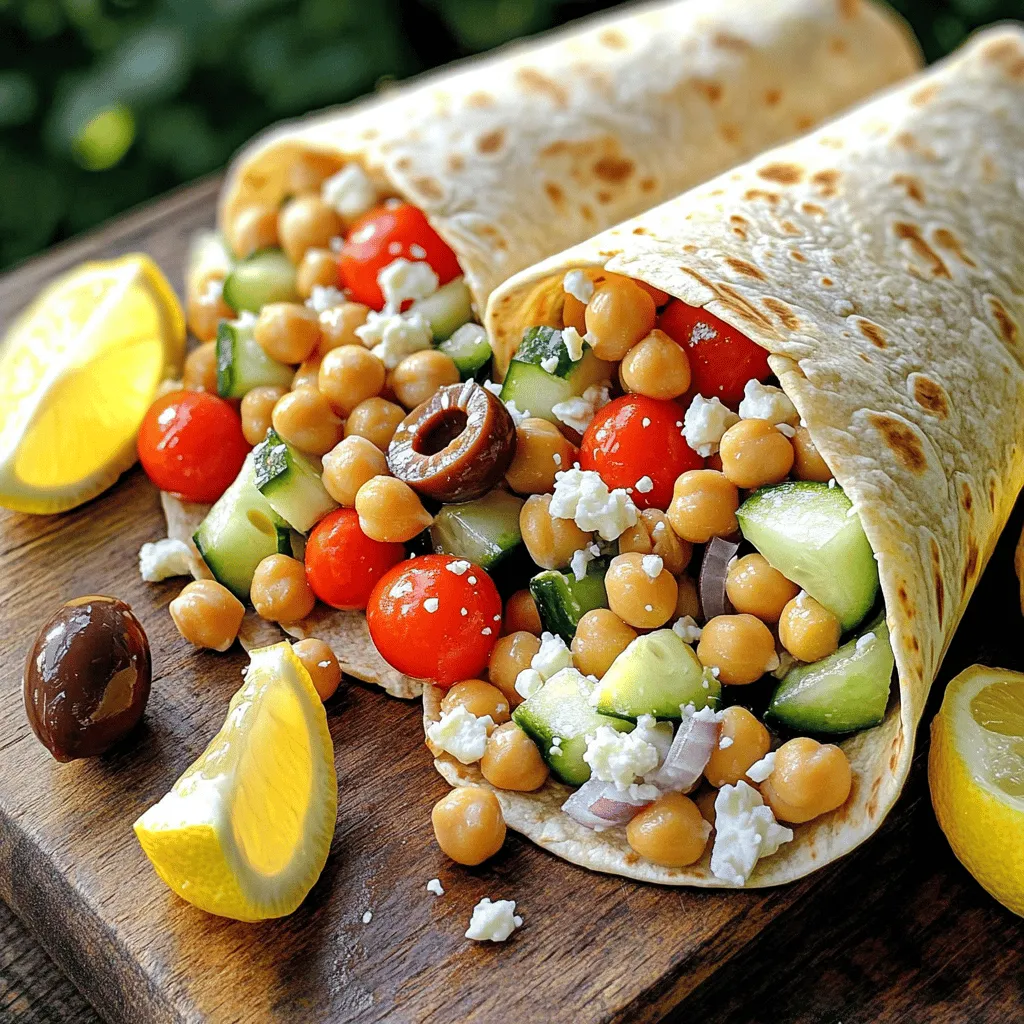
Are you ready to spice up your meal routine? These Mediterranean Chickpea Salad Wraps are fresh, tasty, and easy to make. Packed with flavor and vibrant colors, they make for …
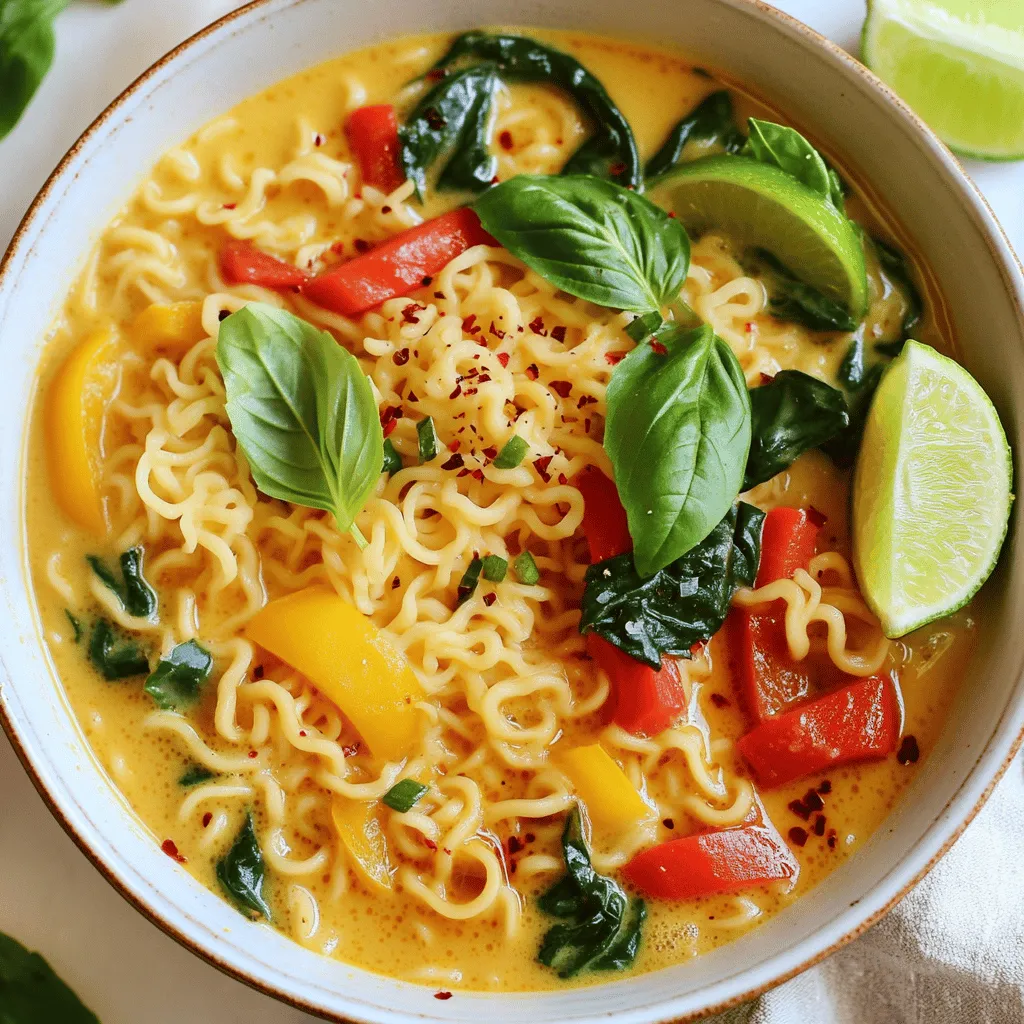
Get ready to dive into a bowl of Thai Coconut Curry Ramen that bursts with flavor! This rich and warming dish combines the best of Thai cuisine with the comfort …
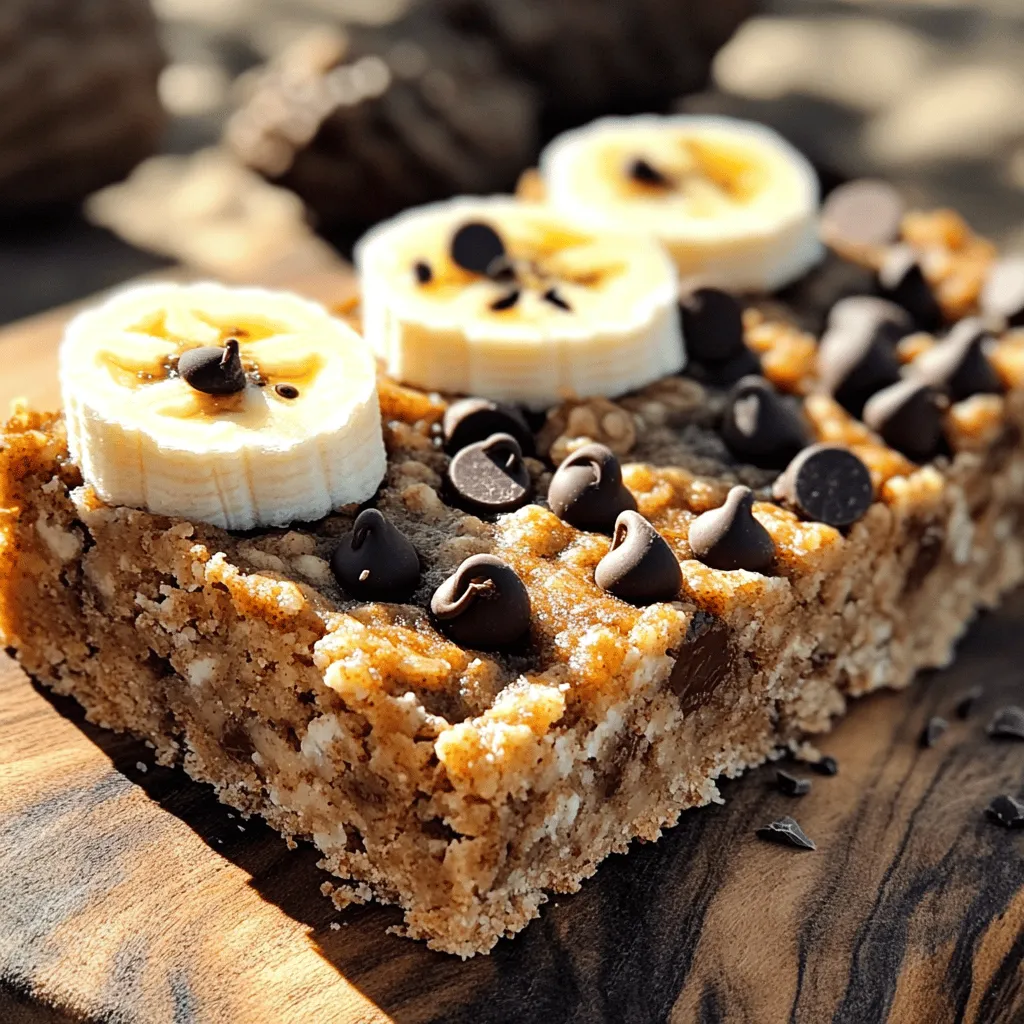
Looking for a quick and tasty snack? These Chocolate Chip Banana Oatmeal Bars are your answer! In just a few steps, you can whip up a delicious treat that’s perfect …
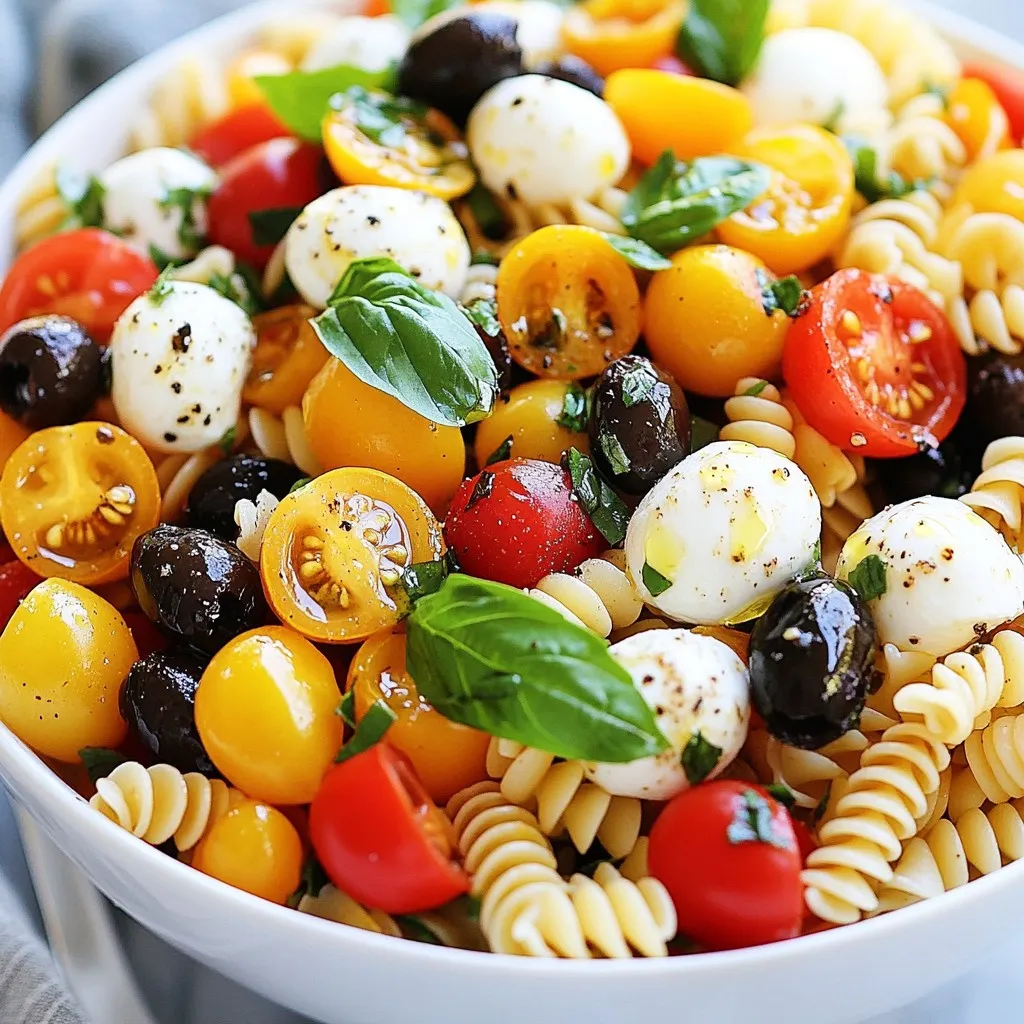
Looking for a tasty way to boost your protein intake? The Italian Protein Pasta Salad is your answer! This dish combines flavors and nutrition into one simple recipe. I’ll guide …
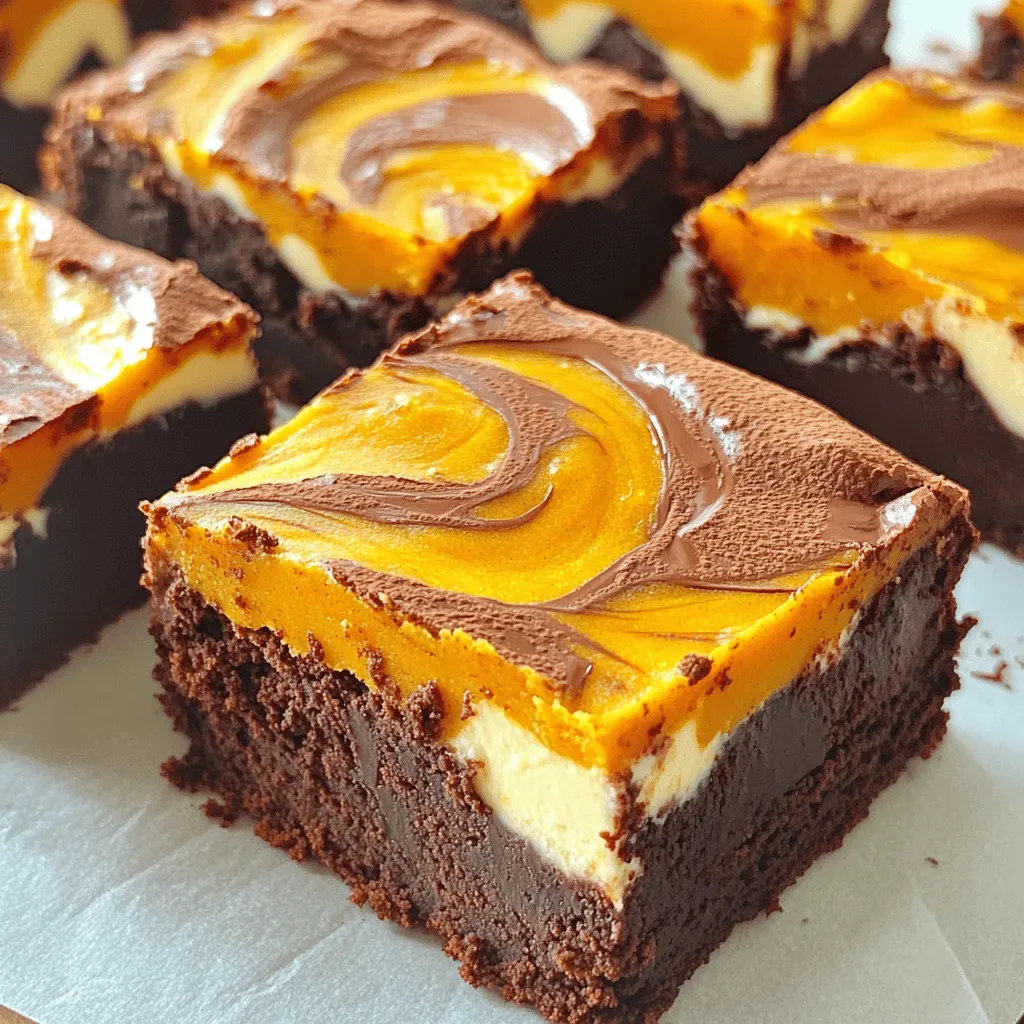
If you’re craving a rich and decadent treat, these Pumpkin Cream Cheese Brownies are for you. Imagine biting into a fudgy brownie layered with creamy, spiced pumpkin goodness. This dessert …