One-Pot Creamy Sun-Dried Tomato Tortellini Soup Delight
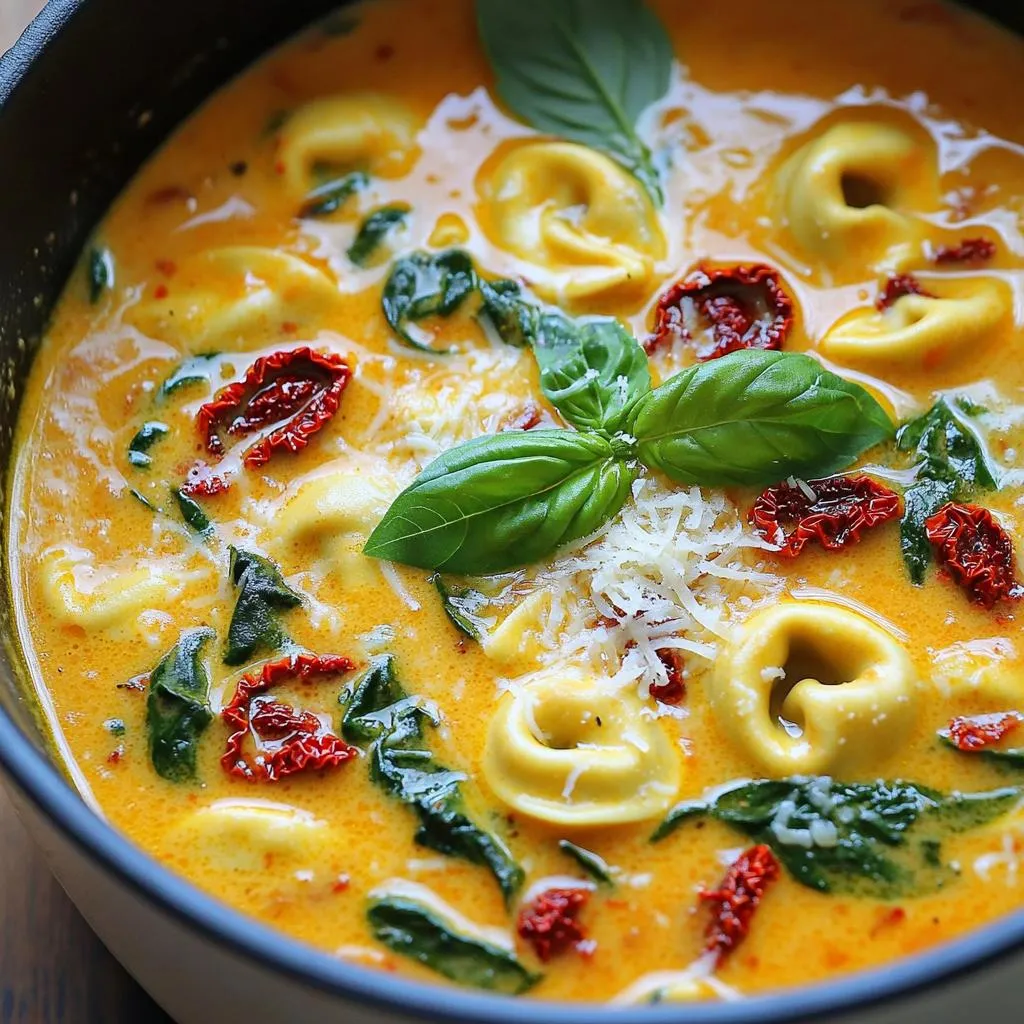
If you crave a warm, cozy meal, then this One-Pot Creamy Sun-Dried Tomato Tortellini Soup is exactly what you need! I’ll share how simple ingredients can turn into a delicious …
If you crave a warm, cozy meal, then this One-Pot Creamy Sun-Dried Tomato Tortellini Soup is exactly what you need! I’ll share how simple ingredients can turn into a delicious …

Looking for a tasty and easy meal? Let’s dive into making Air Fryer Buffalo Chicken Taquitos! This crowd-pleaser combines crispy texture with spicy flavor for a dish you’ll love. I’ll …
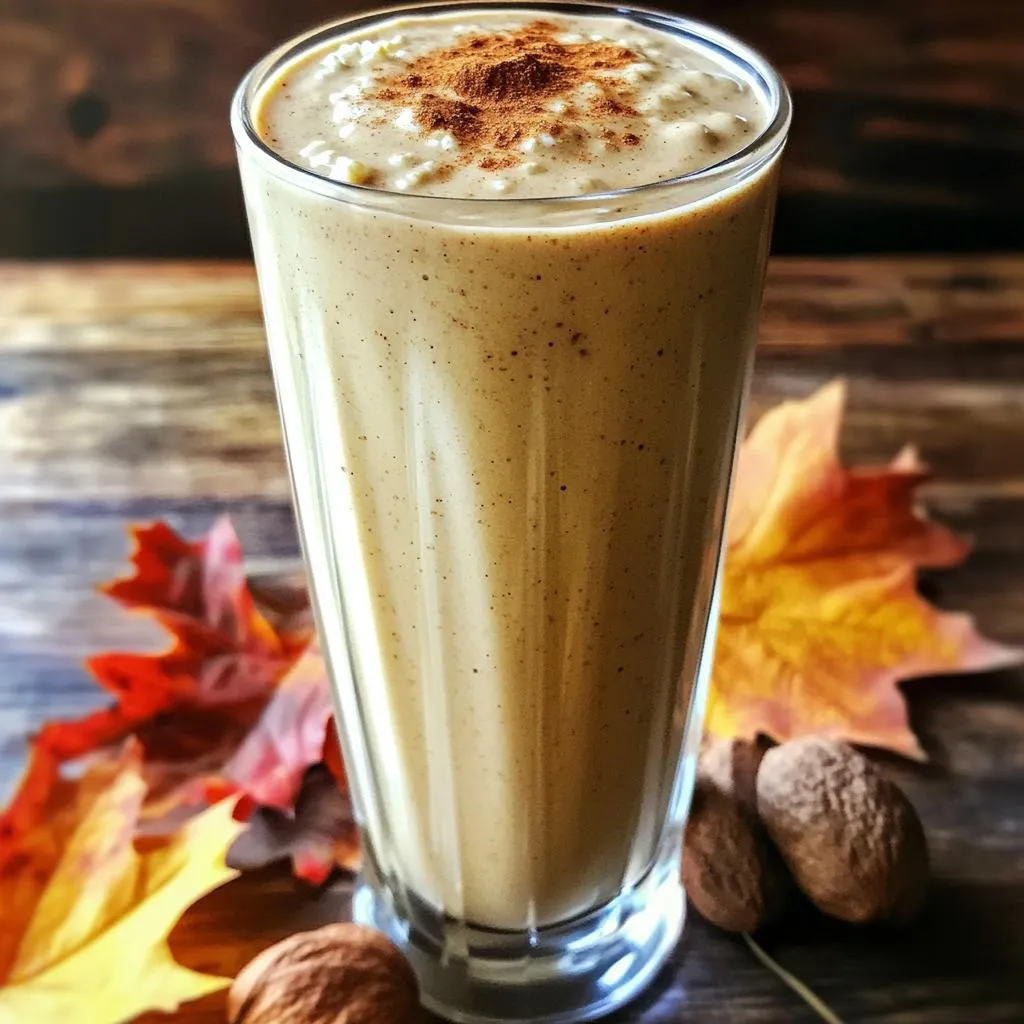
Looking for a tasty way to boost your protein intake? Try my Protein-Packed Gingerbread Cottage Cheese Smoothie! This delightful drink is not only rich in protein but also bursting with …
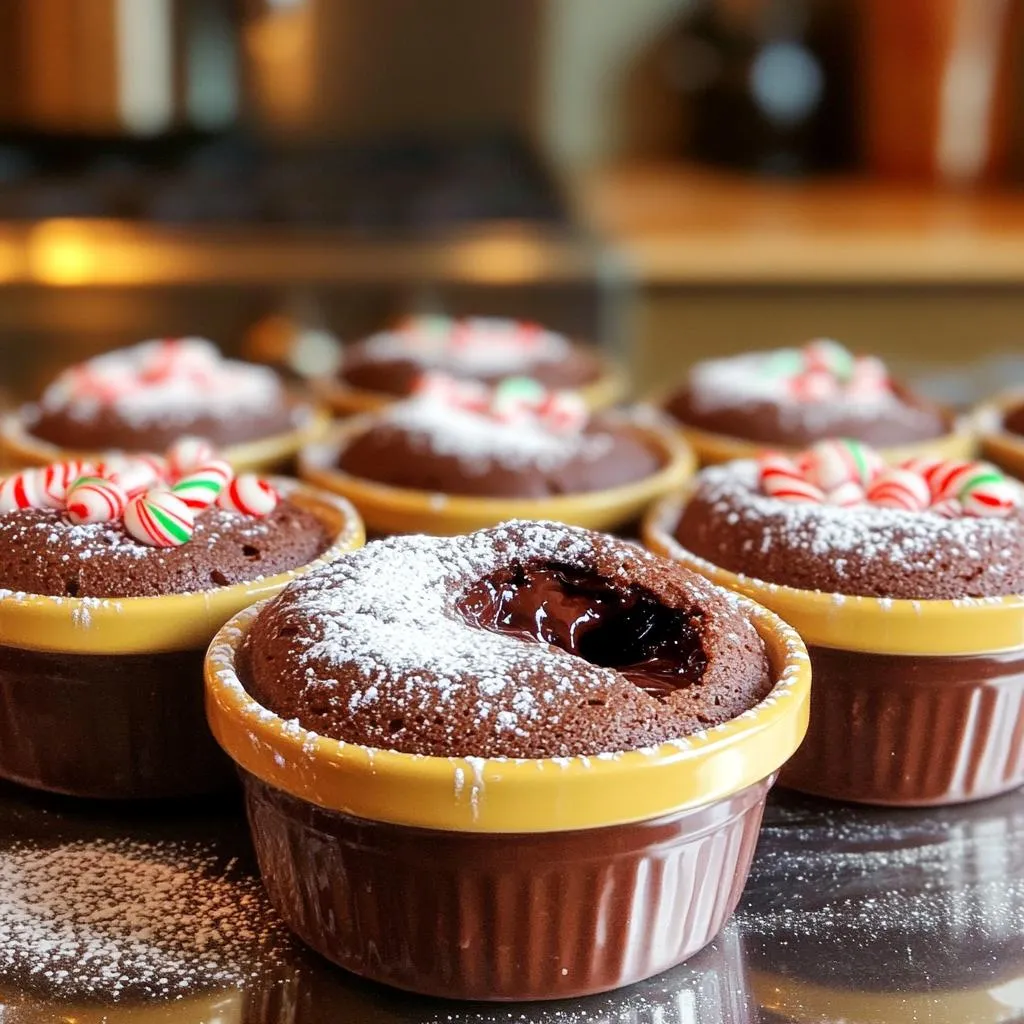
Indulge in the rich, warm joy of chocolate with my Warm Chocolate Peppermint Lava Cakes. This decadent delight will impress your guests and make you the star of any gathering. …
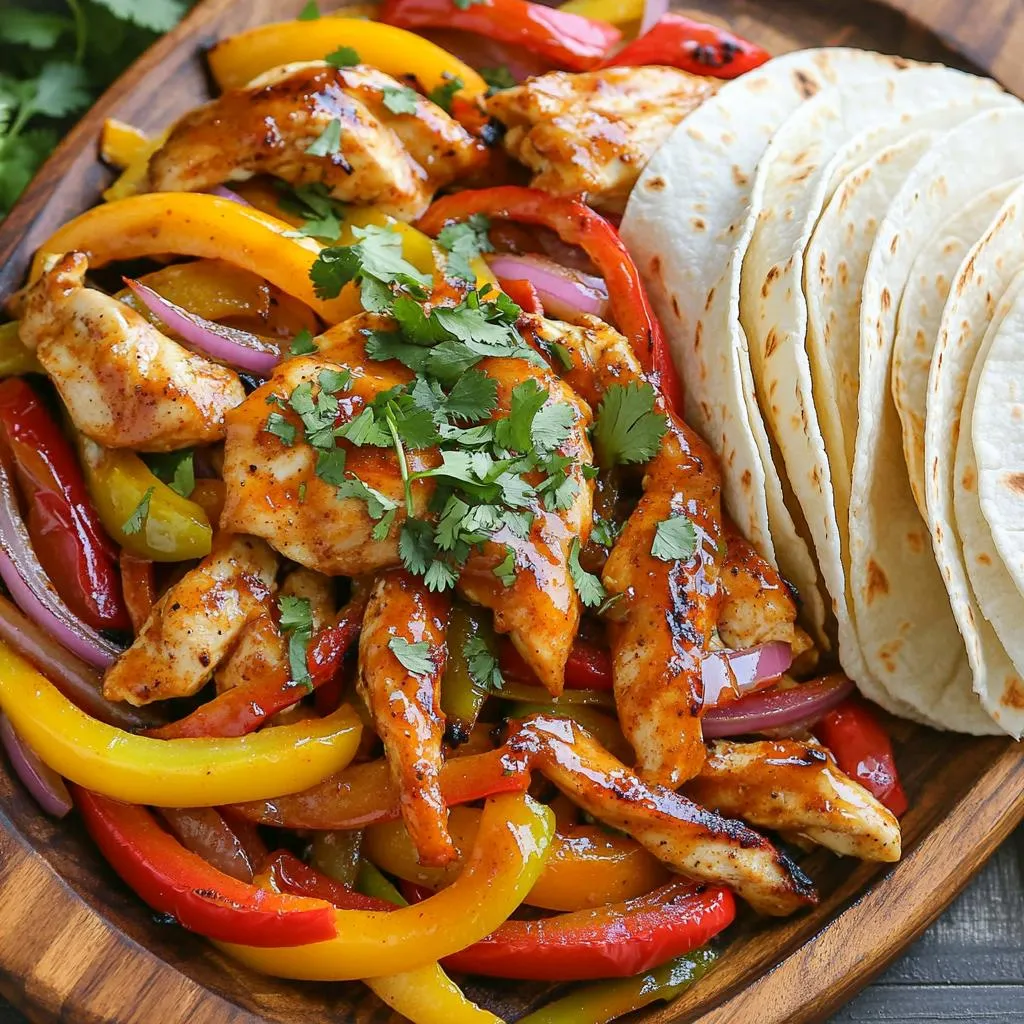
Get ready to spice up your dinner with my Sheet Pan Sweet Chili Lime Chicken Fajitas! This easy recipe combines juicy chicken thighs and fresh veggies, all tossed together with …

Are you ready to whip up a sweet treat without an ice cream maker? I’m excited to share my No-Churn Birthday Cake Ice Cream Delight recipe! This easy, fun dessert …
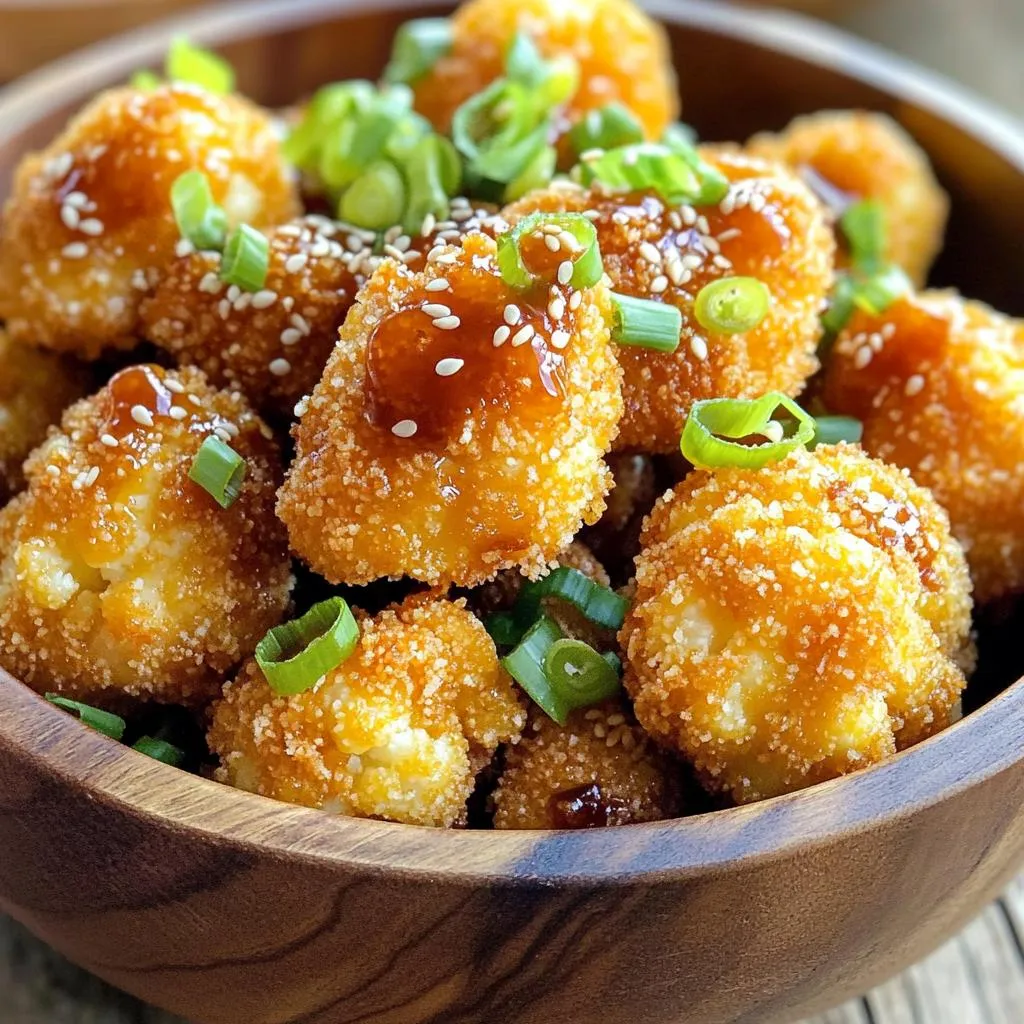
If you’re craving a snack that’s both delicious and healthy, you’ve found it! Crispy Honey Garlic Cauliflower Bites are your perfect solution. This tasty treat combines crunchy cauliflower with a …
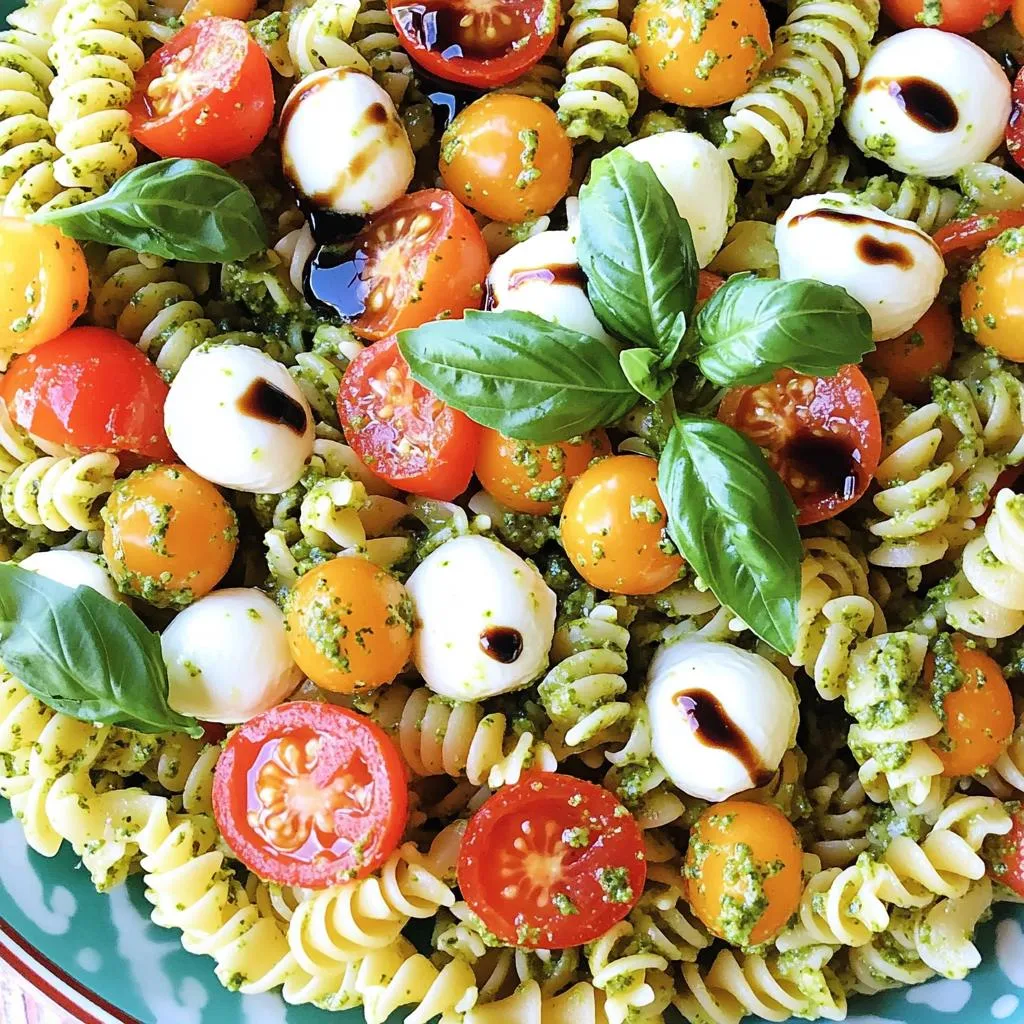
Looking for a quick, tasty dish? This Minute Caprese Pesto Pasta Salad packs brilliant flavors in just a few steps! With rotini pasta, fresh mozzarella, and a vibrant pesto sauce, …
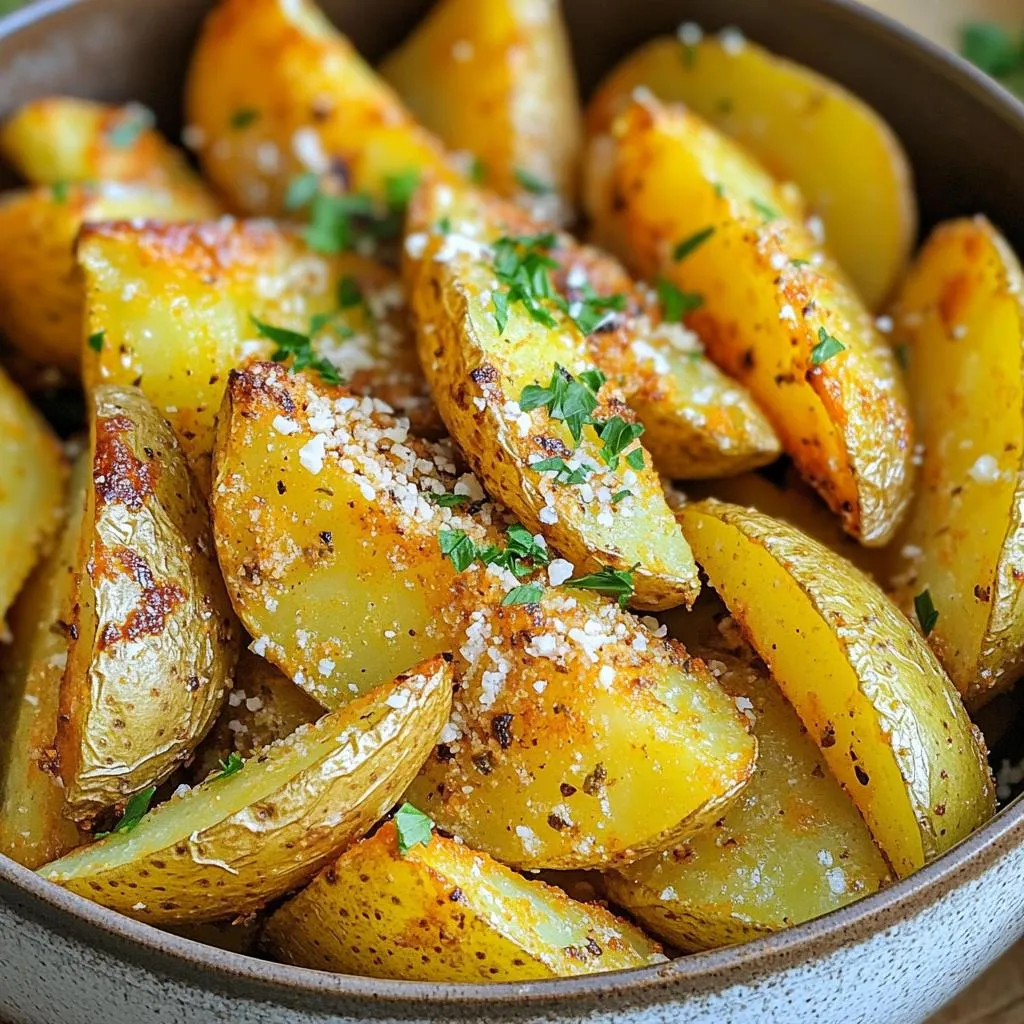
Are you ready to enjoy crispy, flavorful Garlic Parmesan potato wedges? Using an air fryer makes this dish a breeze! I’ll guide you through each step, from gathering fresh ingredients …
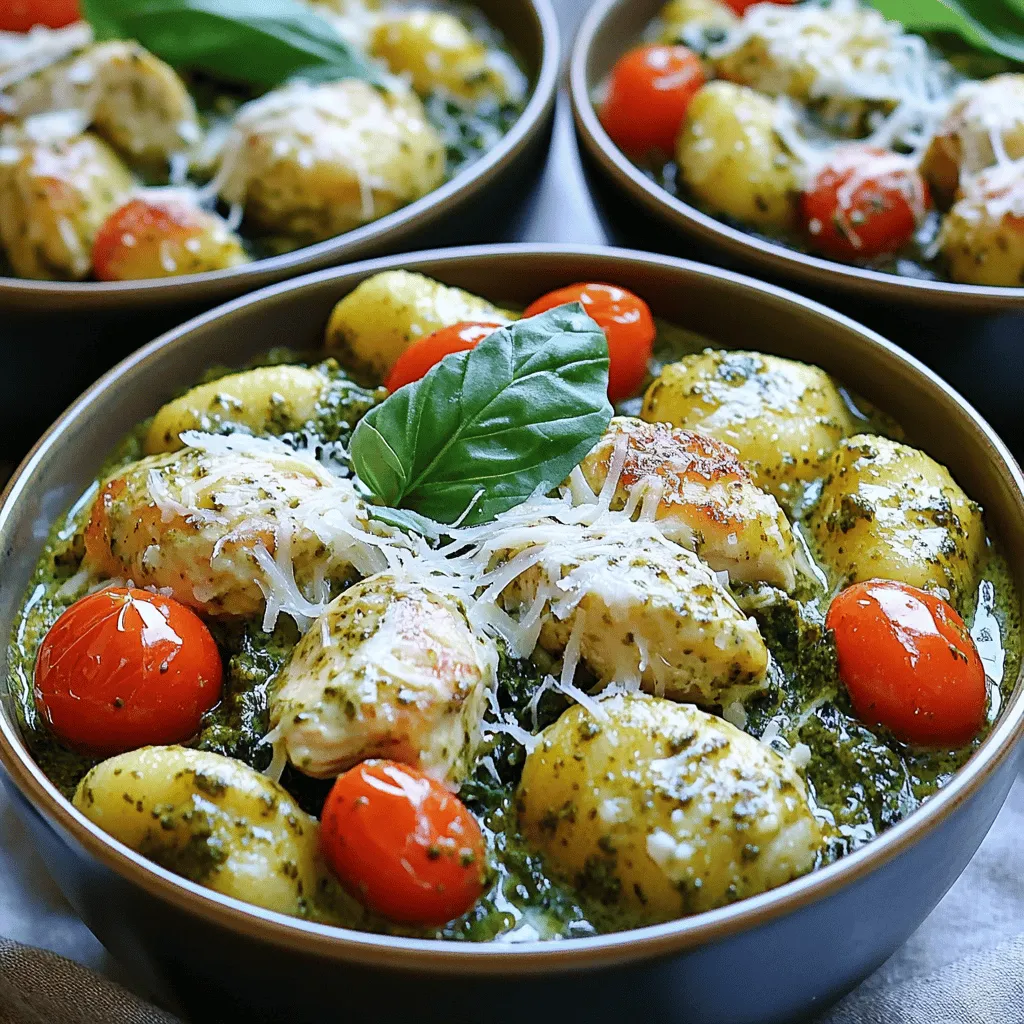
Welcome to your new favorite dish: One-Pot Creamy Pesto Chicken Gnocchi Delight! This meal is easy and bursting with flavor. Imagine tender chicken, pillowy gnocchi, and rich pesto all in …