Pumpkin Hot Chocolate Cozy Fall Favorite Recipe

As the leaves turn and the air gets crisp, there’s nothing cozier than a warm mug of Pumpkin Hot Chocolate. This rich treat blends creamy milk with smooth pumpkin puree …
As the leaves turn and the air gets crisp, there’s nothing cozier than a warm mug of Pumpkin Hot Chocolate. This rich treat blends creamy milk with smooth pumpkin puree …

If you crave comfort food that warms your soul, you’ve come to the right place! My Slow Cooker Creamy Garlic Mash is rich, buttery, and loaded with flavor. It’s the …
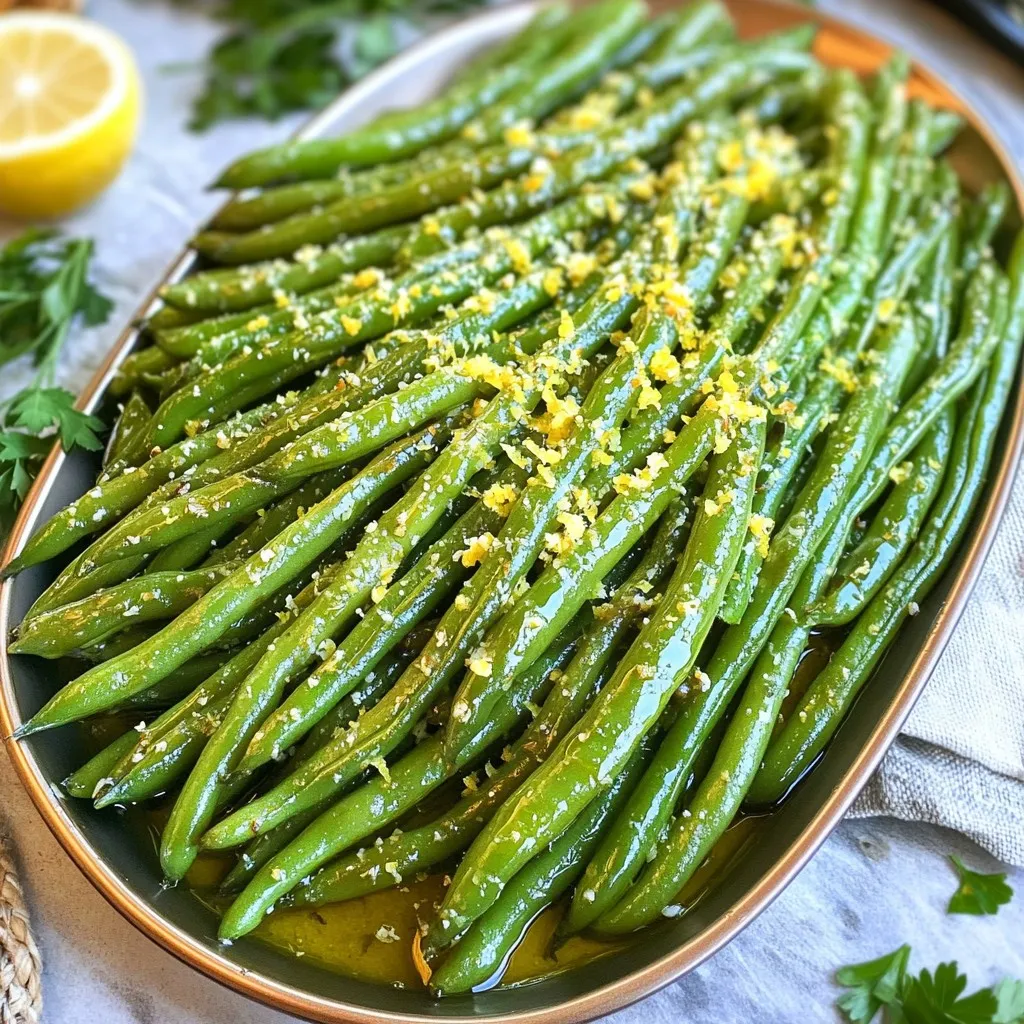
Looking for a tasty side dish that’s quick and easy? You’ve found it! In this post, I’ll show you how to make crispy Air Fryer Parmesan Green Beans. With just …
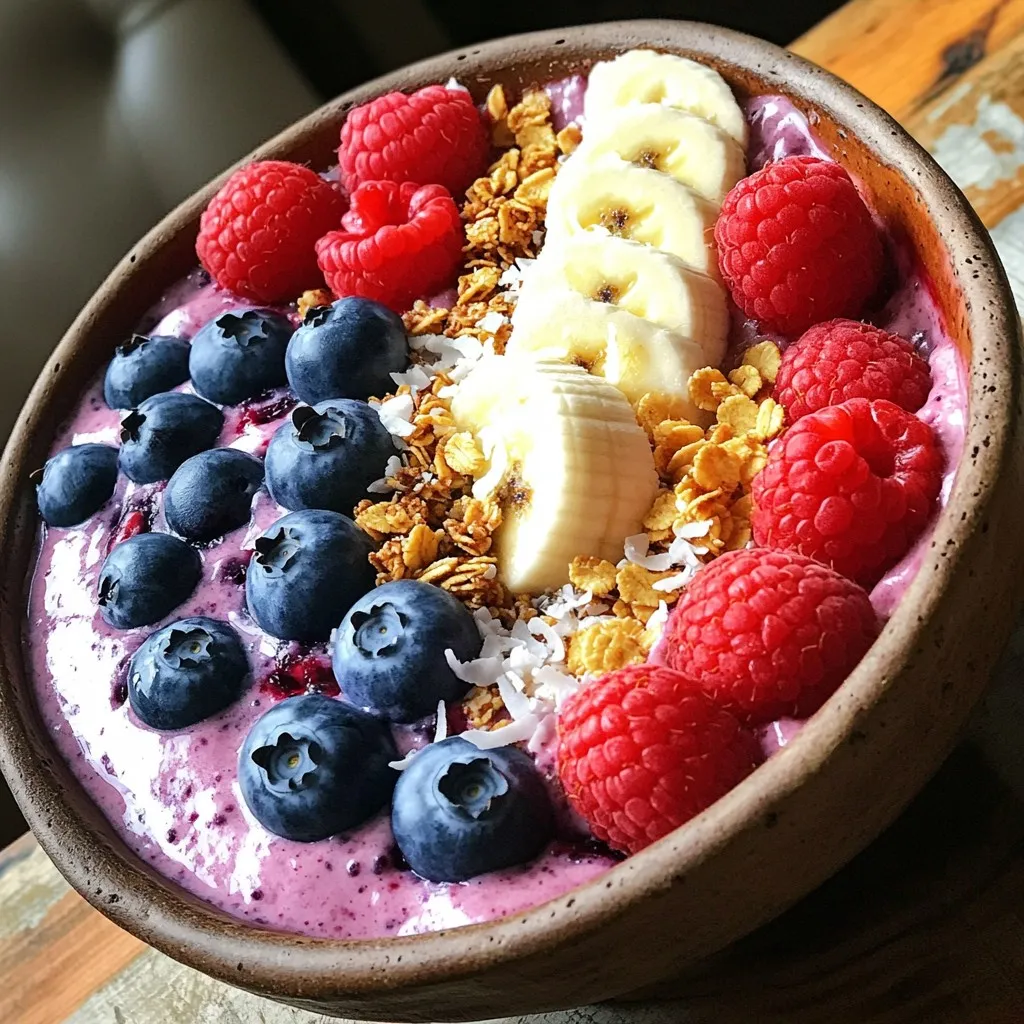
Are you ready to savor a delicious Protein Cottage Cheese Smoothie Bowl that fuels your day? Made with creamy cottage cheese, ripe bananas, and vibrant mixed berries, this bowl is …

Get ready to indulge in No-Bake Biscoff Pumpkin Cheesecake Bites! These treats blend creamy pumpkin goodness with the unique flavor of Biscoff cookies. Perfect for any occasion, they are easy …
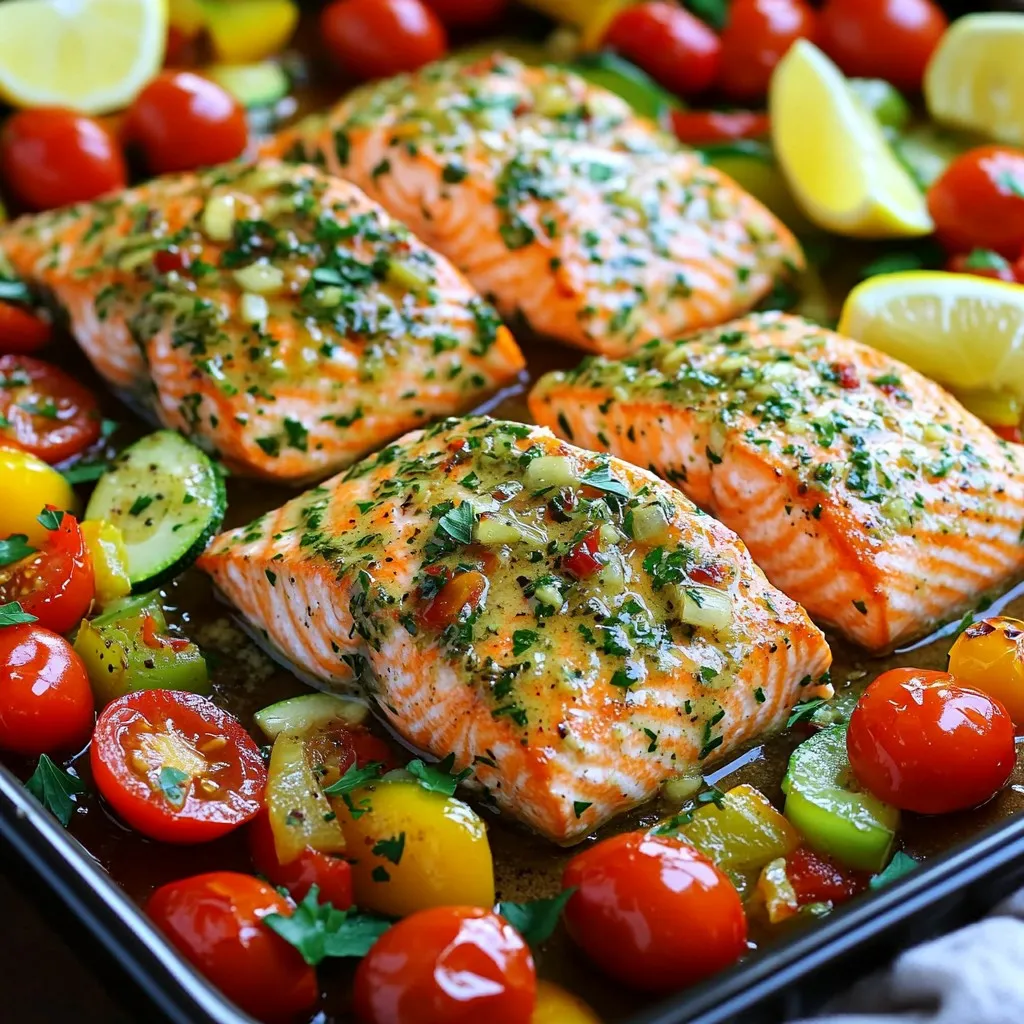
Looking for a quick and tasty dinner? You’ve found it! This Sheet Pan Garlic Herb Salmon & Veggies recipe is easy, healthy, and full of flavor. With fresh salmon, bright …
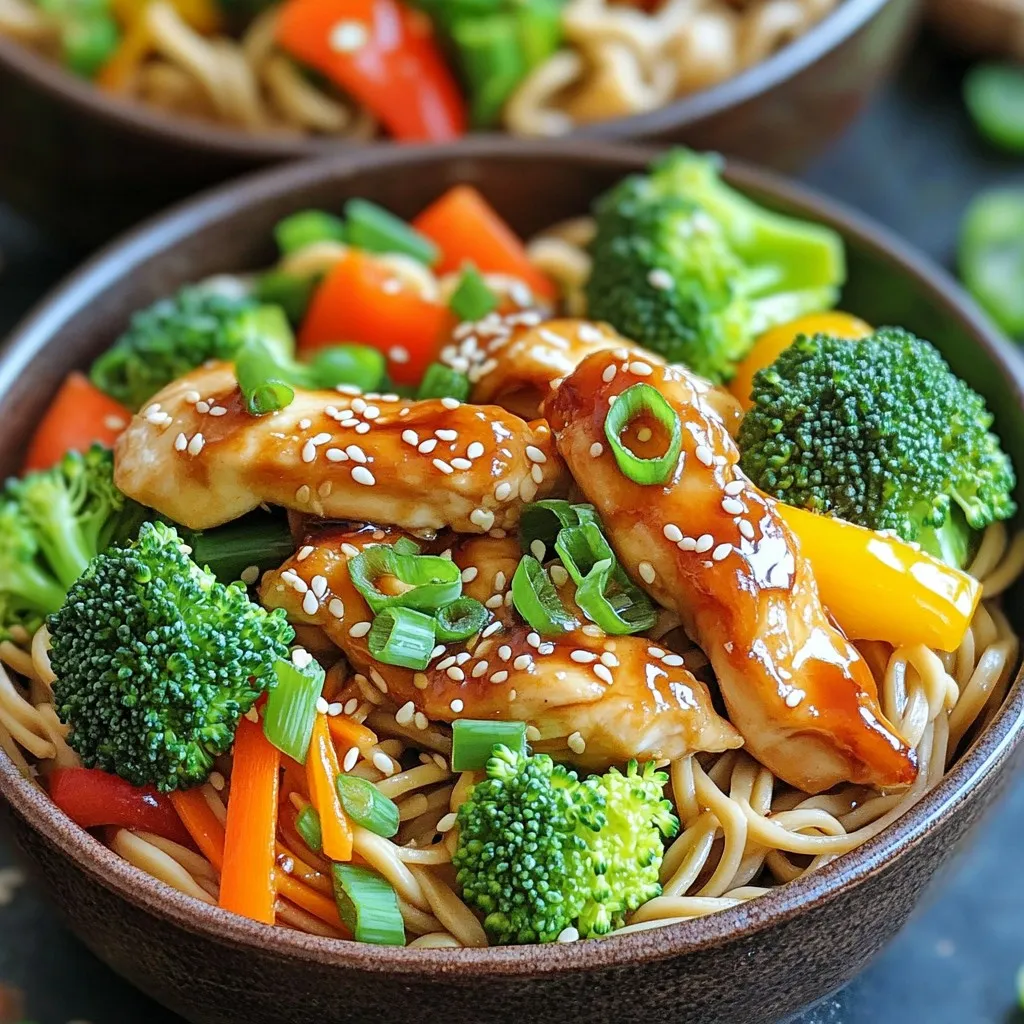
Love takeout but crave a homemade touch? My Teriyaki Chicken Noodle Bowls are a game changer! Packed with fresh veggies, tender chicken, and a sweet-savory sauce, this dish beats anything …
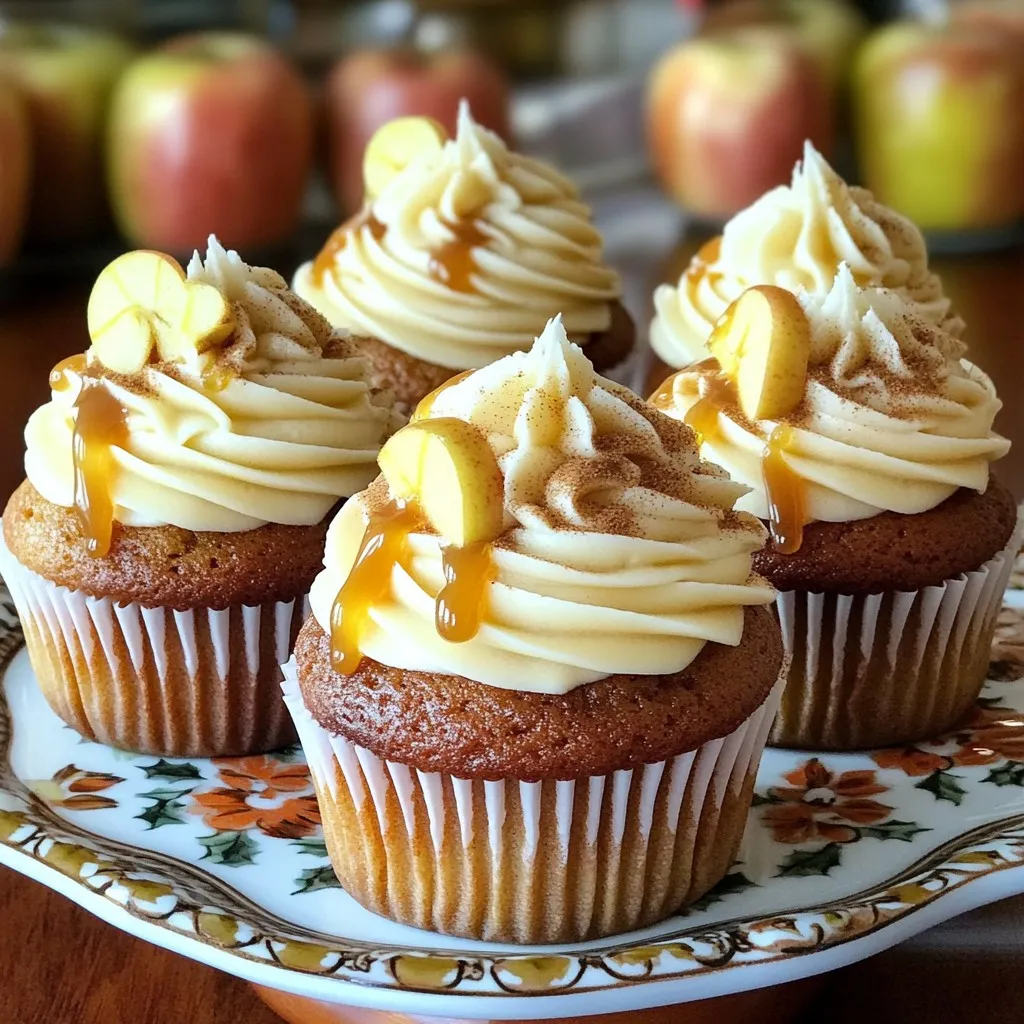
Get ready to indulge in a treat that’s bursting with fall flavors! My Spiced Caramel Apple Cupcakes with Buttercream Delight will amaze your taste buds and warm your heart. These …
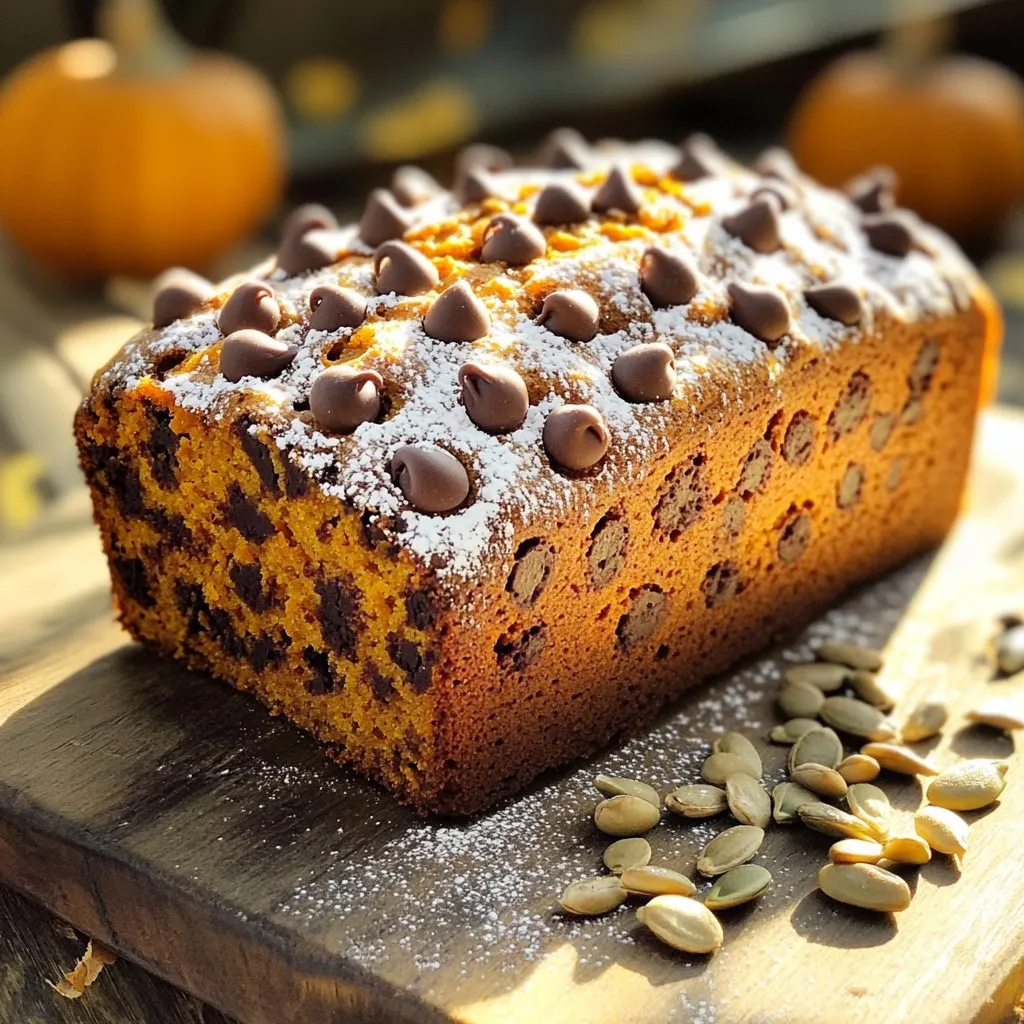
Are you ready to bake something that smells like fall? My Chocolate Chip Pumpkin Bread Bakery Style Delight is the perfect blend of sweet and cozy. This recipe is simple, …
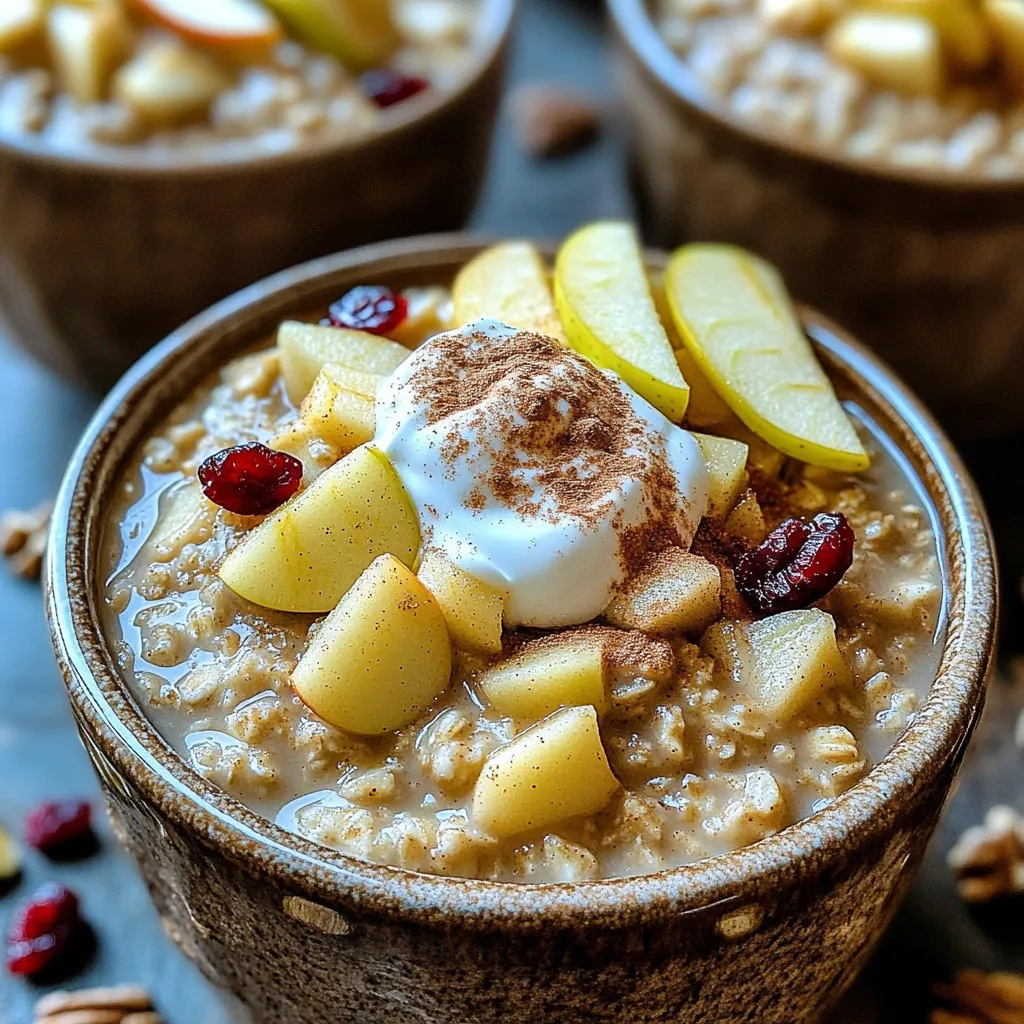
Start your mornings off right with my Slow Cooker Apple Cinnamon Steel Cut Oats Delight! This warm, hearty dish combines the goodness of steel cut oats with sweet apples and …