Skip to content
The Recipe Hatch
  • Home
  • Appetizers
  • Desserts
  • Salads
  • Breakfast
  • Dinner
  • Privacy Policy
  • Contact
  • About

Chef Owen

Air Fryer Apple Fries Crispy and Irresistible Snack

November 11, 2025December 30, 2024 by Chef Owen
- 2 large apples (Fuji or Honeycrisp) - 1 cup all-purpose flour - 1 teaspoon cinnamon - ½ teaspoon nutmeg - 1 cup breadcrumbs (Panko recommended) - 2 large eggs - 2 tablespoons milk - 2 tablespoons brown sugar - Pinch of salt - Cooking spray For this recipe, I love using Fuji or Honeycrisp apples. They are sweet and crisp. The texture holds up well when frying. You want your apples to be fresh for the best flavor. You will need some basic items. Flour, cinnamon, and nutmeg make a lovely coating. The brown sugar adds a hint of sweetness. I prefer Panko breadcrumbs for that extra crunch. Eggs and milk create a nice binding agent. They help the coating stick to the apple fries. A pinch of salt balances the sweetness. Cooking spray is key; it helps the fries crisp up in the air fryer. Gathering these ingredients is easy. You might already have most of them at home. If not, a quick trip to the store will do. Make sure to choose the best apples you can find. Fresh ingredients make all the difference in the world. {{ingredient_image_1}} Wash the apples under running water to remove any dirt. Cut each apple into quarters. Use a knife to remove the core. Slice the quarters into fry-shaped pieces, aiming for even sizes. This helps them cook the same way. In a shallow bowl, mix together the flour, cinnamon, nutmeg, brown sugar, and a pinch of salt. In a second bowl, whisk the eggs and milk together until combined. In a third bowl, place the breadcrumbs. This setup makes coating the apple fries easy. Take one apple fry and dip it into the flour mix. Make sure it gets coated well. Shake off any extra flour. Next, dip it into the egg mixture. Finally, roll it in the breadcrumbs for a nice coating. Repeat this process until all fries are coated. Preheating the air fryer is key. It helps the apple fries cook evenly and get crispy. Set the temperature to 350°F (175°C) before you start cooking. Arrange the coated apple fries in the air fryer basket. Make sure they sit in a single layer. Avoid overcrowding to ensure they cook well. Lightly spray the fries with cooking spray for extra crunch. Cook the apple fries for about 10-12 minutes. Flip them halfway through to ensure even cooking. They should turn golden brown and crispy once ready. Once cooked, let the apple fries cool slightly. Serve them warm for the best taste. Pair with a small bowl of caramel sauce or vanilla yogurt for dipping. You can sprinkle some extra cinnamon and sugar on top for added flavor. When making apple fries, pick the best apples. You can choose sweet or tart varieties based on your taste. - Sweet apples: Fuji or Honeycrisp. These apples give a nice flavor. - Tart apples: Granny Smith. They add a good balance when cooked. For frying, stick to apples that hold their shape. Fuji and Honeycrisp work great. They stay firm when cooked and taste amazing. Crispiness is key for tasty apple fries. Panko breadcrumbs help a lot here. They are lighter and crunchier than regular breadcrumbs. - Use Panko: It gives a better crunch. - Cooking spray: Lightly spray your apple fries before cooking. This helps them crisp up nicely. Sometimes fries can get soggy or cook unevenly. Here are some tips to fix these issues. - Avoiding sogginess: Make sure your apple fries are not wet before breading. Use a towel to dry them first. - Fixing uneven cooking: Flip the fries halfway through cooking. This helps them brown evenly. If they still cook unevenly, try cooking them in smaller batches. Pro Tips Choose the Right Apples: Opt for firm varieties like Fuji or Honeycrisp that hold their shape when cooked, ensuring the perfect crispy fry. Even Sizing Matters: Cut the apple fries into uniform sizes to guarantee even cooking and crispiness across all fries. Don’t Overcrowd the Basket: Air fry in batches if necessary, as overcrowding can lead to uneven cooking and less crispy results. Experiment with Dipping Sauces: Try serving with different dips like caramel sauce, honey, or even chocolate for a fun twist on flavors! {{image_2}} You can add fun flavors to your apple fries. Try mixing in spices like ginger or cardamom. These spices can give your fries a unique twist. You can also swap out regular flour for coconut or almond flour. This will change the taste and add different nutrients. Coconut flour adds a sweet touch, while almond flour gives a nutty flavor. Experimenting with flavors makes cooking exciting! Apple fries can be sweet or savory. For a sweet touch, try adding some melted cheese or herbs. Cheese like cheddar can create a nice contrast with the apples. You can also dip your fries in sauces. Caramel sauce works great for sweet fries, while ranch dressing is perfect for savory ones. Mixing flavors offers more fun at snack time! If you do not have an air fryer, you can still enjoy apple fries. You can bake them in the oven. Preheat your oven to 400°F (200°C). Arrange the fries on a baking sheet and spray them with cooking spray. Bake for 15-20 minutes, flipping halfway through, until golden brown. Another option is using a traditional fryer. Heat oil in a pan to 350°F (175°C). Fry the apple fries in small batches until they are crispy. Be careful when frying, and always watch the temperature. This method gives you a classic fried texture! To keep your apple fries fresh, use airtight containers. Glass or plastic containers work well. Make sure to let the fries cool before placing them inside. This helps avoid moisture buildup. Store them in the fridge for up to three days. To enjoy your apple fries again, you can reheat them in the air fryer. Set the air fryer to 350°F (175°C). Place the fries in the basket and heat for about 5 minutes. This method keeps them crispy. If you prefer, you can also use your oven. Preheat it to 350°F (175°C). Spread the fries on a baking sheet and heat for 10-15 minutes. Flip them halfway for even heating. You can freeze apple fries for later use. First, place them in a single layer on a baking sheet. Freeze them for about an hour until hard. Then, transfer the fries to a freezer bag. Remove as much air as possible. They can stay in the freezer for up to three months. When you are ready to eat, thaw them in the fridge overnight. Reheat them in the air fryer or oven as mentioned above for the best taste. Yes, you can use different apples! Fuji and Honeycrisp are great choices. For a sweeter taste, try Gala apples. If you want a tart flavor, use Granny Smith. The texture matters, too. Firmer apples hold up better when cooked. To make these apple fries gluten-free, swap all-purpose flour for almond flour or gluten-free flour. Use gluten-free breadcrumbs instead of regular ones. These swaps keep the fries crispy and tasty. You have many fun options for dipping! Caramel sauce is a classic choice. You can also try vanilla yogurt or chocolate sauce. For a twist, mix peanut butter with honey. Each dip adds a new layer of flavor. Leftover apple fries can last for about 2-3 days in the fridge. Store them in an airtight container to keep them fresh. If you want them to stay crispy, don’t stack them. Yes, you can prepare the apple fries ahead of time! Cut and coat the apples, then store them in the fridge. Just air fry them when you’re ready to eat. This saves time and gives you a quick snack. You can make tasty apple fries at home with simple ingredients and steps. I shared how to prepare apples, coat them, and use an air fryer for the best results. Don’t forget the tips on choosing apples and keeping them crispy. You can also explore fun variations and storage methods. Enjoy experimenting with flavors and dipping sauces. Now, it’s time to gather your ingredients and enjoy a fun cooking experience! You’ll love your crunchy, sweet snack.

Craving a snack that’s both crispy and sweet? Let me introduce you to Air Fryer Apple Fries! This easy recipe combines the goodness of apples with the delightful crunch of …

Read more

Categories Desserts

Marry Me Chicken Pasta Simple and Flavorful Dish

November 13, 2025December 15, 2024 by Chef Owen
To make Marry Me Chicken Pasta, you need: - 2 boneless, skinless chicken breasts - 2 tablespoons olive oil - Salt and pepper to taste - 1 teaspoon garlic powder - 1 teaspoon dried Italian herbs - 1 cup cherry tomatoes, halved - 2 cups baby spinach - 1 cup heavy cream - 1/2 cup grated Parmesan cheese - 8 oz penne pasta - Fresh basil leaves for garnish These ingredients work together to create a rich and creamy dish. Each one adds its own flavor. You can boost the flavor by adding: - Crushed red pepper flakes for heat - Lemon zest for brightness - Extra garlic for depth These options can make the dish even more exciting. Feel free to mix and match based on your taste. If you’re missing something, here are some swaps: - Chicken breasts can be replaced with thighs for more flavor. - Heavy cream can be swapped with half-and-half for a lighter sauce. - Spinach can be changed to kale or Swiss chard. These substitutions can make the dish work for your needs. Don't hesitate to get creative with what you have! {{ingredient_image_1}} First, fill a pot with water. Add a pinch of salt. Bring the water to a boil. Once boiling, add 8 ounces of penne pasta. Stir well. Cook according to the package instructions until the pasta is al dente. This usually takes around 8 to 10 minutes. When done, drain the pasta and set it aside. Next, take 2 boneless, skinless chicken breasts. Rinse them under cold water and pat them dry. Season both sides with salt, pepper, garlic powder, and dried Italian herbs. Make sure to cover them well. In a large skillet, heat 2 tablespoons of olive oil over medium heat. Once hot, add the chicken. Cook for 6 to 7 minutes on each side. Look for a nice golden brown color. When cooked through, remove the chicken and set it aside. In the same skillet, add 1 cup of halved cherry tomatoes. Sauté them for about 3 to 4 minutes until they soften. Next, toss in 2 cups of baby spinach. Stir until the spinach wilts, which takes about 2 minutes. Then, pour in 1 cup of heavy cream. Mix well. Add 1/2 cup of grated Parmesan cheese. Stir until the cheese melts and the sauce thickens a bit. Slice the cooked chicken into strips. Return the chicken to the skillet. Add the drained penne pasta as well. Toss everything together gently. Make sure the pasta is coated with the creamy sauce. Taste and adjust the seasoning if needed. Serve hot, garnished with fresh basil leaves for that extra burst of flavor. Enjoy your Marry Me Chicken Pasta! To get the best chicken, start with even pieces. They cook better this way. Season them well with salt, pepper, garlic powder, and Italian herbs. Heat olive oil over medium heat in a skillet. Cook the chicken for 6-7 minutes per side. Look for a golden brown color. Use a meat thermometer to check if it’s 165°F (75°C). This ensures it is safe to eat. For a rich sauce, pay close attention while cooking. After you add the heavy cream, stir well. This helps blend the cream and cheese. Let the sauce cook for a few minutes. It should thicken slightly but stay creamy. If it feels too thick, add a splash of pasta water. This helps loosen it up while keeping the flavor strong. Serve your Marry Me Chicken Pasta hot. A sprinkle of fresh basil adds a nice touch. You can pair it with garlic bread or a green salad. This brings a fresh balance to the meal. For extra flair, try adding lemon zest. It brightens the dish and gives a fresh taste. Enjoy your delicious creation! Pro Tips Perfectly Cooked Chicken: Ensure the chicken breasts are of even thickness for uniform cooking. You can pound them slightly to achieve this. Fresh Herbs: For an aromatic boost, add fresh basil or parsley to the sauce just before serving to enhance freshness. Cheese Variations: Feel free to experiment with different cheeses such as mozzarella or feta for a unique flavor twist. Pasta Tip: Reserve a cup of pasta water before draining. Adding a splash can help adjust the sauce's consistency if it becomes too thick. {{image_2}} You can make a tasty vegetarian version of Marry Me Chicken Pasta. Swap the chicken for mushrooms or eggplant. Both options add a nice texture. Use firm tofu for more protein. Just remember to season it well with salt and herbs. To make this dish healthier, try using whole wheat penne pasta. It has more fiber and keeps you full longer. You can also use low-fat cream or a plant-based cream. This change cuts down on fat but keeps the taste creamy. Adding more spinach or other veggies boosts nutrients too. If you want to try different proteins, shrimp or salmon work great. Cook the shrimp until pink, or bake the salmon until flaky. Both add a lovely flavor and pair well with the creamy sauce. You can even try diced turkey for a lighter option. Store any leftover Marry Me Chicken Pasta in an airtight container. Let the dish cool first. You can keep it in the fridge for up to three days. Make sure to seal it well to keep the flavors fresh. To reheat, use a microwave or stovetop. If using the microwave, heat in short bursts. Stir between each burst to ensure even heating. If using the stovetop, add a splash of cream or water. This helps to revive the sauce's creamy texture. Heat on low until warm. You can freeze Marry Me Chicken Pasta for later. Place the cooled pasta in a freezer-safe container. Seal it tightly and label it with the date. It can last for about three months in the freezer. To enjoy, thaw it overnight in the fridge before reheating. Marry Me Chicken Pasta is a creamy and tasty dish. It features chicken, pasta, and a rich sauce. The sauce has heavy cream, Parmesan cheese, and fresh spinach. The cherry tomatoes add a nice burst of flavor. Many people love this dish for its simple steps and delicious taste. You can cook the chicken and sauce ahead. Just store them in the fridge. When you’re ready to eat, cook the pasta. Then, warm the sauce and combine them. This way, you save time and still enjoy a great meal. Yes, you can use any pasta you like. Penne works well, but you can try fettuccine or rotini. Each type will give a different feel to the dish. Just be sure to cook it until al dente. This dish is not spicy, but you can add heat if you want. A pinch of red pepper flakes can spice it up. Adjust the amount based on your taste. This way, you can make it just right for you. In this post, we explored Marry Me Chicken Pasta. We covered required and optional ingredients, along with substitutions. You learned step-by-step cooking methods for the pasta, chicken, and sauce. Tips ensured perfect chicken and sauce consistency. We discussed variations for vegetarians and healthier options. Finally, storage methods for leftovers were shared. Enjoy making this dish for family or friends. It’s sure to impress and satisfy!

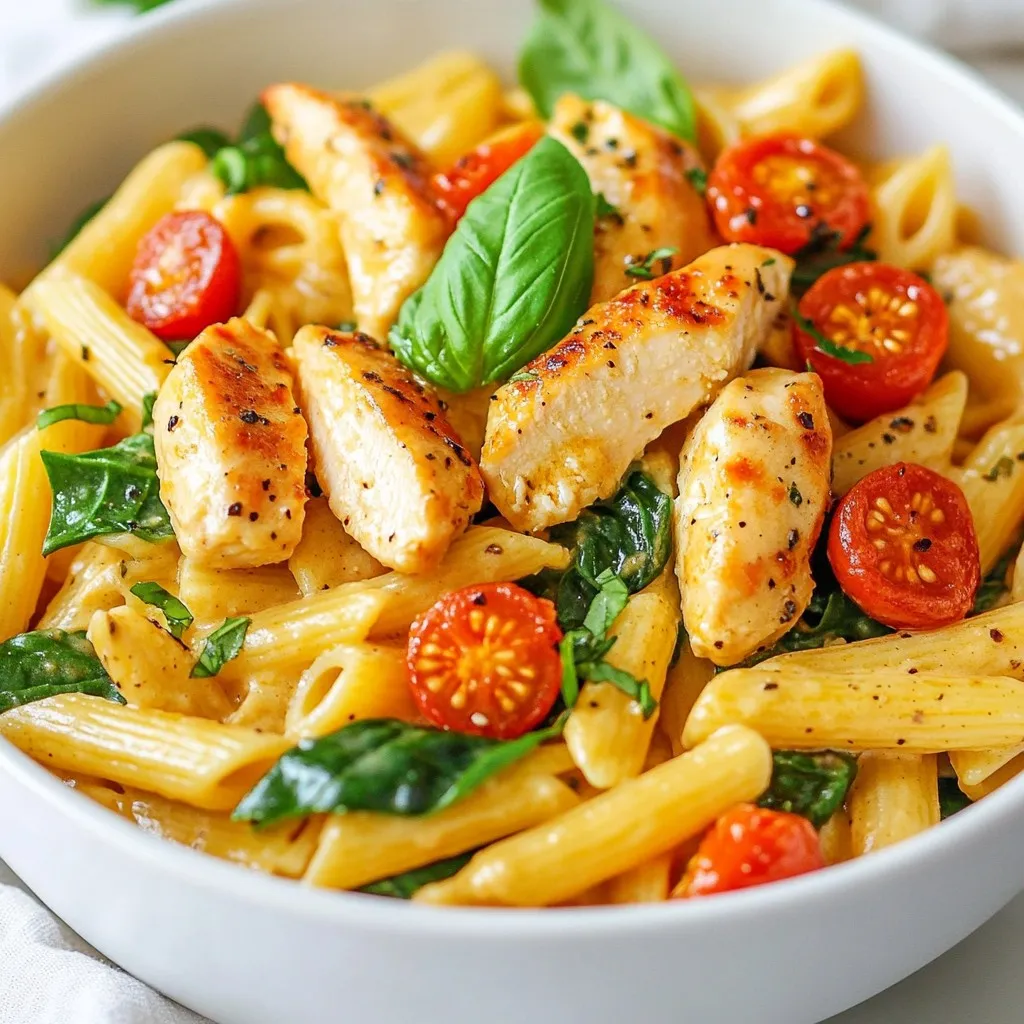
If you want a dish that impresses and delights, you’ve found it! Marry Me Chicken Pasta is simple and full of rich flavors. This creamy meal is perfect for date …

Read more

Categories Dinner
Newer posts
← Previous Page1 … Page124 Page125

THE RECIPE HATCH

Where tasty ideas take flight! 🚀🐣 Fresh, easy recipes hatched daily to make cooking simple and flavorful.

PAGES

Home About Contact Privacy Policy Terms & Conditions Cookie Policy GDPR Policy Copyright Policy Disclaimer

CATEGORIES

Appetizers Desserts Salads Breakfast Dinner

Contact

  • Pinterest
  • Mail
Copyright © 2026 The Recipe Hatch. All rights reserved.