Sheet Pan Maple Dijon Chicken & Veggies Delight
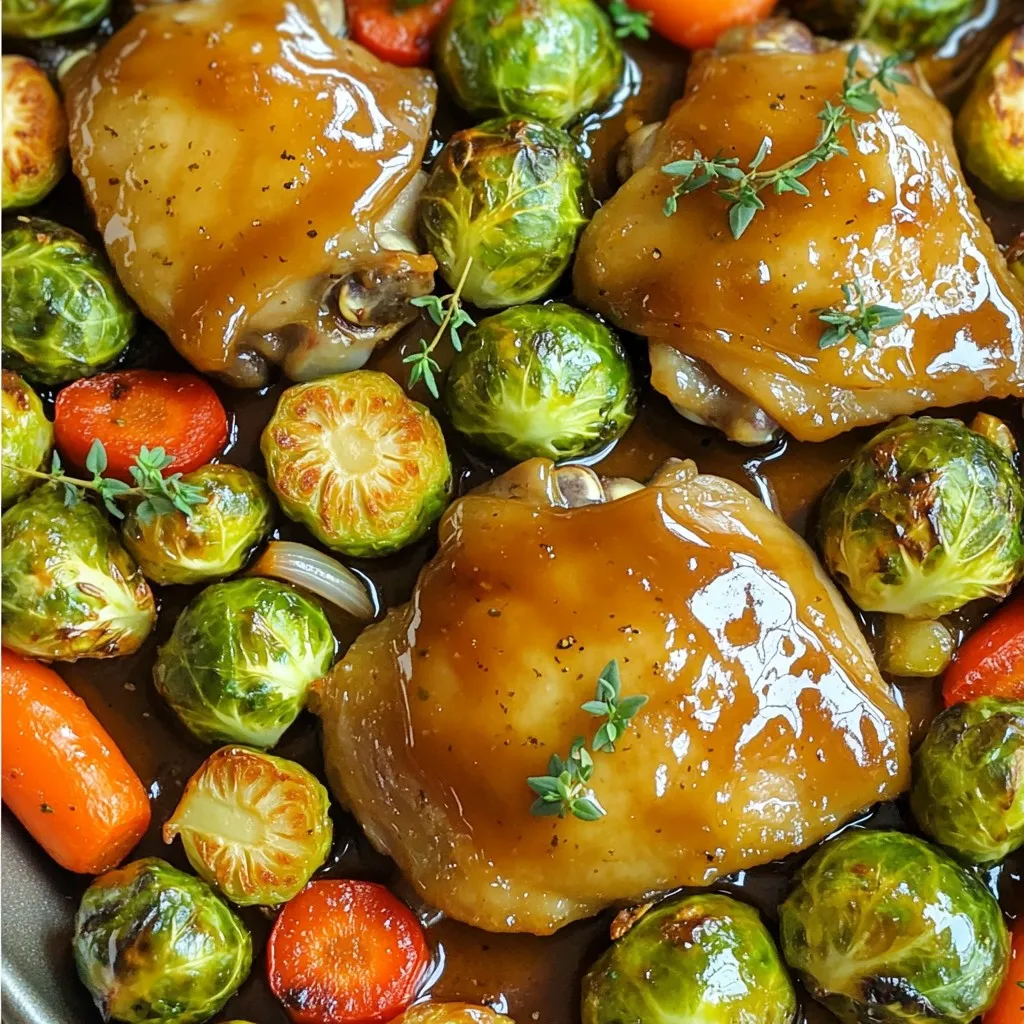
If you’re looking for a simple yet tasty meal, you’ve found it! My Sheet Pan Maple Dijon Chicken & Veggies Delight is your new go-to dish. You’ll love how easy …
If you’re looking for a simple yet tasty meal, you’ve found it! My Sheet Pan Maple Dijon Chicken & Veggies Delight is your new go-to dish. You’ll love how easy …
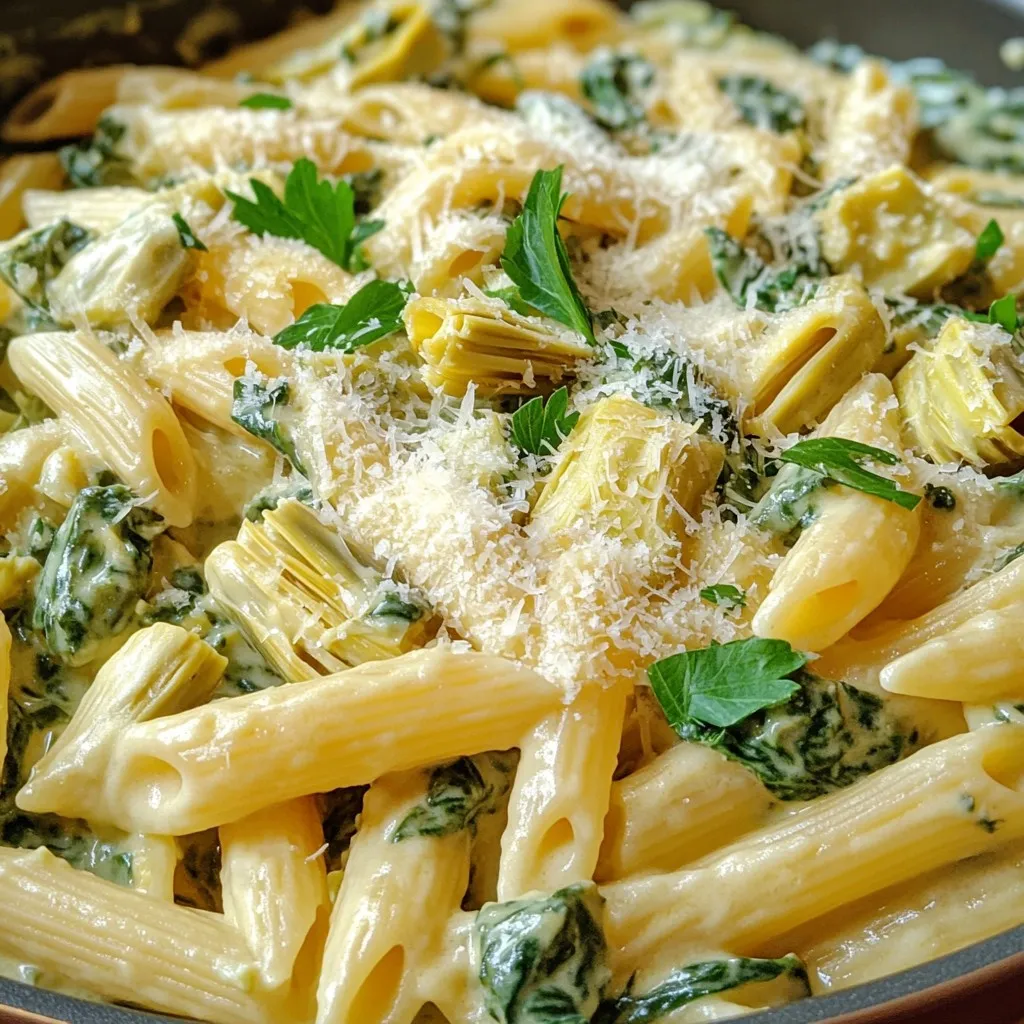
If you love creamy dishes, you’ll adore this Spinach Artichoke Dip Pasta! Imagine all the flavors of the classic dip combined with tender pasta. It’s a simple, tasty meal that …
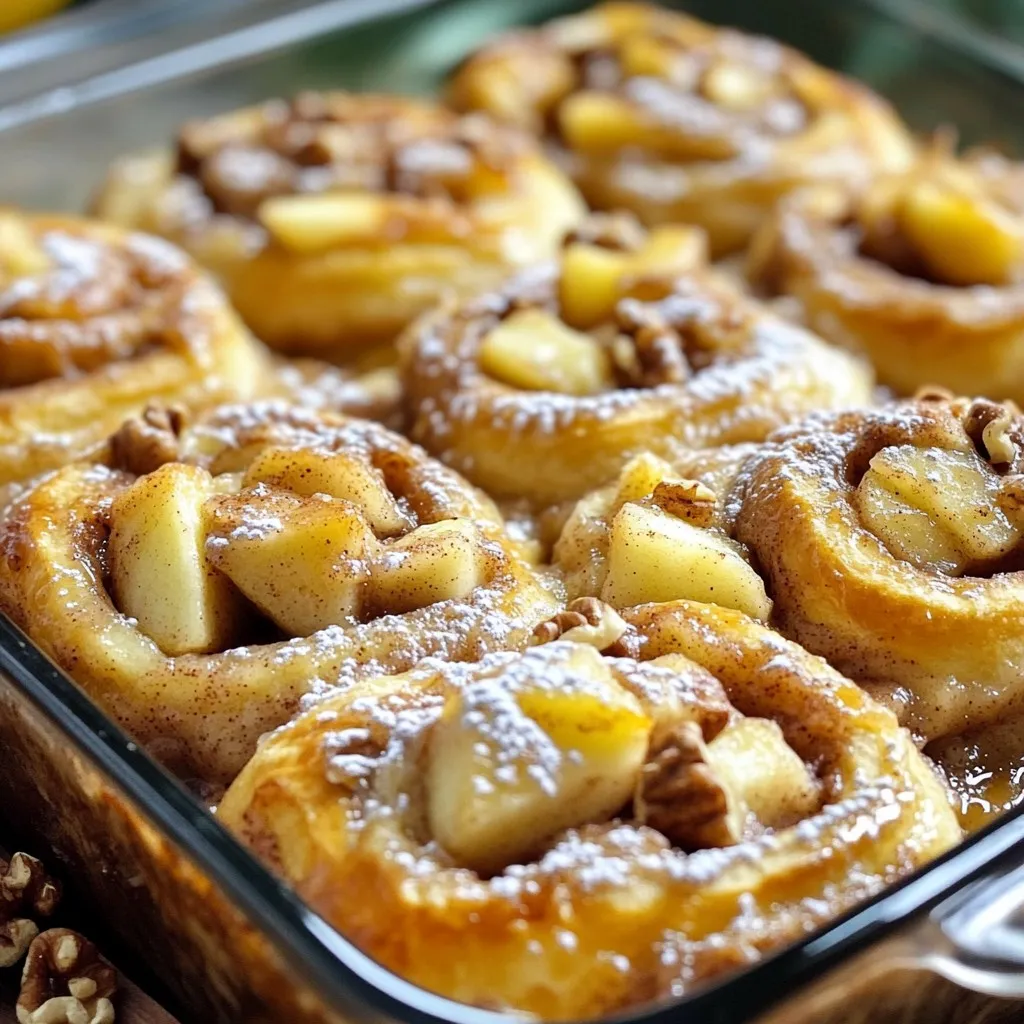
If you’re ready for a dessert that combines two favorites into one mouthwatering treat, you’ve come to the right place! This Apple Pie Cinnamon Roll Bake is the perfect mix …

Are you ready for a meal that’s packed with flavor and easy to make? My One-Pot Cajun Sausage & Rice is the perfect choice for busy weeknights. You’ll love the …

Fall is here, and that means it’s time for Pumpkin Spice Streusel Muffins! This delicious treat blends the warm flavors of pumpkin and spices with a crumbly topping. In this …

Looking for a crispy, tasty snack? Try my Air Fryer Lemon Pepper Wings! With just a few simple ingredients, you can whip up a dish that’s bursting with flavor. I’ll …
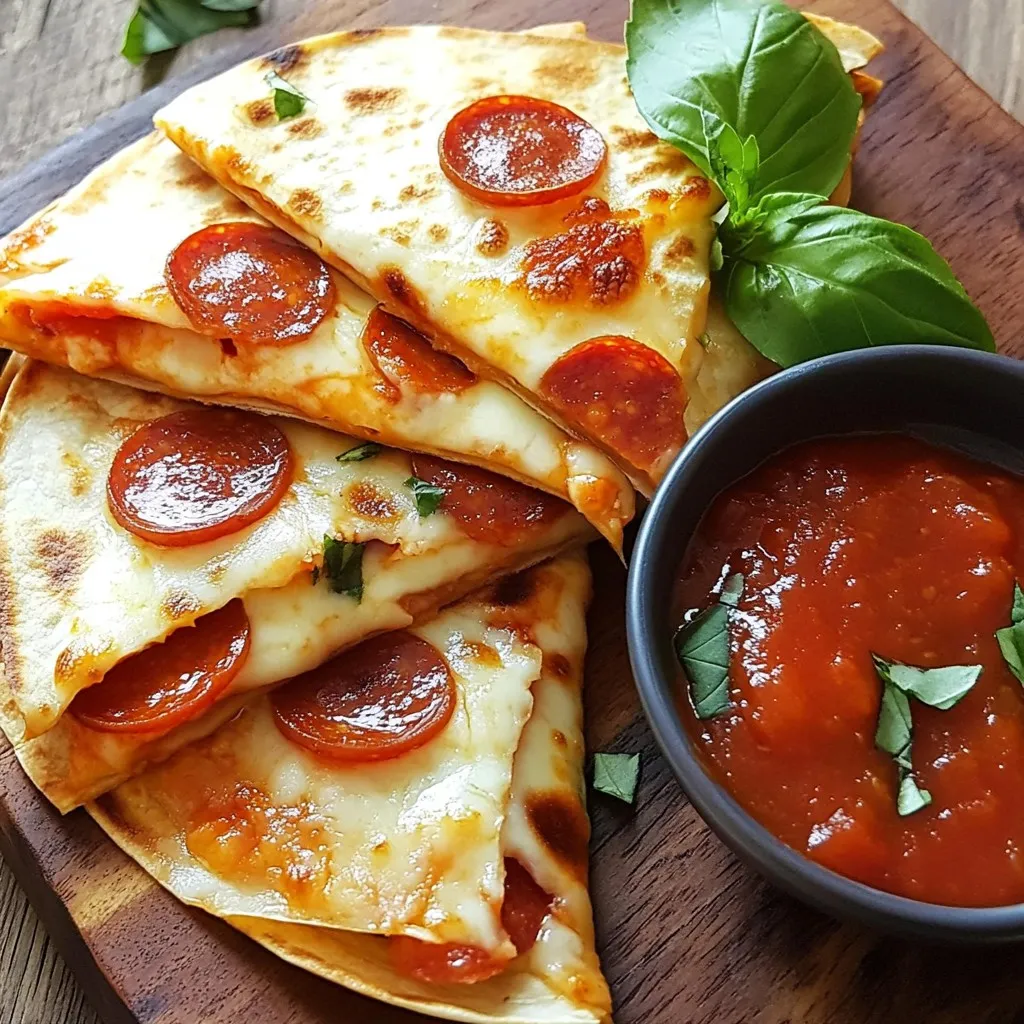
Are you ready to spice up snack time? Try my Savory Pepperoni Pizzadillas! This fun twist on pizza combines all your favorite flavors in a crispy, cheesy package. With just …
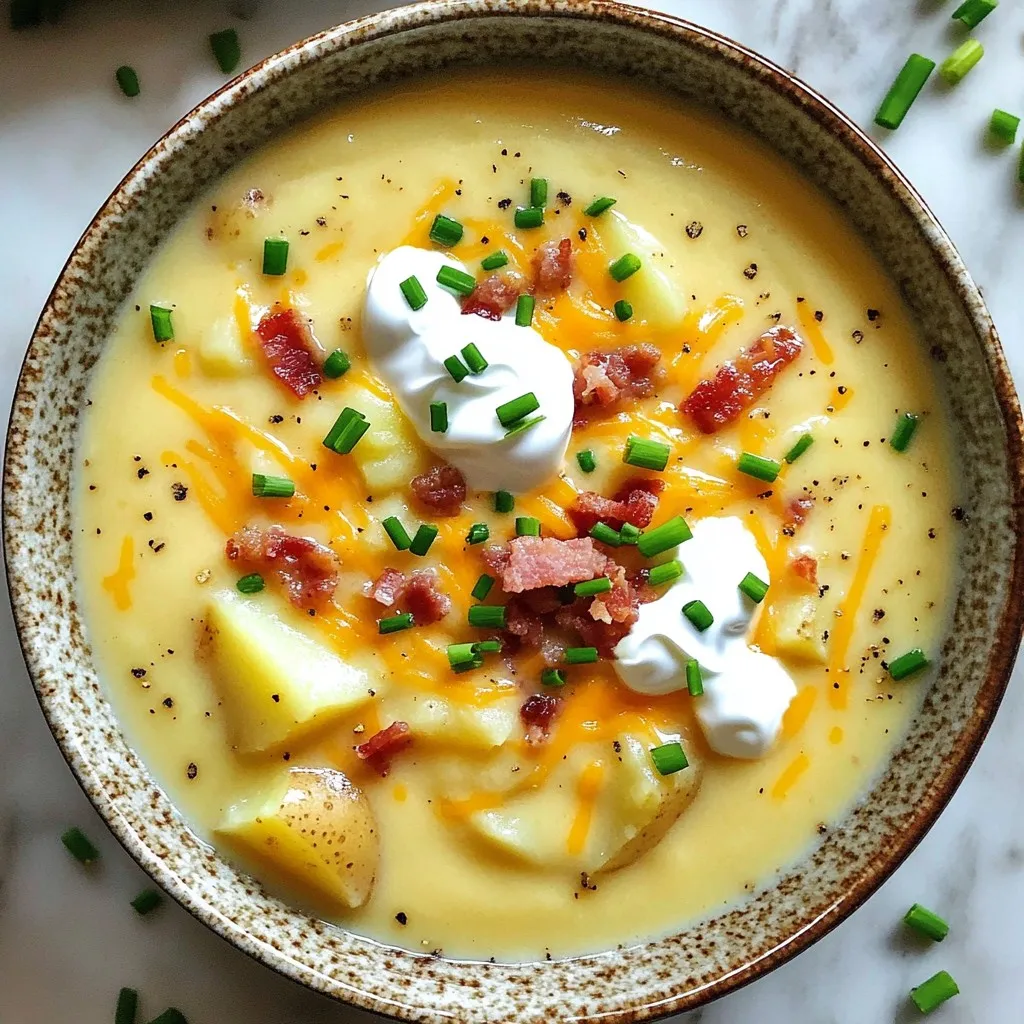
Looking for a warm and easy meal to enjoy? I have just the thing! My Slow Cooker Loaded Potato Soup is comforting, delicious, and perfect for any night. With simple …
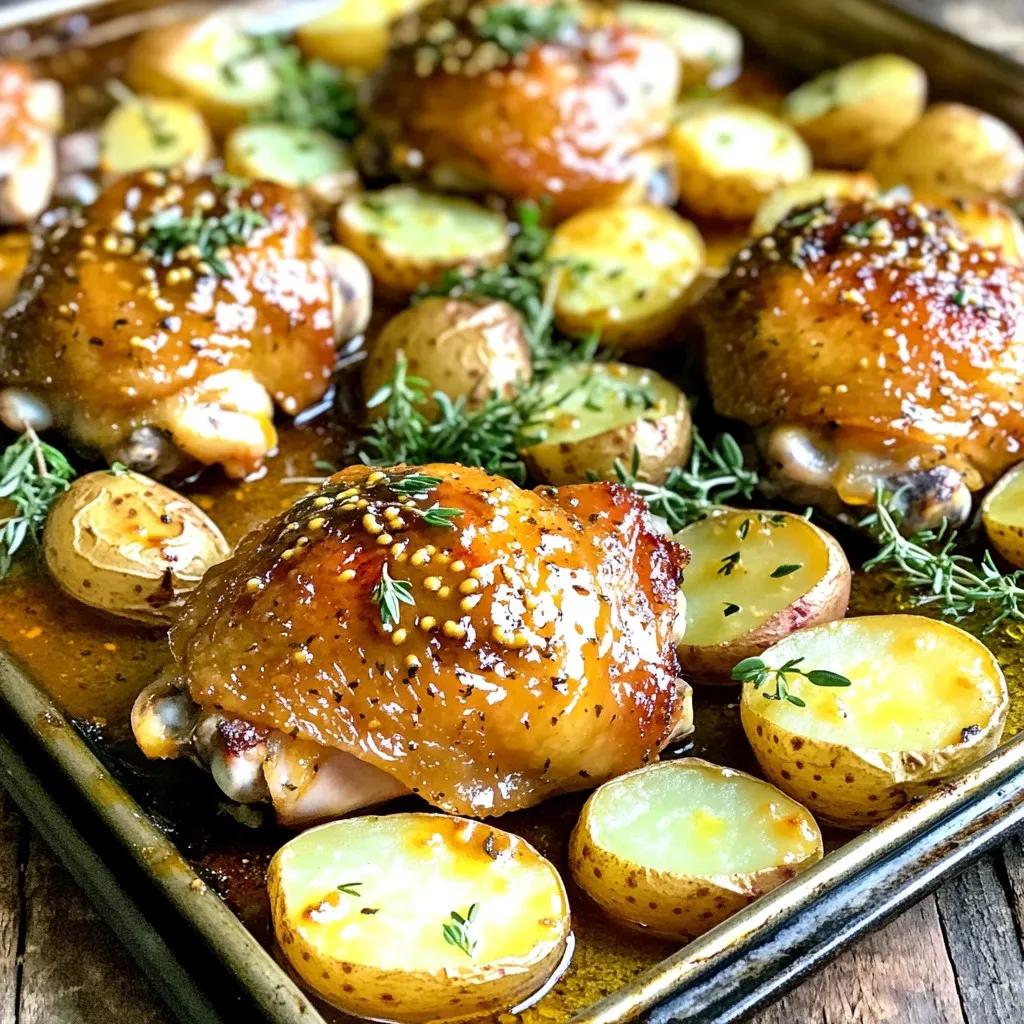
Are you ready to transform your dinner routine? My Sheet Pan Honey Mustard Chicken & Potatoes Delight is your answer! This simple recipe makes weeknight meals a breeze. With tender …

Looking for a healthy snack that’s quick, easy, and packed with flavor? Say hello to No-Bake Pumpkin Pie Energy Balls! These tasty treats are perfect for any time of day. …