Banana Split Dump Cake Easy and Delicious Dessert
![To make a Banana Split Dump Cake, you'll need these main ingredients: - 2 ripe bananas, sliced - 1 can (20 oz) crushed pineapple, undrained - 1 cup strawberry pie filling - 1 box yellow cake mix (15.25 oz) - 1 cup unsalted butter, melted - 1 cup chocolate syrup - Whipped cream (for serving) - Maraschino cherries (for garnish) These ingredients work together to create a layered, sweet treat that everyone will love. You can add extra flavors to your dump cake with these optional ingredients: - 1 cup chopped walnuts or pecans - 1 cup shredded coconut Adding nuts gives a nice crunch, while coconut adds a tropical touch. You will need a few tools to make this dessert: - A 9x13 inch baking dish - A mixing bowl - A spatula for spreading - An oven for baking These items make it easy to mix, layer, and bake your delicious dessert. For the full recipe, check the details above. First, gather all your ingredients. You will need bananas, crushed pineapple, and strawberry pie filling. Don't forget the cake mix and melted butter. If you want, grab some nuts and coconut too. Preheat your oven to 350°F (175°C). Next, grease a 9x13 inch baking dish. Spread the crushed pineapple evenly on the bottom. Then, layer the sliced bananas over the pineapple. After that, pour the strawberry pie filling on top. Make sure it spreads out well. Now, sprinkle the yellow cake mix over the fruit layers. Be careful not to mix it in. Drizzle the melted butter on top of the cake mix. Cover as much as you can. If you are using nuts or coconut, sprinkle them on now. Place the dish in the preheated oven. Bake for 45 to 50 minutes. Watch for a golden brown top and bubbling edges. This means it is ready. Once done, take the dump cake out of the oven. Let it sit for about 10 minutes to cool. This step helps the layers set before serving. Just before you serve, drizzle chocolate syrup on each portion. Top it off with whipped cream. Add a maraschino cherry for a fun touch. This adds color and makes your dessert look special. You can find the full recipe to guide you through these steps. Enjoy your delicious Banana Split Dump Cake! To get the best texture in your banana split dump cake, follow these steps. First, use ripe bananas for a sweet flavor. Their creaminess helps keep the cake moist. Next, do not mix the cake mix with the fruit layers. Just sprinkle it on top. This keeps the layers separate and gives you a better texture. Lastly, drizzle the melted butter evenly. This ensures all parts of the cake cook well. This dessert shines when served warm. The warm cake pairs well with cold whipped cream. You can also add a scoop of vanilla ice cream for extra fun. Just before serving, drizzle some chocolate syrup on top. For a pop of color, add a maraschino cherry. This makes each serving look and taste amazing. Layering is key to making this cake great. Start with the crushed pineapple as the base. This keeps the cake moist. Next, add the sliced bananas. They should sit on top of the pineapple. After that, spread the strawberry pie filling evenly over the bananas. When you sprinkle the cake mix, do it gently. This helps keep the layers intact and looking nice. If you use nuts or coconut, add them at the very end. This keeps them crunchy. For the full recipe, check the designated section. {{image_2}} You can change the fruit in a banana split dump cake. Try using fresh strawberries or peaches. You can also add blueberries for a burst of flavor. Mixing fruits gives you a new taste. Think about using apples with cinnamon for a warm twist. Each fruit brings its own fun, making this dessert special every time. Toppings can change the whole cake. Instead of just chocolate syrup, try caramel sauce. You can also use peanut butter drizzle for a nutty flavor. If you love nuts, try adding slivered almonds or pecans. A sprinkle of crushed graham crackers can add a nice crunch. Mixing toppings is a great way to be creative. You can make this dessert fit your diet. For gluten-free, switch to a gluten-free cake mix. For a vegan option, use dairy-free butter and skip the whipped cream. You can swap the cake mix for a vegan brand. This way, everyone can enjoy this tasty treat. Making it fit your needs keeps it fun and easy. For the full recipe, check the earlier sections. After you enjoy your banana split dump cake, you might have some left. To store leftovers, let the cake cool down. Then, cover it tightly with plastic wrap or aluminum foil. You can also use an airtight container. This keeps the cake fresh for up to three days in the fridge. Make sure to put it in the fridge within two hours of baking. If you want to save some cake for later, freezing is a great option. First, let the cake cool completely. Cut it into pieces for easy thawing. Wrap each piece in plastic wrap. Then, place them in a freezer-safe bag or container. The cake can stay frozen for up to three months. When you're ready to eat it, just take out a piece and let it thaw in the fridge overnight. Reheating your banana split dump cake is simple. You can use the oven or microwave. To use the oven, preheat it to 350°F (175°C). Place the cake in a baking dish and cover it with foil. Heat for about 15-20 minutes, or until warm. If you prefer the microwave, place a slice on a microwave-safe plate. Heat it for 30 seconds to 1 minute, checking it often. Enjoy your warm cake with fresh whipped cream and a cherry on top! For the full recipe, click on [Full Recipe]. A dump cake is a simple dessert. You just "dump" ingredients in a pan. It uses cake mix, fruit, and butter. This makes it easy for anyone to bake. You don’t need to mix the batter or worry about fancy techniques. The result is a warm, sweet treat that’s fun to make and eat. Yes, you can use other cake mix flavors! Chocolate, lemon, or even strawberry work well. Each flavor will change the taste a bit. For a twist, try a spice cake mix for extra warmth. Remember to pick a mix that matches your fruit choices. This way, you keep the flavors balanced. Banana Split Dump Cake lasts for about three to four days. Store it in the fridge to keep it fresh. Cover it with plastic wrap or foil. This helps keep the cake moist. If you notice the bananas turning brown, that’s normal. Just enjoy it while it’s still tasty! You can make this recipe ahead of time! Bake it and let it cool. Then, cover it and store it in the fridge. When you’re ready to serve, just warm it up in the oven. This is a great way to save time for parties or family gatherings. You can enjoy more time with your guests! For the complete recipe, check out the Full Recipe. In this post, we covered the key ingredients, steps, and tips for making a delicious dump cake. We also explored variations, like fruit combinations and dietary adaptations. Lastly, we discussed how to store leftovers and answered common questions. Embrace your creativity! Try new flavors and make it your own. Happy baking!](https://therecipehatch.com/wp-content/uploads/2025/05/9af28e9b-36ac-41b9-b24d-1355cd479329.webp)
Are you ready for a quick and tasty treat? This Banana Split Dump Cake is easy to make and loaded with flavor. You’ll love how simple it is to whip …
Are you ready for a quick and tasty treat? This Banana Split Dump Cake is easy to make and loaded with flavor. You’ll love how simple it is to whip …
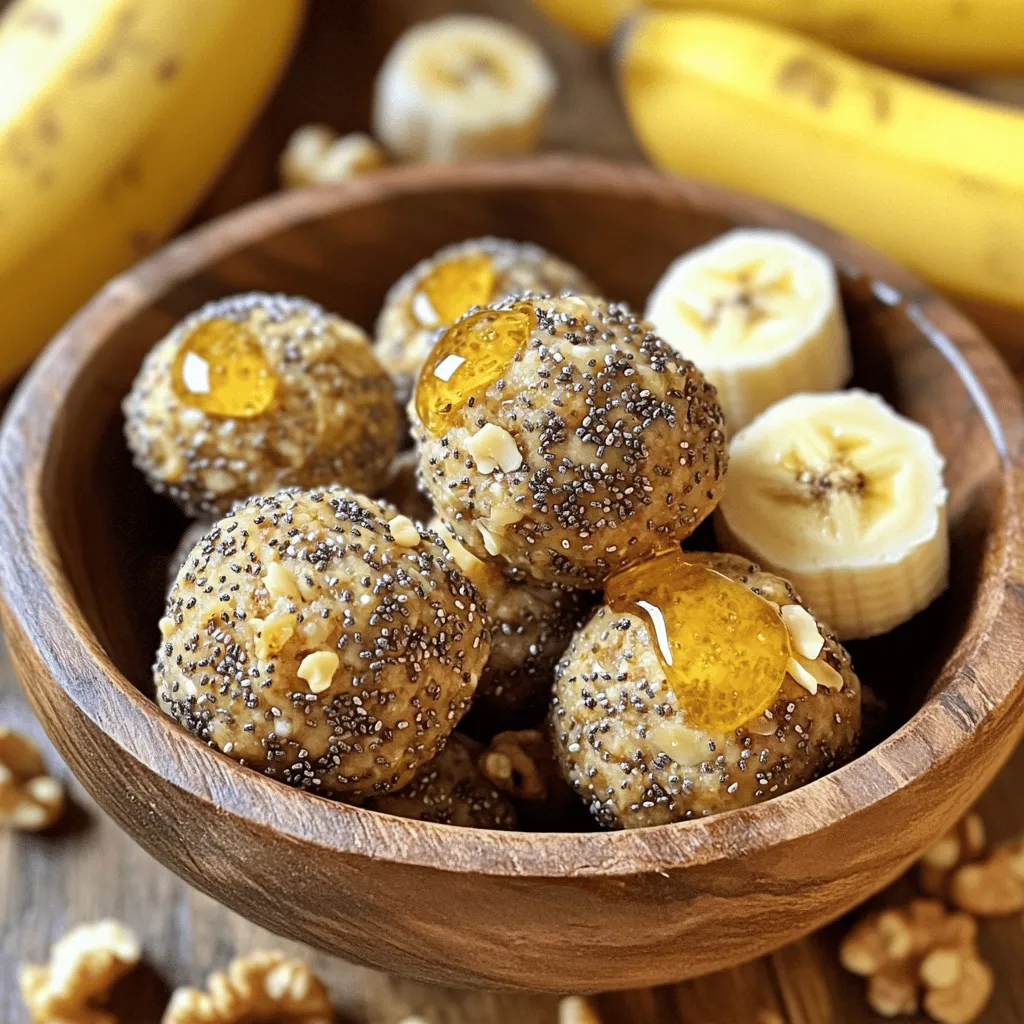
Looking for a healthy snack that’s easy and tasty? You’ll love these Chia Banana Bread Energy Bites! They pack a punch of flavor and nutrition, keeping you full and energized. …

Looking to impress with an easy yet tasty meal? Air Fryer Cheesy Garlic Steaks are your answer! In this post, I’ll guide you step-by-step on how to cook juicy ribeye …
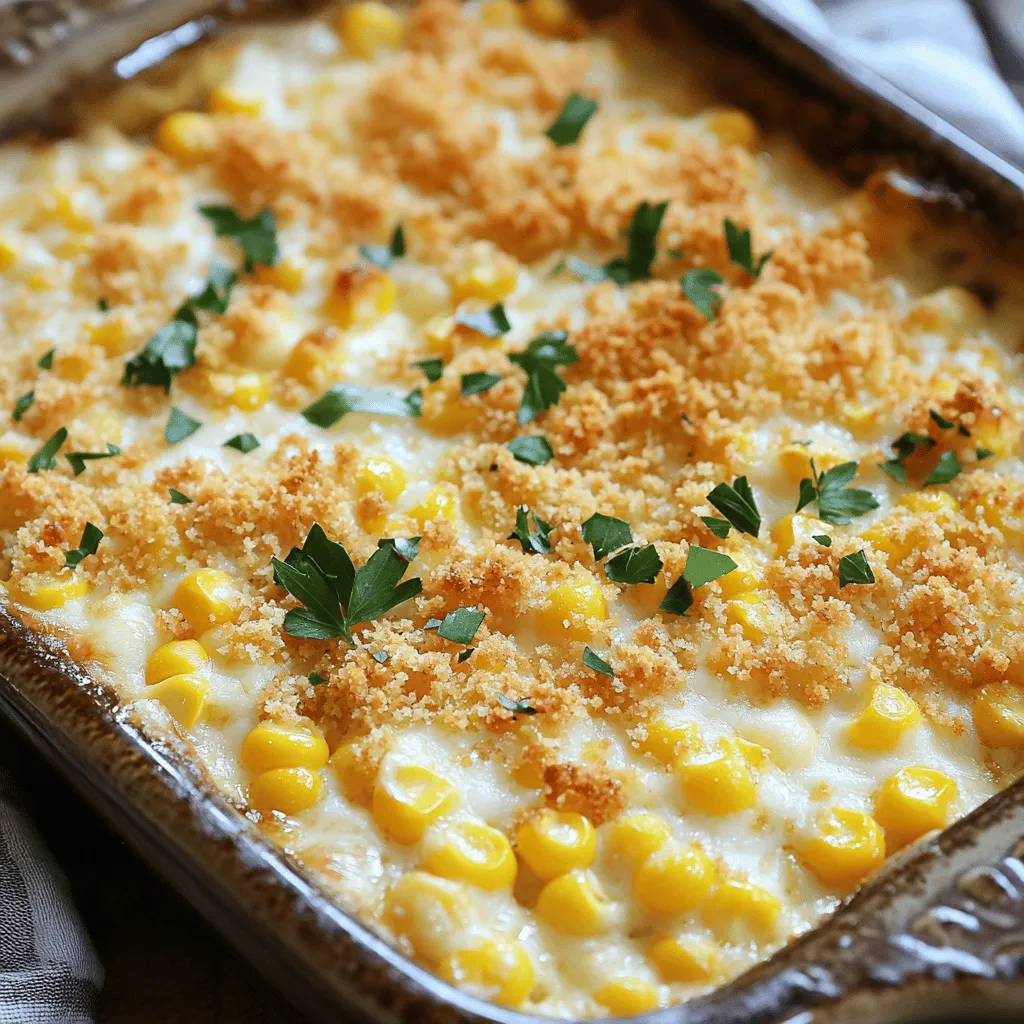
If you’re craving a cozy dish that warms both the heart and the stomach, you’ve found it! White Cheddar Baked Corn is the ultimate comfort food, combining rich flavors and …
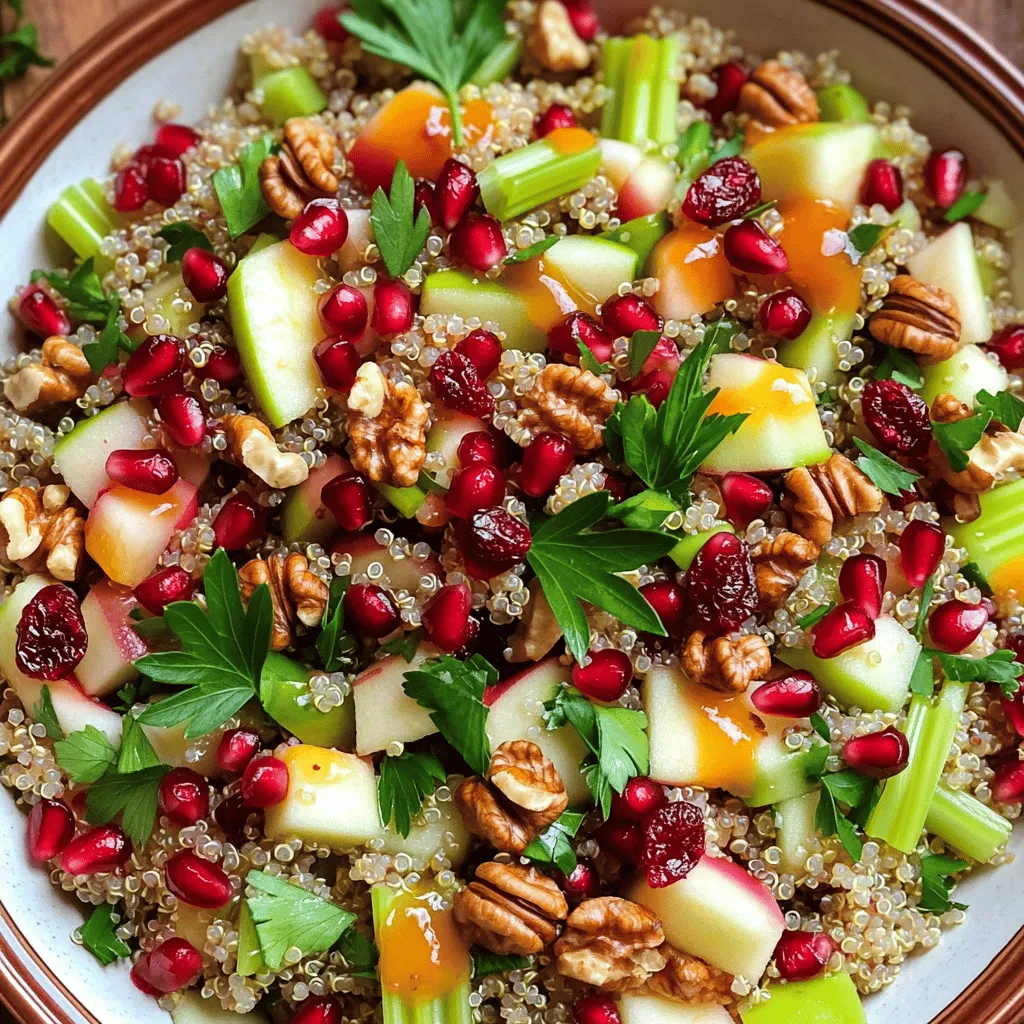
Are you ready to dive into a festive dish that brings joy and flavor to your holiday table? Ensalada Navideña is not just any salad; it’s a vibrant blend of …
![To make crispy zucchini fritters, you need: - 2 medium zucchinis, grated - 1 teaspoon salt - 1 cup all-purpose flour - 1/2 cup grated Parmesan cheese - 2 large eggs - 1/4 cup chopped fresh parsley - 1/4 teaspoon garlic powder - 1/4 teaspoon black pepper - 1/2 teaspoon baking powder - Vegetable oil for frying These simple ingredients create a tasty and fun snack. The zucchini gives a fresh flavor while the cheese adds richness. You can make your fritters even better by adding: - Chopped scallions or onions - Crushed red pepper flakes for spice - Different cheeses like feta or mozzarella Feel free to mix in your favorite flavors. Each option adds a new twist to the dish. Each serving of these zucchini fritters has: - Approximately 200 calories - 10 grams of fat - 20 grams of carbohydrates - 8 grams of protein These fritters are not just tasty but also offer good nutrition. They can fit into many diets. Check the [Full Recipe] for more details on preparation and serving. Start by grating the zucchinis. Use a box grater or food processor for speed. Once grated, place the zucchini in a colander. Sprinkle 1 teaspoon of salt over it. This step is key. Let it sit for about 10-15 minutes. The salt pulls out excess moisture. After 15 minutes, use a clean kitchen towel or paper towels. Squeeze the grated zucchini to remove as much moisture as you can. This helps the fritters stay crispy. If you skip this step, your fritters may turn out soggy. Next, grab a large mixing bowl. Add the drained zucchini to it. Now, combine the zucchini with the dry and wet ingredients. Use 1 cup of all-purpose flour, 1/2 cup of grated Parmesan cheese, and 2 large eggs. Also, include 1/4 cup of chopped fresh parsley, 1/4 teaspoon of garlic powder, 1/4 teaspoon of black pepper, and 1/2 teaspoon of baking powder. Mix it all together until well combined. You want a thick batter that holds together. This mixture is what will become your tasty fritters. Now, it’s time to fry! Heat about 1/4 inch of vegetable oil in a large skillet. Aim for medium heat. You want the oil hot but not smoking. A good test is to drop a small bit of batter into the oil. If it sizzles, you're ready to fry. Using a tablespoon, scoop about 2 tablespoons of the zucchini mixture. Carefully drop it into the hot oil. Flatten it slightly with the back of the spoon. Repeat this until the skillet is full but not overcrowded. Fry the fritters for about 3-4 minutes on each side. Look for a golden brown color and a crispy texture. Use a slotted spoon to transfer them to a paper towel-lined plate. This helps drain any extra oil. Continue frying the remaining fritters, adding more oil if needed. For more detailed cooking instructions, check out the Full Recipe. To get crispy zucchini fritters, you need the right oil temperature. Aim for 350°F (175°C). If the oil is too cool, the fritters will soak up oil and become soggy. If it's too hot, they will burn outside while staying raw inside. Use a deep skillet or a heavy-bottomed pan for frying. A cast-iron skillet works best here. It holds heat well and cooks evenly, giving you that perfect golden finish. Also, use a thermometer to check the oil temperature. This simple tool makes a big difference. These fritters taste great with a dip. Tzatziki or marinara sauce are both nice choices. Tzatziki adds a cool touch, while marinara gives a nice kick. You can also serve them with Greek yogurt for a creamy option. For plating, stack the fritters on a colorful plate. Add fresh herbs like parsley or dill on top for a pop of color. You can even place a small bowl of dip next to the fritters. This looks nice and makes it easy for guests to grab some. One common mistake is overcrowding the pan. If you place too many fritters at once, they won’t fry well. They will steam instead of crisp. Always leave space between each fritter in the pan. Another mistake is not draining the zucchini. After grating, you must remove excess moisture. If you skip this step, your fritters will become mushy. Use paper towels or a clean kitchen towel to squeeze out as much water as you can. This helps keep them crispy. For the full recipe of these delicious crispy zucchini fritters, check out the details provided above. {{image_2}} To make your crispy zucchini fritters even tastier, you can add herbs like thyme or dill. These herbs give your fritters a fresh and vibrant taste that pairs well with zucchini. You can also use spices for an international twist. For instance, try adding cumin for a warm flavor or paprika for a hint of smokiness. These small changes can make a big difference in taste. If you're looking for healthier options, consider baking instead of frying. Baking still gives a nice crunch while cutting down on oil. You can also try using whole wheat flour or gluten-free flour. These options add nutrients and fiber, making your fritters more filling and better for you. Crispy zucchini fritters work well as a side dish or an appetizer. They are perfect for family dinners or parties. You can pair them with salads or soups for a complete meal. They add a fun crunch and a pop of color to your plate. Check the Full Recipe for more ideas on how to enjoy these delicious fritters. To keep your leftover crispy zucchini fritters fresh, place them in an airtight container. You can store them in the fridge for up to three days. Make sure they are completely cool before sealing. This helps to keep their texture. Reheating can be tricky if you want to keep the crunch. I recommend using an oven or an air fryer. Preheat your oven to 350°F (175°C). Place the fritters on a baking sheet and heat them for about 10-15 minutes. If using an air fryer, set it to 375°F (190°C) and heat for about 5-7 minutes. Both methods help retain that crispy outer layer. You can freeze your fritters both uncooked and cooked. For uncooked fritters, place them on a baking sheet and freeze until solid. Then, transfer them to a freezer bag. For cooked fritters, let them cool completely before placing them in a freezer bag. To thaw, leave them in the fridge overnight. For reheating, use the oven or air fryer for best results. Yes, you can prepare zucchini fritters ahead of time. Grate the zucchini, salt it, and let it drain. This step helps remove moisture. After draining, store the zucchini in an airtight container in the fridge for up to 24 hours. You can also mix the other ingredients and keep that mixture in the fridge. Just fry them when you're ready to enjoy a tasty snack. Using frozen zucchini is not the best choice. When zucchini freezes, it loses its crispness. This change affects the taste and texture of the fritters. If you must use frozen zucchini, make sure to thaw and drain it well. Press it to remove as much water as possible. This step helps keep the fritters from being too soggy. If you want a vegan option, you can replace eggs with flaxseed meal or applesauce. To use flaxseed meal, mix one tablespoon with three tablespoons of water. Let it sit for a few minutes to thicken. For applesauce, use 1/4 cup per egg. Both options help bind the fritters, keeping them together and tasty. Zucchini fritters are a simple and fun dish to make. We explored the key ingredients, how to prepare them, and tips for the perfect fry. Remember to manage moisture and temperature to achieve a crispy texture. You can even add your favorite herbs or spices for extra flavor. Whether served as a snack or with a meal, these fritters are both tasty and versatile. Enjoy making them and share them with family and friends for a delightful treat!](https://therecipehatch.com/wp-content/uploads/2025/05/e18f5fec-3a98-46a5-976b-332b4be9b733.webp)
Crispy zucchini fritters are the perfect snack. They’re easy to make and so tasty! I love how they turn a simple veggie into something crunchy and delicious. In this post, …
![To make a fresh and tasty watermelon pineapple salad, you need: - 2 cups seedless watermelon, cubed - 2 cups pineapple, cubed - 1 cup cucumber, diced - 1/4 cup fresh mint leaves, chopped - 1/4 cup feta cheese, crumbled (optional) - 2 tablespoons lime juice - 1 tablespoon honey - Pinch of salt and pepper to taste Choosing ripe fruits is key to a great salad. For watermelon, look for a firm, heavy fruit with a smooth rind. The spot where it rested on the ground should be yellow, indicating ripeness. For pineapple, choose one that smells sweet at the base. The leaves should be green and fresh, not brown. Press the fruit gently; it should yield slightly but not feel mushy. This salad is not just delicious; it’s healthy too. Watermelon is high in vitamins A and C. It keeps you hydrated and supports skin health. Pineapple has bromelain, which aids digestion. Cucumber adds crunch and hydration. Mint is refreshing, and feta cheese adds protein and calcium. This mix makes for a nutritious dish that’s perfect for summer. Feel free to check the Full Recipe for more details on how to prepare this delightful dish! First, gather all your ingredients. You need: - 2 cups seedless watermelon, cubed - 2 cups pineapple, cubed - 1 cup cucumber, diced - 1/4 cup fresh mint leaves, chopped - 1/4 cup feta cheese, crumbled (optional) - 2 tablespoons lime juice - 1 tablespoon honey - Pinch of salt and pepper to taste Next, peel the pineapple and cube it. Cut the watermelon into bite-sized pieces. If there are seeds, make sure to remove them. Dice the cucumber into small chunks. Then, chop the fresh mint leaves finely. In a large mixing bowl, combine the cubed watermelon, pineapple, and diced cucumber. In a smaller bowl, whisk together the lime juice, honey, and a pinch of salt and pepper. Make sure everything blends well. Once the dressing is ready, pour it over the fruit mixture. Gently toss everything together. You want all the ingredients to be coated without crushing them. After that, sprinkle the chopped mint and optional feta cheese on top. For a fun presentation, serve the salad in a large, shallow bowl. You can also use individual cups for each guest. This makes it easy to grab a serving. For an extra special touch, consider using a watermelon shell as your bowl. It adds a pop of color and fun to the table! To boost the taste of your Watermelon Pineapple Salad, add fresh herbs. Mint works great with the fruity flavors. You can also try basil or cilantro for a twist. For a spicy kick, sprinkle in some chili flakes. These herbs and spices add depth and make each bite exciting. Making your salad look great is easy. Serve it in a large, shallow bowl. Add extra mint leaves on top for color. You can also use a watermelon shell as a bowl. This fun touch will wow your guests. Consider layering the fruits for a colorful display. Bright colors make your dish more inviting. Balance your salad's sweetness and acidity to fit your taste. If you like it sweeter, add more honey. For a tangy flavor, increase the lime juice. Taste as you mix to find your perfect balance. A pinch of salt can also enhance the overall flavor. Adjusting these elements lets you create a salad that matches your cravings. {{image_2}} You can make this salad even better by adding more fruits. Try berries like strawberries or blueberries for a sweet touch. Citrus fruits like oranges or mandarins add a fresh zing. Each fruit adds its own color and flavor. Mix and match until you find your favorite combo. Want a different taste? Change the dressing! A honey-lime mix makes it sweeter and tangy. For a bolder flavor, try balsamic vinaigrette. Both dressings bring new life to the salad. You can even experiment with yogurt or a spicy vinaigrette. If you want a fuller meal, add proteins. Grilled chicken makes the salad hearty and tasty. Shrimp is another great option that pairs well with the fruits. You can also use chickpeas for a plant-based twist. Adding protein makes it more filling and nutritious. This refreshing watermelon pineapple salad is versatile and fun to customize. For the full recipe, check out the [Full Recipe]. To keep your watermelon pineapple salad fresh, store it in an airtight container. This will help prevent air from getting in and drying it out. If you use a bowl, cover it tightly with plastic wrap. Always place the salad in the fridge right after serving. The cooler temperature helps keep the fruit crisp and tasty. Your salad will stay fresh for about 2 to 3 days in the fridge. After that, the fruits may start to release moisture and lose their crunch. If you notice any off smells or slimy textures, it's best to throw it away. Use your senses to check for freshness before eating. While you can freeze some fruits, I do not recommend freezing this salad. Watermelon and pineapple have high water content. When frozen, they become mushy after thawing. If you want to freeze components, consider freezing just the pineapple. Cut it into pieces and freeze them on a baking sheet before placing them in a bag. This way, you can add frozen pineapple to smoothies later. Enjoy the full recipe for more details! Yes, you can make this salad ahead of time. To prepare in advance, chop the fruits and mix them in a bowl. Keep the dressing separate until you are ready to serve. This keeps the salad fresh and prevents sogginess. If you need to store it, use an airtight container in the fridge. Serve it within a day or two for the best taste. Watermelon is hydrating and low in calories. It contains vitamins A and C, which support skin health. Pineapple is rich in bromelain, an enzyme that aids digestion. It also has vitamin C and manganese, which help with immune function. Together, they boost hydration and provide essential nutrients. Yes, you can easily make this salad vegan. Simply swap the feta cheese for a plant-based option. You can use vegan feta or even some avocado for creaminess. This keeps the salad full of flavor while catering to plant-based diets. Enjoy a tasty and vibrant dish! This blog post covered how to make a tasty Watermelon Pineapple Salad. You learned about the key ingredients, tips for picking ripe fruits, and health benefits. We also shared detailed prep steps and fun serving ideas. Remember to add herbs for flavor and adjust sweetness to your liking. You can even change up the fruits or dressings. This salad stores well, making it easy to enjoy later. Try these tips to make your salad fun and fresh!](https://therecipehatch.com/wp-content/uploads/2025/05/4aeb76ff-4caa-4561-82cf-90b443911e56.webp)
Looking to brighten your summer meals? My Watermelon Pineapple Salad is the perfect refreshment! Bursting with juicy fruits, crisp cucumber, and a hint of mint, this salad is a crowd-pleaser. …
![- 1 pound shrimp, peeled and deveined - 2 ears of corn, cut into quarters - 1 pound baby potatoes, halved - 1 tablespoon olive oil - 4 cloves garlic, minced - 1 tablespoon Old Bay seasoning - 1 tablespoon lemon juice - 1 teaspoon smoked paprika - Salt and pepper to taste - Fresh parsley, chopped (for garnish) - Lemon wedges (for serving) - Aluminum foil - Grill or oven - Large mixing bowl - Measuring spoons and cups When making shrimp boil foil packs, have your ingredients ready. You’ll need shrimp, corn, and baby potatoes. First, peel and devein the shrimp. Cut the corn into quarters. Halve the baby potatoes for even cooking. Next, gather your cooking tools. You’ll need aluminum foil to create the packets. A grill or oven works well for cooking. Use a large mixing bowl to combine all your ingredients. Measuring spoons and cups help you get the right amounts. Using fresh ingredients makes a big difference. The shrimp should be firm and pink. Look for corn that is bright yellow and fresh. Choose baby potatoes that are smooth and firm. These ingredients will make your meal taste great. For a touch of flavor, use garlic and Old Bay seasoning. The lemon juice adds a nice zing. Smoked paprika gives a warm, smoky taste. Always season with salt and pepper to enhance the flavors. For the full recipe, check out the complete Shrimp Boil Foil Packs recipe. Enjoy making this dish! To start, gather all your ingredients in a large bowl. You need shrimp, corn, baby potatoes, olive oil, garlic, Old Bay seasoning, lemon juice, smoked paprika, salt, and pepper. Now, add all these items into the bowl and mix well. Make sure every piece of shrimp and potato gets coated. This step is key for great flavor. Next, cut four sheets of aluminum foil. Each should be about 12x18 inches. Lay out your foil sheets flat on a clean surface. Divide the shrimp and vegetable mixture evenly among the sheets. Place one portion in the center of each foil. Now, fold the sides of the foil over the mixture. Make sure to seal the top tightly. This will help keep all the juices and flavors inside. Now, preheat your grill or oven to 400°F (200°C). Once ready, place the foil packets on the grill or on a baking sheet if using the oven. Cook for 15 to 20 minutes. You want the shrimp to turn pink and the potatoes to be tender. When the time is up, carefully open the packets. Remember to watch out for steam! Finally, garnish with fresh parsley and serve with lemon wedges. Enjoy your meal! To make your shrimp boil foil packs pop, adjust your seasoning. You can add more Old Bay for a spicy kick or a pinch of cayenne for heat. If you like herbs, try adding fresh thyme or dill. These small changes can change the whole taste! You can also add different veggies or proteins. Bell peppers, zucchini, or asparagus work well. For extra protein, toss in some sausage or crab. Each addition brings a new twist to the dish. You can cook shrimp boil foil packs in an oven or on a grill. Both methods work great. The grill adds a smoky flavor, while the oven gives even heat. Just preheat your grill or oven to 400°F (200°C) before cooking. To avoid overcooking, keep an eye on your packets. Shrimp cooks fast, so check them after 15 minutes. When they turn pink, they are done. Tender potatoes are the sign to remove them from heat. For side dishes, corn on the cob or a fresh salad pairs well. A light coleslaw adds crunch and balance. You can also serve crusty bread to soak up all the juices. For garnishes, fresh parsley brightens the dish. Lemon wedges add a zesty touch when served. You can also try thinly sliced green onions for extra flavor. Each garnish adds a lovely finish to your shrimp boil foil packs. {{image_2}} You can switch up the proteins in your shrimp boil foil packs. Try using crab or sausage. Both options add a nice touch of flavor. You can also mix proteins for a unique taste. For veggies, consider seasonal options. Bell peppers, zucchini, or asparagus work great. You can use whatever you find fresh at the market. This keeps your meal exciting and fresh. Want a kick in your shrimp boil foil packs? Add some heat with red pepper flakes or hot sauce. This spiciness pairs well with the shrimp and veggies. You can also experiment with herbs and spices. Try fresh thyme or dill for a bright taste. A dash of lemon zest can uplift the flavors too. These small tweaks make a big difference in taste. You can easily make gluten-free shrimp boil foil packs. Just ensure your seasoning and other ingredients are gluten-free. For low-carb options, skip the baby potatoes. You can add more veggies like cauliflower instead. This keeps your meal light and healthy. Adjusting your shrimp boil foil packs allows everyone to enjoy them. To store leftover shrimp boil foil packs, first let them cool. Place them in an airtight container. This helps keep them fresh. You can refrigerate leftovers for up to three days. If you want to keep them longer, freezing is a good option. To freeze shrimp boil packets, wrap them tightly in plastic wrap. Then, place them in a freezer-safe bag. Make sure to remove as much air as possible. You can freeze these packs for up to three months. To reheat your shrimp boil foil packs, you can use either the oven or the microwave. If you use the oven, preheat it to 350°F (175°C). Place the foil packet on a baking sheet. Heat for about 15 minutes or until warmed through. If you prefer the microwave, place the packet on a microwave-safe plate. Heat for 3 to 5 minutes. Watch closely as cooking times may vary. To keep the shrimp tender, don’t overheat. Check the packets often to maintain flavor and texture. Enjoy your meal just like it was fresh! You should cook shrimp in foil for about 15 to 20 minutes. This time works well for both grilling and baking. The shrimp will turn pink and curl slightly when done. Make sure to check the potatoes too; they should be tender. Yes, you can! Preheat your oven to 400°F (200°C). Place the foil packs on a baking sheet. Cook for 15 to 20 minutes just like on the grill. This method gives you that same great flavor. You can use homemade blends or other seasonings. Try a mix of paprika, garlic powder, and celery salt. Lemon pepper is a great option too. Adjust to your taste to keep it flavorful. Yes, shrimp boil foil packs are quite healthy. They offer lean protein from shrimp and lots of nutrients from vegetables. Corn and potatoes provide fiber and vitamins. Use olive oil for healthy fats and enjoy a balanced meal. For the complete Shrimp Boil Foil Packs recipe, check out the [Full Recipe]. In this post, we covered how to make shrimp boil foil packs. We reviewed the ingredients needed, cooking equipment, and step-by-step instructions. I also shared tips for flavor, different variations, and how to store leftovers. These foil packs are easy to make and fun to eat. With simple tweaks, you can make them your own. Enjoy experimenting with flavors and ingredients. Happy cooking!](https://therecipehatch.com/wp-content/uploads/2025/05/a1b7c106-ca16-4e27-a913-77b008bcbade.webp)
Get ready to savor the taste of a classic shrimp boil in a fun new way! My easy Shrimp Boil Foil Packs bring together fresh shrimp, corn, and potatoes into …
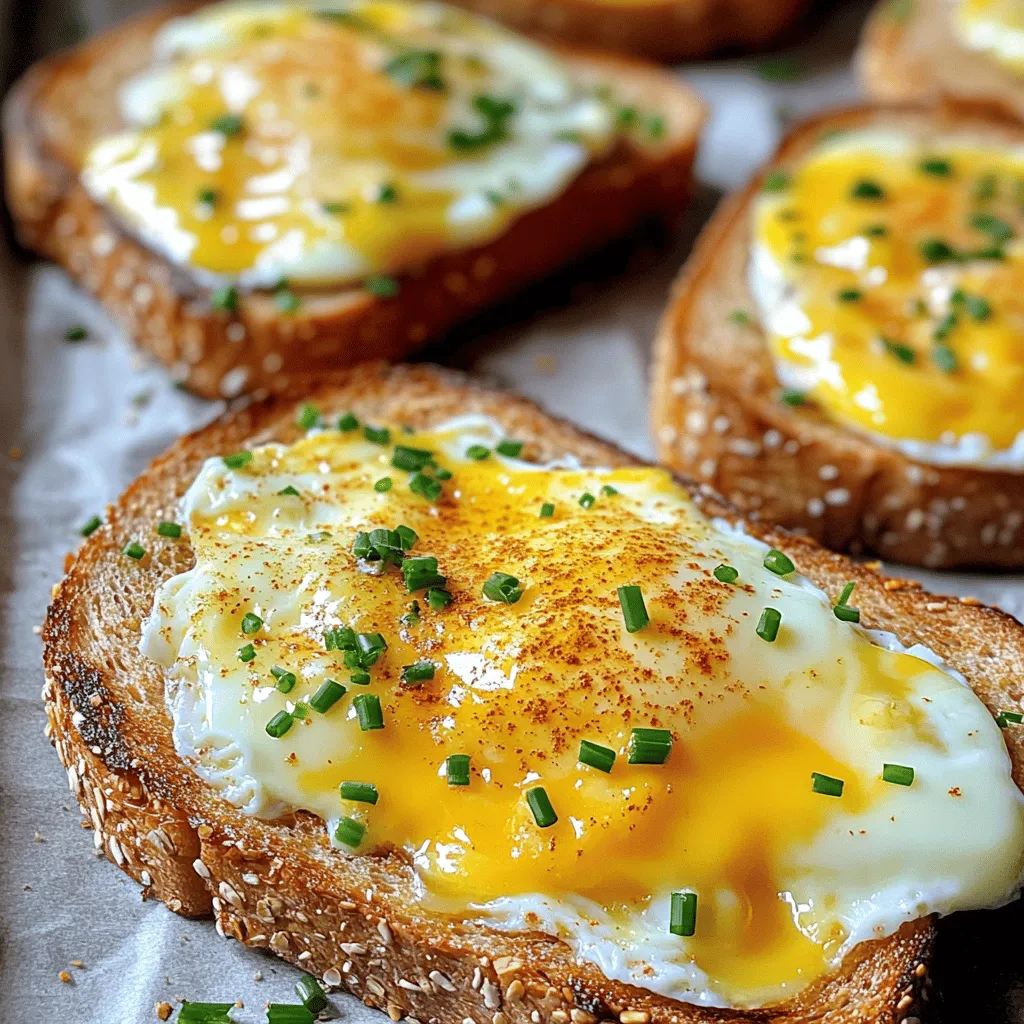
Craving a quick and tasty breakfast? You’ll love this Savory Air Fryer Egg and Cheese Toast recipe! I’ll show you how to whip up a delicious meal in no time, …
![- 2 ripe bananas, mashed - 1/3 cup melted butter - 1/2 cup brown sugar - 1/4 cup granulated sugar - 1 large egg - 1 teaspoon vanilla extract - 1 teaspoon baking soda - 1/2 teaspoon salt - 1 1/2 cups all-purpose flour - 1/4 cup chopped walnuts - 1/4 cup raisins or chocolate chips - 1 cup powdered sugar - 2 tablespoons milk - 1/2 teaspoon vanilla extract These ingredients create a sweet, soft treat that blends banana bread and cinnamon rolls. The ripe bananas add natural sweetness and moisture, while the butters and sugars create a rich flavor. You can add walnuts, raisins, or chocolate chips for extra texture and taste. For the icing, powdered sugar, milk, and vanilla make a sweet drizzle that takes these rolls to the next level. To see the full recipe, check the section above. - Preheat oven to 350°F (175°C) - Grease a 9x9 inch baking dish - Combine mashed bananas and melted butter - Mix in sugars, egg, and vanilla extract - Add baking soda, salt, and flour Start by mashing your bananas in a bowl. I like to use ripe bananas for the best taste. Add melted butter and mix until smooth. Then, stir in brown sugar and granulated sugar. Next, crack the egg into the mix, along with the vanilla extract. Blend until everything is well mixed. After that, sprinkle in the baking soda and salt. Finally, add the flour slowly, stirring gently. Do not over-mix; a few lumps are okay! - Roll out dough into a rectangle - Add melted butter, cinnamon, and optional fillings - Roll, slice, and arrange in baking dish On a floured surface, roll the dough into a rectangle about 1/4 inch thick. Brush the dough with melted butter. Then sprinkle ground cinnamon evenly over the top. If you want to add extra flavors, now is the time! You can add chopped walnuts, raisins, or chocolate chips. Next, start rolling the dough tightly from one edge. Pinch the seam to seal it. Once rolled, cut the log into 1-inch thick slices. Place these slices into your greased baking dish. - Bake for 20-25 minutes - Prepare icing while rolls bake - Drizzle icing over warm rolls Bake the rolls for about 20-25 minutes. They should be golden brown and puffed up. While they bake, make the icing. In a bowl, whisk together powdered sugar, milk, and vanilla extract until smooth. After baking, let the rolls cool a bit, then drizzle the icing over them. Enjoy your delicious banana bread cinnamon rolls! For the full recipe, check out the details above. - Avoid over-mixing the dough. This keeps the rolls fluffy and soft. - Ensure butter is not too hot when mixing. Hot butter can cook the egg. - Use ripe bananas for best flavor. They add natural sweetness and moisture. - Serve warm with drizzling icing. This makes each bite melt in your mouth. - Garnish with banana slices or a sprinkle of cinnamon. This adds a nice touch. - Recommended baking dish type: I like a 9x9 inch dish for even baking. - Useful tools for rolling and cutting include a rolling pin and a sharp knife. For the full recipe, check out the [Full Recipe]. {{image_2}} You can easily change the flavor of your banana bread cinnamon rolls. Adding spices like nutmeg or cardamom gives a warm twist. These spices enhance the sweet banana flavor. You can also swap chocolate chips for nuts or dried fruit. Walnuts or pecans add crunch, while dried cranberries or figs add sweetness. If you want a healthier treat, try replacing white sugar with honey or maple syrup. These natural sweeteners add flavor and moisture. Using whole wheat flour instead of all-purpose flour boosts fiber. This makes your rolls more filling and nutritious while keeping them tasty. For those with dietary needs, gluten-free flour alternatives work well. Look for blends that mimic all-purpose flour. For a vegan version, you can use flaxseed meal or applesauce as egg substitutes. This keeps the rolls moist and fluffy without using eggs. For more ideas, check out the Full Recipe. After baking, let your banana bread cinnamon rolls cool for about 10 minutes. This helps the rolls set and keeps them moist. To store, use a clean kitchen towel to cover the rolls. You can also place them in an airtight container. This keeps them fresh for longer. I recommend using a glass or plastic container with a tight lid. Avoid metal containers, as they can trap moisture and make your rolls soggy. If you want to save them for later, you can freeze your rolls. Wrap each roll in plastic wrap, then place them in a freezer bag. They will last up to three months in the freezer. If you want to store them in the fridge, they will stay fresh for about a week. For room temperature storage, keep them in a cool place. They are best eaten within three days when stored at room temperature. To enjoy your rolls warm again, use the microwave or oven. For the microwave, place a roll on a plate and heat it for 10-15 seconds. This keeps them soft. If you prefer the oven, preheat it to 350°F (175°C). Wrap the rolls in foil to keep them moist and heat for about 10 minutes. This method makes them taste freshly baked again. Enjoy your delicious banana bread cinnamon rolls anytime! For the complete recipe, check the Full Recipe section. Yes, you can use frozen bananas. To do this, take the bananas out of the freezer. Let them sit at room temperature for 30 minutes. Once thawed, peel and mash them. This will give you the same taste as fresh bananas. Look for a golden brown color on top. The rolls should also puff up nicely. A toothpick inserted in the center should come out clean. These signs mean your cinnamon rolls are ready to enjoy! You can use applesauce or mashed banana as an egg replacer. Use 1/4 cup of either for one egg. This keeps the rolls moist but may change the taste slightly. You can also try a flaxseed meal mix. Combine 1 tablespoon of flaxseed with 2.5 tablespoons of water. Let it sit for a few minutes before mixing it in. Yes, you can prepare the rolls in advance. After you slice them, cover and refrigerate them for up to 24 hours. When ready to bake, let them sit at room temperature for 30 minutes. Then, bake as directed. This makes mornings much easier! Banana bread cinnamon rolls are simple to make and tasty. You learned the key ingredients, helpful tips, and different ways to enjoy them. Remember to use ripe bananas for great flavor and try optional add-ins for unique twists. Store your rolls correctly to keep them fresh. With this guide, you're well on your way to baking delicious rolls. I hope you enjoy each bite as much as I do!](https://therecipehatch.com/wp-content/uploads/2025/05/43a16549-cf4d-4073-95f5-24728ed7249c.webp)
Are you ready to indulge in a treat that combines two of your favorites: banana bread and cinnamon rolls? In this blog post, I’ll show you how to whip up …