Skip to content
The Recipe Hatch
  • Home
  • Appetizers
  • Desserts
  • Salads
  • Breakfast
  • Dinner
  • Privacy Policy
  • Contact
  • About

Chef Owen

Sunshine Salad Refreshing and Healthy Delight

June 3, 2025 by Chef Owen
To make your sunshine salad, you will need: - 2 cups mixed salad greens (spinach, arugula, and kale) - 1 cup cherry tomatoes, halved - 1 yellow bell pepper, diced - 1 avocado, diced - 1/2 cup canned chickpeas, rinsed and drained - 1/4 cup roasted sunflower seeds - 1/4 cup feta cheese, crumbled (optional) - 2 tablespoons fresh lemon juice - 1 tablespoon olive oil - Salt and pepper to taste - Fresh basil leaves for garnish Each ingredient in the sunshine salad adds great nutrition: - Mixed Salad Greens: They are low in calories and packed with vitamins A, C, and K. They help keep your weight in check. - Cherry Tomatoes: These small gems boost your skin health. They are high in antioxidants and vitamin C, too. - Yellow Bell Pepper: This pepper adds sweetness and is high in vitamin A and C. It helps support your immune system. - Avocado: This creamy fruit has healthy fats that are good for your heart. It also has fiber, which aids digestion. - Chickpeas: These add protein and fiber. They help keep you full and are great for muscle health. - Roasted Sunflower Seeds: These tiny seeds are full of healthy fats, vitamins, and minerals. They help with heart health. - Feta Cheese: If you choose to add it, feta gives a creamy taste. It also adds calcium for strong bones. - Lemon Juice: This zesty juice adds flavor and vitamin C, which is good for your skin. - Olive Oil: A healthy fat that helps your heart. It also acts as a dressing base. - Salt and Pepper: These enhance the flavors. Use them wisely to keep your salad healthy. - Basil Leaves: Fresh basil adds flavor and also has antioxidants that help fight diseases. Not everyone has the same tastes or needs. Here are some swaps: - Mixed Greens: Use romaine or butter lettuce if you prefer. - Cherry Tomatoes: Any other tomatoes work well. Try grape or heirloom varieties. - Yellow Bell Pepper: Use red or green bell peppers for a different twist. - Avocado: For a creamy texture, use hummus instead. - Chickpeas: Black beans or kidney beans can be a good swap. - Sunflower Seeds: Try pumpkin seeds or chopped nuts for crunch. - Feta Cheese: Omit or use a vegan cheese for a dairy-free option. - Lemon Juice: Lime juice can give a nice twist. - Olive Oil: Any light oil, like avocado oil, can work. - Salt and Pepper: Use herbs or spices instead for flavor without salt. This recipe is a great chance to mix and match based on what you enjoy. You can find the full recipe in the earlier section. Start with a large salad bowl. Add two cups of mixed salad greens. I love using spinach, arugula, and kale. These greens add color and nutrition. Toss them gently to mix. This forms a fresh base for your sunshine salad. Next, it's time for the veggies! Add one cup of halved cherry tomatoes. Their sweetness brightens the dish. Then, dice one yellow bell pepper and add that too. It brings a nice crunch. Lastly, dice one avocado and gently place it on top. Its creaminess balances the salad. Now, let’s add some protein. Take half a cup of canned chickpeas. Rinse and drain them first. Sprinkle them evenly over the salad. This gives a hearty touch. Next, add a quarter cup of roasted sunflower seeds. They add a lovely crunch. If you like cheese, crumble a quarter cup of feta on top. It adds richness and flavor. For the dressing, mix two tablespoons of lemon juice and one tablespoon of olive oil in a small bowl. Add salt and pepper to taste. Drizzle this mixture over the salad. Use salad tongs to toss everything gently. Be careful not to squish the avocado. Finally, garnish with fresh basil leaves. They add a pop of flavor and color. Serve immediately for the best taste! For the full recipe, check the details above. When picking an avocado, look for a dark green color. It should feel slightly soft but not mushy. Press gently; if it gives a little, it's ripe. Avoid any avocados with dark spots or dents. These could mean the fruit is overripe or bad. Always check the stem area. If it's green, the avocado is fresh. If it's brown, skip it. If you have leftover salad, keep it fresh. Store it in an airtight container. This helps prevent wilting and sogginess. Keep the dressing separate until you’re ready to eat. This way, the greens stay crisp. You can store the salad in the fridge for up to two days. However, it’s best to eat it fresh. To change up the flavor, try different dressings. A honey mustard dressing adds a sweet kick. A balsamic vinaigrette gives a tangy taste. For a spicy twist, add a dash of sriracha to your lemon dressing. You can also mix in fresh herbs like dill or cilantro for more flavor. These options make your sunshine salad exciting each time! For the full recipe, check the details above. {{image_2}} Adding grains to your sunshine salad makes it hearty and filling. Quinoa or couscous works well. Quinoa is a great choice because it has protein and fiber. Couscous has a light and fluffy texture. You can cook it ahead of time and let it cool. Mix it into the salad with the greens and veggies. This twist turns your salad into a full meal. For a tropical vibe, add pineapple and coconut. Fresh pineapple gives your salad a sweet and juicy kick. Shredded coconut adds a nice crunch. Use fresh pineapple for the best flavor. Cut it into small pieces and toss it in. For coconut, unsweetened flakes work best. This variation brings a taste of the tropics to your plate. If you want a vegan option, skip the feta cheese. You can substitute it with avocado or a nut-based cheese. Avocado adds creaminess and healthy fats. Nut-based cheese gives a similar taste to feta. Make sure to adjust the dressing to keep it light. This vegan sunshine salad is just as tasty and colorful. For a full recipe, check out the Sunshine Salad recipe above. To keep your Sunshine Salad fresh, store the ingredients separately. Place the mixed salad greens in a loose bag or container. This helps them stay crisp. For the cherry tomatoes and bell pepper, use a small container. Keep the avocado in a separate, airtight container to prevent browning. Store the chickpeas in a sealed container, too. The sunflower seeds should stay in a cool, dry spot. If you use feta cheese, keep it in the fridge in its original container. To keep your Sunshine Salad fresh, follow these tips. First, dress the salad just before you eat it. This keeps the greens from getting soggy. If you make extra salad, store the dressing separately. You can combine the salad and dressing when ready to eat. In the fridge, your salad ingredients can last up to three days. Always check for freshness before serving. If you have leftover Sunshine Salad, use it creatively. You can mix it into a grain bowl with quinoa or rice. Another option is to blend it into a smoothie for a nutrient boost. If you want to reheat the chickpeas, do so in a pan on low heat. Add a bit of oil and spices for flavor. However, avoid reheating the greens and avocado, as they lose their texture. Try to enjoy your leftovers within two days for the best taste. Check out the Full Recipe for more ideas! Sunshine Salad has roots in fresh, wholesome cooking. It features bright colors and vibrant flavors. Many say it draws inspiration from Mediterranean cuisine, where salads shine. The use of greens, colorful veggies, and healthy fats unites cultures. This salad celebrates fresh produce and simple ingredients. It’s perfect for summer picnics or any sunny day. Yes, you can prepare Sunshine Salad ahead of time. I recommend keeping the dressing separate until you serve it. This keeps the greens crisp and fresh. You can chop the veggies and mix them in a bowl. Store them in the fridge for up to a day. Toss everything together just before serving for the best taste. Sunshine Salad pairs well with many dishes. You can serve it with grilled chicken or fish for protein. It also goes great with whole-grain bread or wraps for carbs. If you want a vegetarian option, try adding quinoa or brown rice. You can even enjoy it as a side to a hearty soup. This salad is flexible and fits many meal times. For the full recipe, check out the Sunshine Salad section above. Sunshine Salad offers a tasty mix of bright flavors and health benefits. We explored each ingredient, uncovering their nutritional perks and how to swap for dietary needs. I shared easy steps to prepare the salad and tips for choosing ripe avocados, storing leftovers, and adding dressings. This dish is versatile, allowing for creative variations like tropical or vegan styles. Remember, proper storage keeps your salad fresh. Dive in and enjoy the sunshine! It’s an easy way to eat well and feel great.

Looking for a bright, tasty way to eat healthy? Let me introduce you to Sunshine Salad! This vibrant dish bursts with fresh ingredients and offers a satisfying crunch. It’s packed …

Read more

Categories Salads

Italian Grilled Cheese Sandwiches for Tasty Delight

June 3, 2025 by Chef Owen
To make Italian grilled cheese sandwiches, you need key ingredients. Here’s the list: - 4 slices of rustic Italian bread - 2 tablespoons basil pesto - 1 cup fresh mozzarella cheese, sliced - ½ cup sun-dried tomatoes, chopped - ½ teaspoon garlic powder - 2 tablespoons olive oil - Salt and pepper to taste - Fresh basil leaves for garnish These ingredients blend well to create a tasty sandwich. The rustic Italian bread gives a great texture. The mozzarella melts beautifully, making each bite rich and creamy. Sun-dried tomatoes add a sweet and tangy touch. You can add some optional extras to boost the flavor. Consider these options: - Roasted red peppers for sweetness - Fresh spinach for a healthy crunch - Prosciutto for a salty kick - A sprinkle of red pepper flakes for heat These extras let you customize your sandwich. Feel free to mix and match based on your taste. Choosing the right bread is key to a great grilled cheese. Here are some recommended types: - Ciabatta for a crispy crust - Focaccia for a fluffy inside - Pane Toscano for a rustic flavor Each bread type brings its own character. Experiment with different breads to find your favorite! For a full recipe, you can check the detailed steps provided. First, gather all your ingredients. You will need: - 4 slices of rustic Italian bread - 2 tablespoons basil pesto - 1 cup fresh mozzarella cheese, sliced - ½ cup sun-dried tomatoes, chopped - ½ teaspoon garlic powder - 2 tablespoons olive oil - Salt and pepper to taste - Fresh basil leaves for garnish Start by laying out your bread slices. Spread basil pesto on one side of each slice. Next, slice your fresh mozzarella. Chop the sun-dried tomatoes. This prep makes cooking easy and fun. Now, it's time to grill. Preheat your skillet over medium heat. Drizzle olive oil in the hot skillet. Take two slices of bread with pesto facing out. Place mozzarella slices on the non-pesto side. Sprinkle the chopped sun-dried tomatoes on top. Season with garlic powder, salt, and pepper. Cover with the other two slices of bread, pesto side out. Place the sandwiches in the skillet. Grill each side for about 3-4 minutes. You want the bread golden and crispy, and the cheese melted. Once grilled, remove the sandwiches from the skillet. Let them cool for a minute. This helps the cheese set a bit. Slice the sandwiches in half for easy eating. Garnish with fresh basil leaves for color and aroma. Enjoy your tasty Italian grilled cheese! For detailed cooking steps, check the Full Recipe. To get that ideal golden crust, you need two things: heat and fat. Use medium heat. If it's too hot, the bread burns. If it's too low, it won't crisp up. Use olive oil when grilling the sandwich. It adds flavor and helps the bread brown nicely. Spread it evenly on the outside of the bread. This will make each bite crunchy and tasty. For the best melt, I love fresh mozzarella. It gets gooey and adds a creamy taste. You can also mix cheeses. Try adding provolone or fontina for extra flavor. Keep in mind that shredded cheese melts faster than slices. If you're in a hurry, shredded works great. Just remember to layer it well for a good melt. One big mistake is using cold bread. Always let the bread sit at room temperature. Cold bread won't cook well. Another mistake is not enough oil or butter. You need enough fat to help the bread crisp. Don’t rush the cooking. Let each side grill for 3-4 minutes. If you flip too soon, the cheese won't melt properly. Keep these tips in mind, and you’ll make the best Italian grilled cheese sandwiches every time! {{image_2}} If you love meat, add slices of prosciutto or salami. These meats pair well with the rich cheese. They add great flavor and texture. You can even use grilled chicken for a heartier meal. Just layer your chosen meat on top of the cheese before grilling. This gives you a tasty, protein-packed sandwich. For a veggie twist, you can add roasted peppers, spinach, or artichoke hearts. These ingredients add color and nutrition. They also bring a fresh taste. Try mixing in some sliced mushrooms for an earthy flavor. Just layer your veggies between the cheese and bread. This way, you keep the sandwich hearty and filling without meat. If you need gluten-free options, use gluten-free bread. Many brands offer great flavors and textures. Look for rustic or artisan styles for the best results. Also, check ingredients to ensure they fit your diet. Grilling may take a bit longer, but you’ll get that crispy crust. Enjoy your Italian grilled cheese without missing out! To store leftover Italian grilled cheese sandwiches, let them cool first. Wrap each sandwich in foil or parchment paper. This keeps them from getting soggy. Place them in an airtight container. They will last up to three days in the fridge. When you’re ready to eat, reheat the sandwiches to keep them crispy. A skillet works best. Heat it over medium heat, adding a little butter or oil. Place the sandwich in the skillet. Grill each side for about 2-3 minutes. This method helps restore that golden, crunchy crust. You can also freeze these sandwiches for later. Wrap each sandwich tightly in plastic wrap. Then, place them in a freezer bag. They can last up to two months in the freezer. When you want one, just thaw in the fridge overnight. Reheat as mentioned above for the best results. Yes, you can use different cheeses! Try provolone, fontina, or even a mix. Each cheese gives a unique taste. Mixing cheeses can add depth and richness to your sandwich. For a sharp flavor, use aged cheeses. For a milder option, mozzarella works great. Just remember to keep that gooey texture we love when melting! Great sides can lift your meal! A fresh salad with arugula and cherry tomatoes pairs well. You can also serve it with a bowl of tomato soup. The soup adds warmth and comfort. For a crunchy touch, try potato chips or pickles. They contrast nicely with the creamy sandwich. To make this dish dairy-free, choose vegan cheese. Brands like Daiya or Violife offer tasty options. Use dairy-free butter or olive oil for grilling. You can also add nutritional yeast for a cheesy flavor. This keeps the essence of the sandwich while catering to your needs! You can find the Full Recipe for Italian Grilled Cheese Sandwiches right here. It lists all the ingredients and step-by-step instructions to guide you through the process. Enjoy every bite of this delightful treat! You learned how to make Italian grilled cheese sandwiches with the best tips and tricks. We covered essential ingredients, how to grill them perfectly, and ways to store leftovers. Remember to play with flavors and toppings to suit your taste. Making these sandwiches can be quick and easy. With practice, you'll impress yourself and others. Enjoy your tasty creations and don't be afraid to experiment!

Are you ready to take your grilled cheese game to a whole new level? In this post, we’ll explore the art of making Italian grilled cheese sandwiches. With the right …

Read more

Categories Dinner

Minute Pan-Fried Noodles Quick and Flavorful Meal

January 12, 2026June 2, 2025 by Chef Owen
- 8 oz egg noodles (or ramen noodles) - 2 tablespoons vegetable oil - 1 cup mixed bell peppers, julienned - 1 small carrot, julienned - 1 cup broccoli florets - 2 green onions, thinly sliced - 2 cloves garlic, finely minced - 3 tablespoons soy sauce - 1 tablespoon sesame oil - 1 teaspoon fresh ginger, grated - Salt and freshly cracked pepper - Sesame seeds for garnish For this quick and tasty dish, you need a mix of fresh ingredients. I prefer to use vibrant bell peppers for color and crunch. The egg noodles or ramen noodles serve as the base. Vegetables are key. They add texture and flavor. Use broccoli florets for a nice bite. Julienne the carrots and peppers for even cooking. The green onions add a fresh touch at the end. Don’t forget the aromatics! Garlic and ginger bring warmth and depth. They make the dish smell amazing. The soy sauce and sesame oil add a savory kick. Adjust these based on your taste. Finally, the sesame seeds are a must! They add a nice crunch and look great on the plate. When you gather these ingredients, you are set for a delightful meal. {{ingredient_image_2}} To cook the noodles, start with a large pot. Bring salted water to a strong boil. Add in 8 oz of egg noodles. Cook them for about 3 minutes. You want them to be al dente, which means they should still have a slight bite. Drain the noodles in a colander. Rinse them with cold water. This stops the cooking process and keeps them from getting soggy. Set the noodles aside for later. While the noodles cook, let’s prepare the vegetables. For the mixed bell peppers and carrot, use a sharp knife to julienne them. This means cutting them into thin strips. For the broccoli, break it into small florets. Make sure each piece is bite-sized. This helps them cook evenly. Once cut, keep the veggies aside until you need them. Next, heat oil in a skillet or wok. Pour in 2 tablespoons of vegetable oil. Turn the heat to medium-high. Wait until the oil shimmers and is hot. Add 2 cloves of minced garlic and 1 teaspoon of grated ginger to the hot oil. Stir-fry for about 30 seconds until they smell good. Then, add the julienned bell peppers, carrot, and broccoli florets. Stir-fry for 3-4 minutes. You want the veggies tender but still crunchy. Now, it’s time to combine everything. Gently add the pre-cooked noodles into the skillet with the veggies. Use a spatula to toss everything together. Make sure the noodles and veggies mix well. Next, drizzle in 3 tablespoons of soy sauce and 1 tablespoon of sesame oil. Toss again to coat everything evenly. Taste, and add salt and freshly cracked pepper if needed. This step ensures every bite is flavorful. To keep your veggies crunchy, stir-fry them for just a few minutes. Start with garlic and ginger for flavor. Then, add bell peppers, carrots, and broccoli. Cook until they are bright and tender. Avoid overcooked noodles by boiling them for only three minutes. Rinse them under cold water to stop the cooking. This keeps them firm and ready to fry. Adjust the soy sauce based on your taste. If you love saltiness, add more. For a lighter flavor, use less. Sesame oil adds a nice nutty touch. Don't skip the garnishes! Green onions and sesame seeds make each bite pop. They add color and crunch to your dish. Serve your noodles in shallow bowls for a nice look. This way, everyone sees the colorful veggies. Add a sprig of fresh cilantro on top for extra flair. Using chopsticks to eat adds fun too! Choose bright dishware to highlight the dish's colors and make it appealing. Pro Tips Use Fresh Ingredients: Fresh vegetables will enhance the flavor and nutritional value of your dish. Opt for seasonal produce whenever possible. Customize Your Noodles: Feel free to substitute egg noodles with whole wheat or gluten-free options based on your dietary preferences. Adjust the Sauce: Experiment with different types of soy sauce, such as low-sodium or tamari, to suit your taste and health needs. Spice It Up: If you enjoy heat, add a pinch of red pepper flakes or a drizzle of sriracha for an extra kick in flavor. {{image_4}} You can add protein to your Minute Pan-Fried Noodles for extra flavor and nutrition. Here are some tasty options: - Chicken: Use about 1 cup of cooked, diced chicken. Cook it for 5-7 minutes until golden. - Shrimp: Add 1 cup of shrimp. Cook for 2-3 minutes until they turn pink. - Tofu: Use 1 cup of firm tofu, cut into cubes. Cook for about 4-5 minutes until golden. Adding protein makes the dish more filling and satisfying. You can switch up the vegetables based on what you have. Here are some ideas for seasonal swaps: - Zucchini: Slice it thin. It cooks quickly and adds a nice texture. - Snap Peas: These add a sweet crunch. Stir-fry them for about 2 minutes. - Spinach: Toss in a handful at the end. It wilts quickly and adds nutrients. Using different vegetables not only boosts the dish’s flavor but also increases its nutritional value. If you love heat, add a spicy kick to your noodles. Here’s how to do it: - Chili Flakes: Sprinkle in about 1 teaspoon while cooking. Adjust based on your spice level. - Sriracha: Drizzle some on top right before serving. It packs a flavorful punch. Balancing the heat is key. You want to enhance the flavors, not overpower them. To keep your Minute Pan-Fried Noodles fresh, use airtight containers. Glass or plastic containers work great. Make sure to cool the noodles before sealing them. Store them in the fridge for up to three days. If you plan to eat them later, try to keep the veggies separate to avoid sogginess. When it's time to enjoy your leftovers, use the stovetop for the best results. Heat a pan over medium heat and add a splash of water. This will help keep the noodles moist. Stir them gently to avoid sticking. If you're in a hurry, you can use the microwave. Just cover the bowl with a damp paper towel. This helps prevent drying out. You can freeze cooked noodles for longer storage. First, let them cool completely. Then, place them in a freezer-safe bag. Remove as much air as possible before sealing. They can last up to three months in the freezer. When you're ready to eat, thaw them in the fridge overnight. Reheat them as you normally would, adding a bit of water if needed. Pan-fried noodles can last about 3 to 5 days in the fridge. To store them, place the noodles in an airtight container. Make sure they are cool before sealing. This keeps them fresh and prevents moisture loss. Always check for any off smells or signs of spoilage before eating. Yes, you can easily make this recipe gluten-free. Use rice noodles or gluten-free egg noodles instead of traditional egg noodles. For soy sauce, choose a gluten-free version or use tamari. Both options give great flavor without gluten. Egg noodles and ramen noodles are both great choices for pan-frying. Egg noodles cook quickly and have a nice chew. Ramen noodles are also quick and can get crispy when fried. Avoid using thick pasta, as it may not cook evenly in this quick dish. To save time, prep ingredients ahead of time. Chop your veggies and cook noodles the day before. You can also use pre-cooked or instant noodles. They take less time to cook. Keep your skillet hot to speed up cooking the vegetables. Absolutely! To make this recipe vegetarian, simply skip the meat and use vegetable broth instead of any meat-based sauces. You can also add more vegetables or tofu for protein. This keeps the dish hearty and satisfying without any meat. In this blog post, we explored the key ingredients for delicious pan-fried noodles and how to cook them perfectly. We discussed cooking techniques, tips for great flavor, and variations to suit your taste. It's clear that with the right ingredients and methods, you can create a tasty meal. Remember to store leftovers properly and enjoy the creative options this dish offers. Your pan-fried noodle adventure starts now!

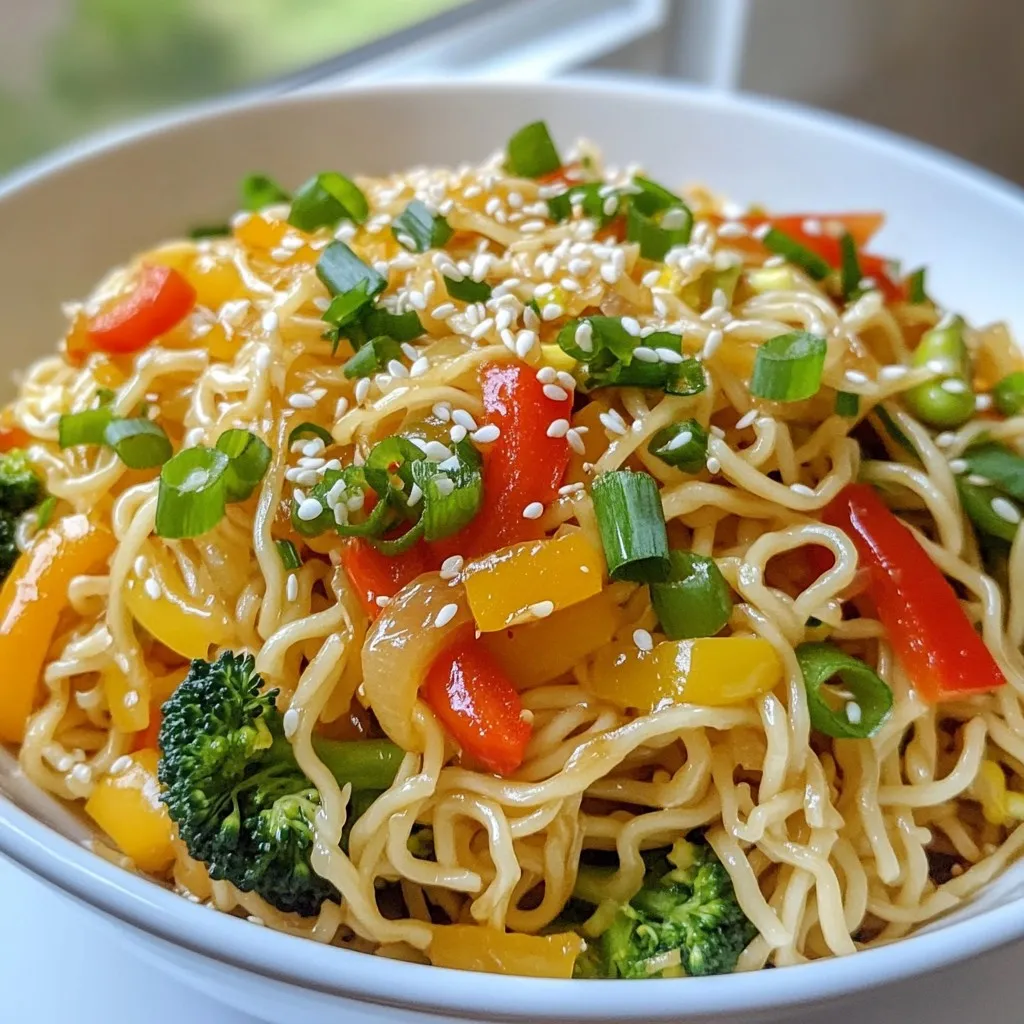
Need a quick meal that’s both tasty and easy to make? Let me show you how to whip up Minute Pan-Fried Noodles. In just a flash, you can enjoy a …

Read more

Categories Dinner

Chicken Pot Pie Pasta Flavorful Comfort Food Dish

January 13, 2026June 1, 2025 by Chef Owen
To make Chicken Pot Pie Pasta, gather these simple ingredients: - 8 oz pasta (fusilli or penne recommended) - 2 tablespoons extra virgin olive oil - 1 medium onion, diced - 2 medium carrots, diced - 2 celery stalks, diced - 2 cloves garlic, minced - 2 cups cooked chicken, shredded - 1 cup frozen peas - 3 cups chicken broth (homemade or low-sodium for best flavor) - 1 cup heavy cream - 1 teaspoon dried thyme - 1 teaspoon dried rosemary - Salt and freshly ground black pepper to taste - 1 cup shredded sharp cheddar cheese - Fresh parsley, chopped for garnish You can change this dish to suit your taste. Consider these options: - Use different pasta shapes like rotini or farfalle. - Swap cooked chicken for turkey or rotisserie chicken. - Add mushrooms for extra flavor and texture. - Toss in spinach or kale for added nutrients. - Use a blend of cheeses, like mozzarella or gouda, for a twist. This dish is not just tasty; it's also a good source of nutrients. Here’s a quick look: - Calories: Approximately 500 per serving - Protein: High due to chicken and cheese - Carbs: Comes mainly from pasta and veggies - Fats: Heavy cream and cheese add healthy fats Enjoy this hearty meal packed with flavor! {{ingredient_image_2}} To start, bring a large pot of salted water to a boil. I suggest using a good amount of salt. This adds flavor to the pasta. Once the water is boiling, add 8 ounces of fusilli or penne pasta. Cook it according to the package instructions until it is al dente. This usually takes about 8 to 10 minutes. After cooking, drain the pasta but save a small cup of pasta water. You might need it later to adjust the creaminess. Next, we’ll prepare the veggies. In the same pot, heat 2 tablespoons of extra virgin olive oil over medium heat. Once the oil is hot, add 1 medium diced onion, 2 diced carrots, and 2 diced celery stalks. Sauté these vegetables for about 5 minutes. You want them to soften and the onion to turn translucent. After that, add 2 minced cloves of garlic. Stir this mixture for about one minute. The garlic should become fragrant but not browned. Now, let’s make the sauce. Add 2 cups of shredded cooked chicken to the pot. Stir it in with the sautéed veggies. Gradually pour in 3 cups of chicken broth. Bring this mixture to a gentle simmer. Reduce the heat and mix in 1 cup of heavy cream. Now, add 1 teaspoon of dried thyme and 1 teaspoon of dried rosemary. Season with salt and freshly ground black pepper to taste. Let this simmer for 5 to 7 minutes until it thickens slightly. After thickening, fold in the cooked pasta and 1 cup of frozen peas. Stir well to combine everything. If the dish looks too thick, add a splash of the reserved pasta water. This helps reach your desired creaminess. Finally, remove the pot from heat and stir in 1 cup of shredded sharp cheddar cheese. This creates a creamy, cheesy finish. Serve hot and garnish with chopped fresh parsley for added color and freshness. To make a creamy sauce, use heavy cream. It adds richness. You can also mix in a bit of pasta water. This helps with texture and flavor. If your sauce seems too thick, add more cream or water. Stir it well until smooth and creamy. Using fresh herbs like thyme and rosemary boosts flavor. Always taste your sauce. Adjust salt and pepper based on your liking. Store any leftovers in an airtight container. Let it cool down first. Refrigerate it within two hours of cooking. Chicken Pot Pie Pasta stays fresh for about three days. For longer storage, freeze it. Make sure to use a freezer-safe container. Label it with the date. When you're ready to eat, thaw it overnight in the fridge. To make a complete meal, serve this dish with a side salad. A simple green salad pairs well. You can also offer garlic bread for a nice touch. If you want more veggies, add steamed broccoli or green beans. For drinks, a light white wine or sparkling water can enhance the meal. Enjoy it with family or friends for a cozy dinner! Pro Tips Use Fresh Herbs: Fresh thyme and rosemary can elevate the flavor profile of your dish significantly. Consider using fresh herbs instead of dried for a more vibrant taste. Cook Pasta Al Dente: Make sure to cook your pasta al dente, as it will continue to cook slightly when combined with the sauce. This will prevent it from becoming mushy. Adjust Creaminess: If the sauce is too thick after adding the pasta, use the reserved pasta water to adjust the consistency to your liking. It helps to maintain the flavor as well. Garnish for Freshness: A sprinkle of fresh parsley not only adds a pop of color but also enhances the overall flavor of the dish. Don't skip this final touch! {{image_4}} You can switch up the protein in this dish. Try turkey instead of chicken. Shredded rotisserie chicken works great too. For a seafood twist, use cooked shrimp or crab. Just make sure to add them at the right time to keep them tender. If you want a veggie version, skip the chicken. Add mushrooms for a meaty texture. Bell peppers and zucchini also work well. You can use vegetable broth instead of chicken broth. This keeps the flavor rich and satisfying without meat. Boost the flavor with spices. Add a pinch of cayenne for heat. A splash of lemon juice brightens the dish. Fresh herbs like basil or dill add a nice touch. You can also mix in some garlic powder or onion powder for depth. Experiment to find your perfect blend! To store Chicken Pot Pie Pasta, first let it cool. Use an airtight container. This keeps the pasta fresh and tasty. Try to eat it within three days. You can store it in the fridge. Avoid leaving it out for too long. When you reheat Chicken Pot Pie Pasta, do it slowly. Use a stove or microwave. If using a stove, add a little water or broth. This keeps it creamy. Heat on low to avoid burning. Stir often to warm it evenly. In the microwave, cover it to keep moisture in. Heat in short bursts, stirring in between. Freezing Chicken Pot Pie Pasta is a great option. Use a freezer-safe container. Leave some space at the top. This allows for expansion. You can freeze it for up to three months. To thaw, place it in the fridge overnight. Reheat it as described above for the best taste. Yes, you can use gluten-free pasta. Look for brands that offer fusilli or penne shapes. These work well in this dish. Cooking times may vary, so check the package instructions. Gluten-free pasta can be just as tasty and will soak up the creamy sauce. To lower calories, use whole wheat pasta. This adds fiber and keeps you full longer. Swap the heavy cream for a low-fat milk or unsweetened almond milk. You can also cut back on cheese or use a lighter version. Adding more veggies like spinach or mushrooms can help cut calories too. If you need a substitute for heavy cream, try using half-and-half. It gives a creamy texture with fewer calories. You can also blend silken tofu with a little water for a dairy-free option. Greek yogurt adds creaminess too, but mix it in at the end to avoid curdling. This blog post gives you all you need for a tasty Chicken Pot Pie Pasta. You learn about key ingredients, how to cook each part, and the best tips for creamy sauce. You also discover ways to customize the dish and store leftovers. Remember, whether you choose chicken or a veggie option, enjoy experimenting with flavors. Now, you have a dish that’s not only easy to make, but also fun to share. Happy cooking!

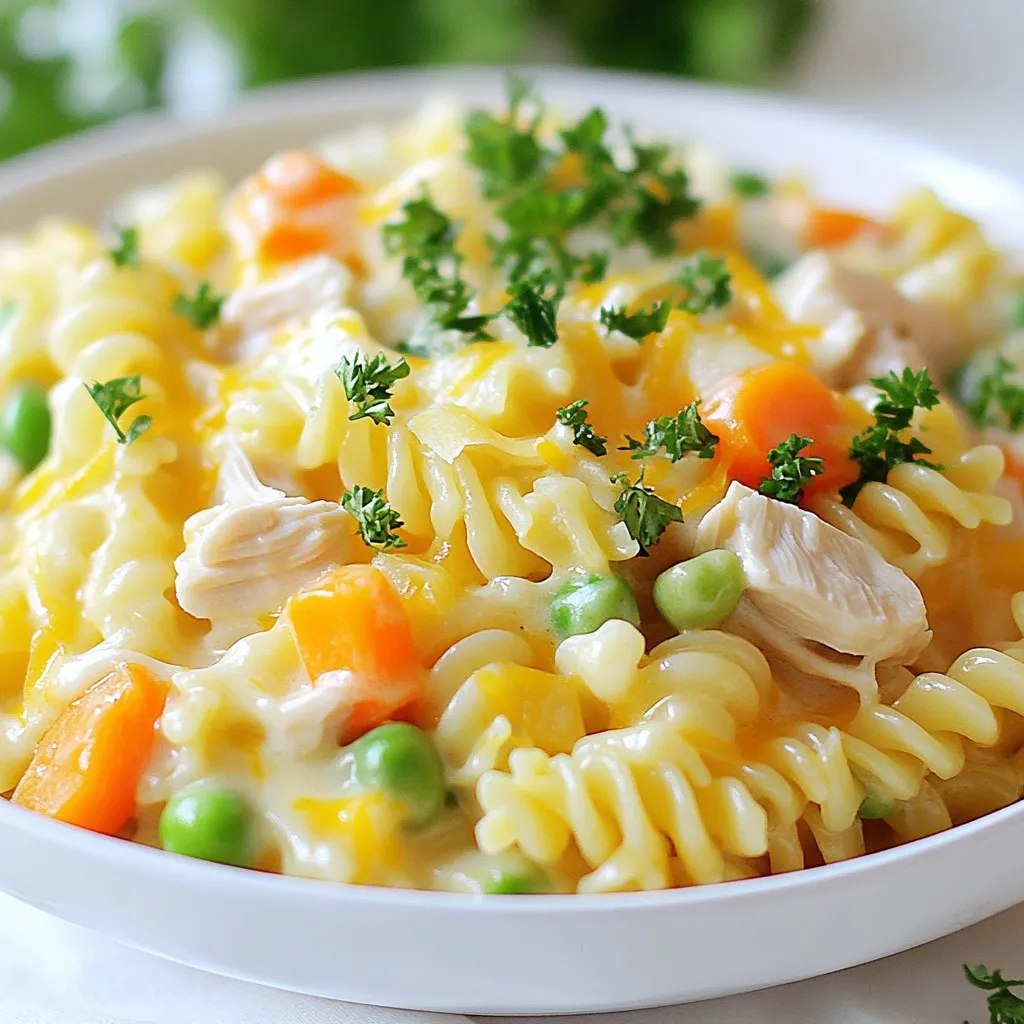
Looking for a cozy dish that warms your heart and fills your belly? Chicken Pot Pie Pasta is your answer! This flavorful comfort food combines pasta with chicken and veggies, …
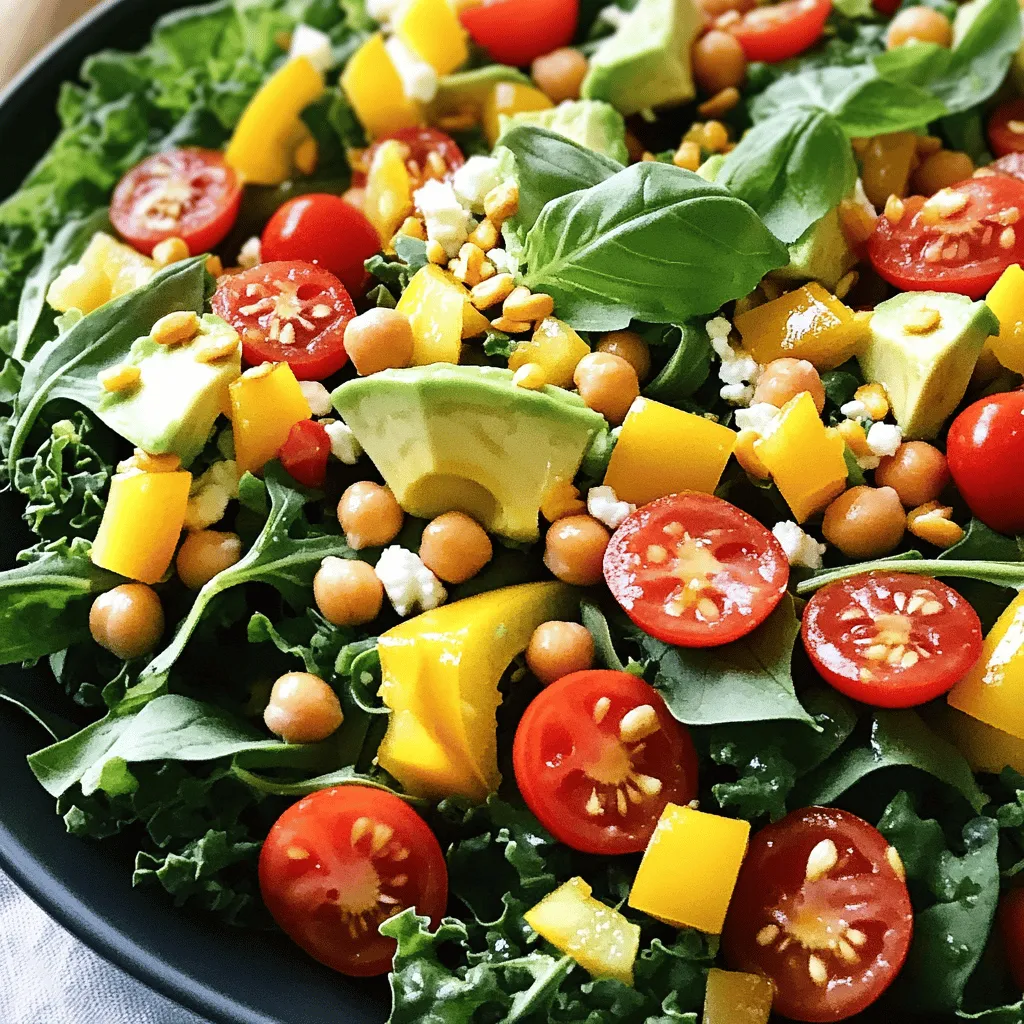
Read more

Categories Dinner

Pineapple Cucumber Salad Fresh and Flavorful Mix

May 30, 2025 by Chef Owen
- 2 cups fresh pineapple, diced - 1 large cucumber, thinly sliced - 1 red bell pepper, diced - 1 jalapeño, finely chopped (optional) - 1/4 red onion, thinly sliced - 1/4 cup fresh cilantro, chopped - Juice of 2 limes - 2 tablespoons honey or agave syrup - Salt and pepper to taste - 1/4 cup crumbled feta cheese (optional) Pineapple cucumber salad bursts with bright flavors. Each ingredient plays a role. First, fresh pineapple adds sweetness and tang. Choose ripe, juicy pineapple for the best taste. The cucumber brings a cool crunch. It balances the sweetness of the pineapple. Next, the red bell pepper contributes color and extra flavor. The jalapeño adds a bit of heat. You can skip it if you prefer a milder dish. Red onion gives a sharp bite, while cilantro adds freshness. Lime juice brings acidity and brightness. Honey or agave syrup adds a touch of sweetness. Adjust it to your taste. Finally, salt and pepper enhance all the flavors. If you want, sprinkle feta cheese on top. It adds a creamy, salty twist. This salad is a feast for the eyes and the palate. For the full recipe, check out Tropical Crisp Pineapple Cucumber Salad. - Step 1: Combine Main Ingredients In a large bowl, add 2 cups of diced fresh pineapple, 1 thinly sliced cucumber, 1 diced red bell pepper, and 1/4 thinly sliced red onion. If you want some heat, add 1 finely chopped jalapeño. This mix gives a colorful look and fresh taste. - Step 2: Make the Dressing In a small bowl, whisk together the juice of 2 limes and 2 tablespoons of honey or agave syrup. Mix until it’s smooth and well-blended. This dressing balances the sweet and tart flavors in your salad. - Step 3: Mix Dressing with Salad Pour the lime dressing over the salad ingredients. Gently toss everything together until all the pieces are coated. This step is key to ensuring each bite is flavorful. - Step 4: Add Seasoning and Garnish Add salt and pepper to taste, along with 1/4 cup of chopped fresh cilantro. Toss the salad lightly again. If you like, sprinkle 1/4 cup of crumbled feta cheese on top for a savory twist. - Importance of Refrigeration Refrigerating the salad helps the flavors mix well. The coolness also enhances the crispness of the ingredients. - Duration for Best Flavor Let the salad chill in the fridge for at least 30 minutes before serving. This wait makes every bite even more delicious. For the full recipe, check the detailed instructions above. Choosing Ripe Pineapple To pick a ripe pineapple, look for a sweet smell. The skin should be golden and firm. Press gently; it should yield a little. Avoid pineapples that feel too soft or have brown spots. A ripe pineapple adds great flavor to your salad. Vegan Alternatives to Honey If you want a vegan option, use agave syrup instead of honey. It has a similar sweetness and works well with lime juice. You can also try maple syrup for a unique taste. These substitutes keep your salad tasty and plant-based. How to Serve Pineapple Cucumber Salad Serve your salad in a large bowl or individual dishes. For presentation, consider adding a sprig of cilantro on top. A sprinkle of feta cheese can also enhance the look. Chill the salad before serving for a refreshing treat. Pairing with Other Dishes This salad pairs well with grilled chicken or fish. It also complements spicy tacos or rice bowls. You can serve it at barbecues or picnics as a side dish. The bright flavors balance rich meals nicely, making every bite enjoyable. For the complete recipe, check out the [Full Recipe]. {{image_2}} Other Fruits to Include You can mix in other fruits for a tasty twist. Try mango, kiwi, or strawberries. Each fruit adds its own flair and flavor. They keep the salad fresh and exciting. Experiment with what you like best! Alternative Dressings If you want a different taste, swap the dressing. A splash of coconut milk or a balsamic glaze works great. You can even use a simple olive oil with lemon juice. Each dressing gives a new vibe to the salad. Gluten-Free Options This salad is naturally gluten-free. All the ingredients are safe for those avoiding gluten. You can enjoy it without worry. Just ensure any added dressing is gluten-free too. Low-Calorie Modifications For a lighter dish, skip the honey or use a sugar-free sweetener. You can also cut back on the feta cheese. The salad will still taste great, and you save some calories. Enjoying healthy meals can be tasty! To keep your pineapple cucumber salad fresh, store it in an airtight container. This helps keep out air and moisture. You can place it in the fridge right after making it. The salad stays fresh for up to three days. After that, the veggies may lose their crunchy texture and flavor. Should you reheat pineapple cucumber salad? No, this salad is best served cold. Heating can change the texture and flavor. How to refresh leftovers? If you have leftovers, try adding a bit of fresh lime juice. This brightens the salad and brings back some zest. You can also toss in some fresh herbs, like cilantro, to enhance the taste. For a quick fix, just mix it well and enjoy! For the full recipe, check out the Tropical Crisp Pineapple Cucumber Salad. How do I make it more spicy? To add spice, include more jalapeño. You can also use red pepper flakes. Adjust the amount based on your taste. A little heat can really boost the flavor! Can I prepare this salad ahead of time? Yes, you can make it a few hours early. Just mix everything except the dressing. When you’re ready to serve, add the dressing and toss. This keeps the salad fresh and crunchy! What can I use instead of cilantro? If you don’t like cilantro, try parsley or basil. Both add great flavor. You can even skip herbs if you prefer a more simple taste. Is Pineapple Cucumber Salad healthy? Yes, this salad is very healthy! It has fresh fruits and veggies. Pineapple provides vitamins, while cucumber adds hydration. The honey adds a bit of sweetness, but it’s still light. Enjoy this fresh mix guilt-free! For the full recipe, check out the Tropical Crisp Pineapple Cucumber Salad. You learned how to make a tasty Pineapple Cucumber Salad. We covered fresh ingredients, easy steps, and tips for perfection. Remember to chill it for great flavor. Feel free to experiment with different fruits or dressings. This salad is not just healthy; it’s fun to make. Store leftovers properly, and enjoy them later. Keep these ideas in mind for a fresh, bright dish that fits any meal. Your family will love it, and you will too!

Looking for a refreshing and vibrant dish? My Pineapple Cucumber Salad is just what you need! It’s easy to make and packed with flavor. With ripe pineapple and crisp cucumbers, …

Read more

Categories Salads

Peach Berry Fruit Salad Refreshing and Healthy Delight

May 30, 2025 by Chef Owen
To make the Peach Berry Fruit Salad, you need fresh, tasty ingredients. Here’s what you’ll need: - Peaches - Berries (strawberries, blueberries, blackberries) - Additional flavorings (honey, lemon juice, mint) - Optional add-ins (other fruits or nuts) I always pick ripe peaches for the best flavor. Their sweetness pairs well with the tangy berries. Strawberries, blueberries, and blackberries add color and taste. You can mix in other fruits like bananas or apples if you like. Nuts give a nice crunch, too. For extra flavor, I use honey and lemon juice. These add a sweet and tangy touch. Fresh mint brings a burst of freshness. It’s like a little garden in each bite. With these simple ingredients, you can create a refreshing and healthy delight. Check out the Full Recipe to get started! Making Peach Berry Fruit Salad is simple and fun. Here’s how to do it in easy steps. Mixing the fruits Start by gathering all your fruits. In a large bowl, add: - 2 ripe peaches, diced - 1 cup strawberries, hulled and halved - 1 cup blueberries - 1 cup blackberries Gently mix the fruits with a spoon. Be careful not to mash them. Making the dressing In a small bowl, whisk together: - 1 tablespoon honey (or maple syrup for a vegan option) - 1 tablespoon fresh lemon juice - 1 tablespoon fresh mint, chopped - A pinch of sea salt This dressing adds great flavor and brings the fruits together. Combining the fruits and dressing Pour the dressing over the mixed fruits. Gently toss everything together. Make sure all the fruits get coated, but don’t squish them. Recommended resting time Let the salad sit at room temperature for about 10 minutes. This helps the flavors mix and taste even better. You can find the Full Recipe at the beginning of this article. Enjoy your fresh and tasty Peach Berry Fruit Salad! How to choose ripe peaches To pick ripe peaches, look for ones that feel slightly soft. They should have a sweet smell. The skin should be a vibrant color, often yellow or red. Avoid peaches with green spots; they are not ripe. Picking the freshest berries Fresh berries are firm and plump. Check for bright colors. Avoid any that look mushy or have mold. If you can, buy them in season for the best taste. Storing leftovers Store leftover fruit salad in an airtight container. Keep it in the fridge. Try to eat it within two days for the best taste. If the fruits start to brown, toss them out. Serving suggestions Serve the salad in a clear bowl for a colorful display. This lets everyone see the beautiful fruits. You can also use individual cups for a fun touch at parties. Garnishing tips Garnish with fresh mint leaves. This adds a pop of green and fresh flavor. You can also sprinkle some extra berries on top for color. Creative plating options Try layering the fruit salad in a glass. This makes for a stunning visual. You can also use cookie cutters to shape the fruit for a playful vibe. For a unique twist, serve it in halved peaches or coconuts. For the complete recipe, see the [Full Recipe]. {{image_2}} You can easily change the Peach Berry Fruit Salad by adding tropical fruits. Mango or pineapple can give it a sweet twist. Their juicy textures pair well with the berries and peaches. You might also try using fresh herbs. Basil or cilantro can add a unique flavor. These herbs will surprise your taste buds and make the salad more exciting. If you want to adjust the sweetness, consider different sweeteners. Agave syrup or stevia can be good substitutes. They can help you make the salad fit different diets. For vegan options, simply swap honey with maple syrup. This keeps the salad sweet without any animal products. If you need gluten-free variations, you can rest easy. All the ingredients in this salad are naturally gluten-free. You can enjoy it without worry. Looking for low-sugar adaptations? Cut back on sweeteners or skip them altogether. The natural sweetness from the fruits shines through, keeping it tasty and light. Explore these variations to make your Peach Berry Fruit Salad even more delightful. For the full recipe, check the recipe section above! To keep your Peach Berry Fruit Salad fresh, use airtight containers. Glass containers work well since they do not retain smells. Make sure to separate the dressing if possible. This helps keep the fruits crisp. Store the salad in the fridge for the best results. If you need longer storage, you can freeze the fruits. However, freezing may change the texture. I recommend freezing peaches and berries alone. This way, you can use them later in smoothies or other recipes. The Peach Berry Fruit Salad stays fresh for about 2-3 days in the fridge. After that, the fruits may get mushy. You will know it’s time to throw it out if you see brown spots or an off smell. Always trust your senses when checking for spoilage. Keep an eye on the berries especially. They spoil faster than peaches. If they start to look slimy or feel soft, it’s time to discard them. Enjoy your salad while it’s at its best! How to make Peach Berry Fruit Salad ahead of time? You can make this salad a few hours before serving. Just mix the fruits and dressing, then keep it in the fridge. The salad tastes great even after sitting. Just remember to add the mint right before serving for a fresh touch. Can I use frozen fruit for this recipe? Yes, you can use frozen fruit. Thaw the fruit first and drain any excess liquid. This helps keep the salad from getting soggy. However, fresh fruit gives the best taste and texture. What other fruits can be added to a fruit salad? You can add many fruits to your salad. Try bananas, grapes, or kiwi. Pineapple and mango also add a nice tropical twist. Get creative with your favorite fruits! What are the health benefits of berries and peaches? Berries are packed with vitamins and antioxidants. They may help your heart and brain. Peaches are low in calories and high in fiber. They keep you hydrated and support good digestion. Is fruit salad a healthy dessert option? Yes, fruit salad is a great dessert choice! It is low in calories and full of nutrients. It satisfies your sweet tooth without added sugars. Fresh fruit also provides energy and vitamins. How many calories are in Peach Berry Fruit Salad? The Peach Berry Fruit Salad has about 100 calories per serving. This depends on the exact amount of fruit and sweeteners used. It’s a light and healthy option for a snack or dessert. For the complete recipe, check the [Full Recipe]. We explored creating a delicious Peach Berry Fruit Salad. You learned to choose ripe fruits and mix them well. I shared tips on storing leftovers and how to make it ahead of time. You can even try different fruits and sweeteners. Fruit salad is not just tasty; it's also healthy. Feel free to get creative with your ingredients. Remember that freshness matters. Enjoy your fruit salad and share it with family or friends!

Looking for a tasty and healthy treat? You’ve come to the right place! My Peach Berry Fruit Salad combines ripe peaches and fresh berries into a refreshing dish. It’s perfect …

Read more

Categories Salads

Pan Seared Chimichurri Shrimp Flavorful Meal Guide

May 30, 2025 by Chef Owen
- 1 lb large shrimp, peeled and deveined - 1/4 cup fresh parsley, finely chopped - 1/4 cup fresh cilantro, finely chopped - 1/4 cup extra virgin olive oil - 3 tablespoons red wine vinegar (or lemon juice for non-vinegar alternative) - 2 garlic cloves, minced - 1 teaspoon red pepper flakes - Salt and pepper to taste - 1 tablespoon lemon juice - Optional: Arugula for serving - Suggested pairings: rice, salad When making Pan Seared Chimichurri Shrimp, the right ingredients make all the difference. Start with fresh, large shrimp. They provide the best texture and flavor. Next, gather your herbs. Fresh parsley and cilantro create a bright chimichurri sauce. The olive oil adds richness and helps blend the flavors. You can add red wine vinegar for tanginess. If you prefer a citrus kick, use lemon juice instead. Minced garlic gives the sauce depth, while red pepper flakes add a gentle heat. Salt and pepper enhance all the flavors in the dish. For serving, arugula makes a great bed for the shrimp. It adds a peppery taste and nice color. You can also pair the shrimp with rice or a fresh salad. This meal is not just tasty but also visually appealing. For the full recipe, check out the linked instructions above. - Combine 1/4 cup fresh parsley, finely chopped - Add 1/4 cup fresh cilantro, finely chopped - Pour in 1/4 cup extra virgin olive oil - Mix in 3 tablespoons red wine vinegar or lemon juice - Stir in 2 minced garlic cloves - Add 1 teaspoon red pepper flakes, salt, and pepper to taste - Mix well and set aside - Drizzle 1 tablespoon of lemon juice over the shrimp - Season with salt and pepper, tossing to coat - Heat olive oil in a skillet until hot - Sear shrimp in a single layer for 2-3 minutes - Flip shrimp and cook for an additional 2-3 minutes This method creates juicy shrimp covered in bright, fresh flavors. Enjoy the full recipe for all the fun details! To make your chimichurri shine, adjust the flavors. Add more herbs like oregano or spices like cumin. This mix can transform your sauce into a new favorite. Let your chimichurri sit for a while. This resting time boosts the flavor. It helps all the ingredients blend well. When you cook shrimp, avoid overcrowding the pan. Adding too many shrimp can lower the heat. This makes them steam instead of sear. Cook them in batches if needed. Also, ensure your shrimp are the same size. Uniform shrimp cook evenly, giving you that perfect texture. Serve your chimichurri shrimp right away. This keeps them juicy and full of flavor. For garnish, consider fresh herbs like parsley or cilantro. A slice of lemon can also add a bright touch. Plating on a bed of arugula adds color and taste. For the full recipe, check out the details above. {{image_2}} You can change the flavor of your chimichurri shrimp with different herbs. Try adding basil or mint for a fresh twist. These herbs give your dish a unique taste. You can also experiment with other fresh herbs like dill or chives. Each herb brings its own character to the dish, making it fun to explore new flavors. Want more spice? Add more red pepper flakes or use jalapeños for a kick. This change will give your shrimp a hotter flavor that some people love. If you prefer a milder dish, simply reduce the red pepper flakes. Adjusting the heat level lets you tailor the meal to your taste buds. While pan-searing is a great way to cook shrimp, you can try other methods too. Grilling shrimp adds a nice smoky flavor that many enjoy. Just make sure to keep an eye on them so they don’t overcook. Baking shrimp offers a healthier option since it uses less oil. This method keeps the shrimp juicy while cooking evenly. Store leftover chimichurri shrimp in an airtight container. This keeps the shrimp fresh and tasty. It is best to eat it within 2-3 days. After that, the flavor may fade. You can freeze leftover shrimp and chimichurri in separate containers. This helps keep their taste intact. Thaw the shrimp in the refrigerator overnight before you reheat them. This slow thaw helps maintain their texture. Reheat shrimp gently in a skillet or microwave. This keeps them juicy and prevents them from turning rubbery. Make sure to avoid overcooking during reheating. Doing so helps keep the shrimp tender and full of flavor. You can find the full recipe above to ensure you enjoy every step! Yes, just ensure they are thawed before cooking. This step is key. Frozen shrimp can work well if you plan ahead. Leave them in the fridge overnight to thaw. If you’re in a hurry, you can run them under cold water. Just don’t cook them while still frozen; they won’t cook evenly. Shrimp should be pink and opaque when fully cooked. This color change is your best sign. When shrimp curl up and turn bright pink, they are almost ready. Overcooked shrimp turn rubbery, so time is important. Cook them for 2-3 minutes on each side in the pan. If you doubt, cut one open; it should be white inside. Yes, it can be prepared a day in advance for flavor enhancement. Making it ahead lets the flavors blend well. Store the sauce in an airtight container in the fridge. Just give it a good stir before using. This way, you save time and get more flavor. The sauce keeps well for about a week. This article covers how to make delicious chimichurri shrimp. We discussed essential and optional ingredients, step-by-step cooking instructions, and tips for perfecting your dish. I shared serving suggestions and tasty variations to keep meals exciting. Remember, fresh herbs make a big difference. Adjust the heat level to match your taste. With quick storage tips and answers to your questions, you are now ready to try this recipe. Enjoy the flavors and share this meal with friends or family for a great dining experience.

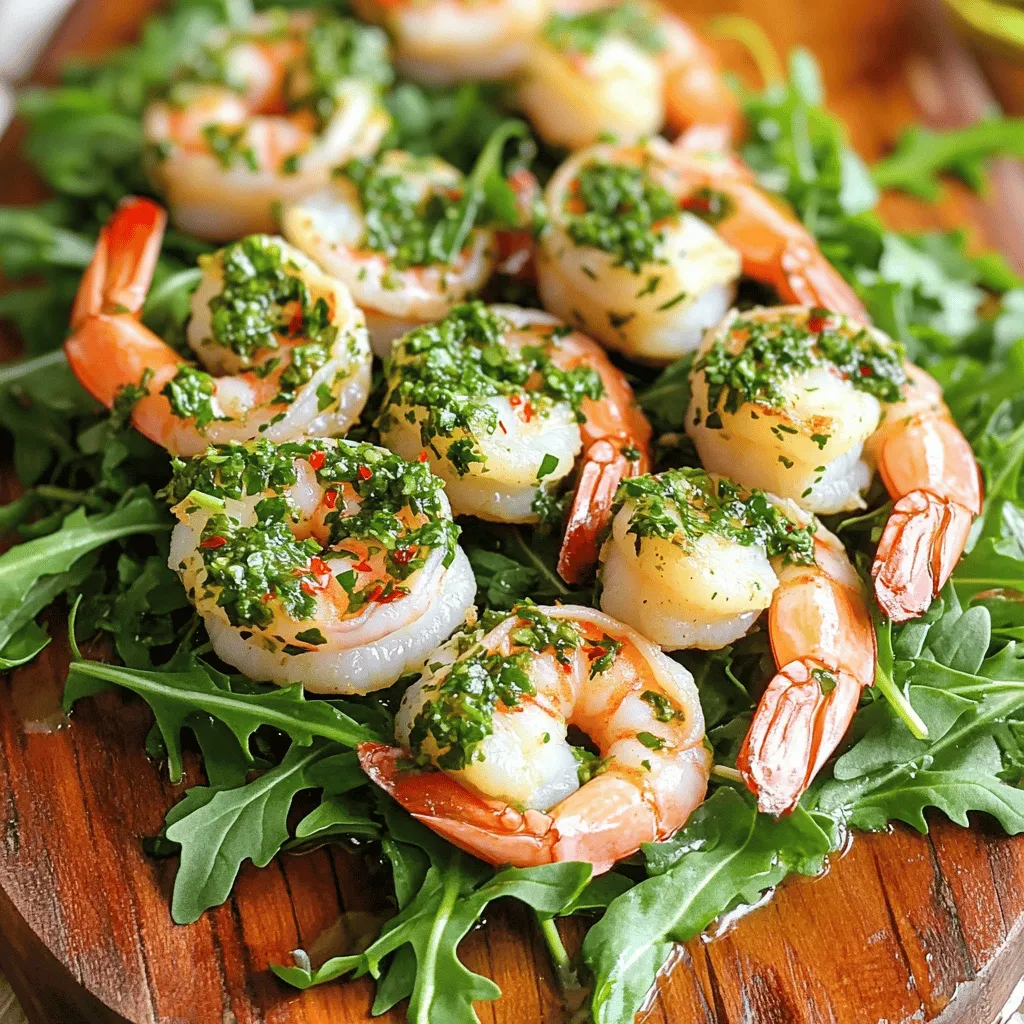
Are you ready to spice up your dinner routine? This Pan Seared Chimichurri Shrimp meal guide brings bold flavors and easy steps right to your kitchen. With a few key …

Read more

Categories Appetizers

Crispy Rice with Spicy Salmon Delightful Flavor Boost

May 30, 2025 by Chef Owen
- Sushi Rice: 2 cups - Fresh Salmon: 1 lb, skinless and diced - Sauces: Soy sauce and sriracha - Seasonings: Sesame oil, rice vinegar, sugar, and sea salt - Garnishes: Avocado, green onions, nori sheets, and toasted sesame seeds To make crispy rice with spicy salmon, gather your ingredients first. Use sushi rice for the best texture. You want the rice to be sticky. Fresh salmon adds a rich taste to the dish. Diced salmon mixes well with sauces. Soy sauce gives umami, while sriracha adds heat. For seasonings, sesame oil brings a nutty flavor. Rice vinegar adds a bit of tang. Sugar balances the flavors, and sea salt enhances them. Finally, garnishes are key! Slices of avocado add creaminess. Chopped green onions give a fresh crunch. Nori sheets add a fun touch, and toasted sesame seeds bring a nutty bite. For the full recipe, follow the steps closely to create this delightful dish! Rinsing the Rice Start by washing your sushi rice. Rinse it under cold water. Do this until the water runs clear. This helps remove excess starch. Drain the rice well to prepare for cooking. Cooking the Rice In a medium saucepan, combine the rinsed rice and 2 ½ cups of water. Bring the mixture to a boil. Then, reduce the heat to low and cover it. Let it simmer for 20 minutes until the water is absorbed. After that, remove it from heat and let it sit covered for another 10 minutes. This step makes the rice fluffy. Seasoning the Rice In a small bowl, mix rice vinegar and sugar. Stir until the sugar dissolves. Gently fold this mixture into the cooked rice. Let the rice cool completely before using it for patties. Marinating the Salmon In a bowl, combine your diced salmon with soy sauce, sriracha, sesame oil, and a pinch of sea salt. Mix it well to coat the salmon. Allow it to marinate for 10-15 minutes. This allows the flavors to blend nicely. Forming Rice Patties Once the rice is cool, take a handful and shape it into a patty. Aim for about ½ inch thick. Make sure it is compact, so it holds together well. Cooking the Patties Heat a non-stick skillet over medium heat. Lightly oil the skillet to prevent sticking. Place the rice patties on the skillet and cook for 4-5 minutes on each side. They should turn golden and crispy. Repeat this for all the rice. Arranging the Components Start by placing the crispy rice patties on a serving plate. Top each patty with a spoonful of your marinated salmon. This creates a beautiful and tasty layer. Final Touches and Serving Add slices of avocado next to the patties for creaminess. Sprinkle chopped green onions and toasted sesame seeds on top. Finish with nori strips for a lovely garnish. Your Crispy Rice with Spicy Salmon is now ready to enjoy! For the full recipe, check the earlier section. To get your rice crispy, the patting technique is key. Form small rice patties. Press them gently but firmly. This helps them hold their shape. A compact patty cooks more evenly. Cooking temperature matters too. Use medium heat for best results. If the heat is too low, the rice won’t crisp up. If it’s too high, it will burn. Keep an eye on them while they cook. For marinating salmon, use fresh ingredients. Combine soy sauce, sriracha, sesame oil, and salt. This mix adds a great flavor boost. Allow the salmon to marinate for about 10 to 15 minutes. This time is perfect for soaking up the flavors. Don’t marinate too long. The fish can become too salty or mushy. Trust me, this timing makes a big difference in taste. Pair your crispy rice with fresh sides. I love serving it with cucumber salad or pickled veggies. They add a nice crunch and freshness. For drinks, try iced green tea or light beer. These drinks enhance the meal without overpowering it. Presentation is fun too. Stack the crispy rice and top with salmon. Add avocado slices and sprinkle with green onions. Finish with nori strips and sesame seeds for a beautiful look. Check out the Full Recipe for more details on perfecting your dish. {{image_2}} You can switch the salmon for other proteins. Tuna is a great choice. It has a similar texture and pairs well with the sauces. Just use fresh, sushi-grade tuna and follow the same marinating steps. For a vegetarian option, try tofu. Firm tofu works best. Cube it, marinate, and pan-fry until golden. You can also explore other seafood options. Shrimp or scallops can add a fun twist. Just make sure to adjust the cooking time since they cook faster than salmon. You can customize the sauce levels to fit your taste. If you love heat, add more sriracha. If you prefer milder flavors, reduce the sriracha. You can also mix in some lime juice for extra zing. Adding toppings can enhance the dish. Try pickled ginger for a tangy bite. You can also sprinkle on some crushed peanuts for crunch. Fresh herbs like cilantro or mint can add a refreshing touch. For gluten-free options, use tamari instead of soy sauce. It gives a similar flavor without the gluten. Always check labels to ensure other ingredients are gluten-free. If you want vegetarian or vegan alternatives, opt for plant-based proteins. Marinated and grilled eggplant can be a hearty option. You can also use more vegetables. Roasted bell peppers or zucchini can make a colorful and tasty topping. To find the full recipe, check the detailed steps above. Refrigeration Guidelines You can store leftover crispy rice with spicy salmon in the fridge. Make sure to keep it in an airtight container. This helps keep moisture and flavor in. Use the dish within two days for the best taste. Best Containers for Storage Glass containers work well for storing leftovers. They do not hold odors like plastic. If you use plastic, choose BPA-free options. Label the container with the date to keep track of freshness. How to Reheat Crispy Rice To reheat crispy rice, use a skillet. Add a splash of water to help steam it. Heat the rice over medium-low heat for about five minutes. This helps revive the crispiness. Maintaining Texture and Flavor Avoid the microwave if you can. It can make the rice soggy. If you must use it, cover the rice with a damp paper towel. This keeps some moisture while reheating. For this recipe, sushi rice works best. It is sticky and holds shape well. You can also use long grain rice, but it won’t be as sticky. Sushi rice gives the dish a nice texture. This helps to create crispy rice patties that are golden and delicious. Yes, you can make parts of this dish ahead of time. Cook the rice and let it cool. You can store the rice in the fridge for up to two days. Marinate the salmon a few hours before serving. Just keep it in the fridge until you are ready to cook. Crisp the rice patties right before serving for the best texture. You can find dishes like crispy rice with spicy salmon in many sushi restaurants. Look for spots that focus on modern Japanese cuisine. These places often have creative takes on traditional dishes. Some Asian fusion restaurants might also serve this dish. Check local restaurant reviews to find the best options near you. To reduce the spice level, cut back on the sriracha sauce. You can also use a milder sauce, like sweet chili sauce. Another option is to skip the sriracha altogether and add more soy sauce. This will keep the flavor while making the dish less hot. Adding extra avocado can also help to cool it down. This blog post covered how to make crispy rice with spicy salmon. We went through ingredients, step-by-step instructions, and handy tips. I shared ways to adjust flavors and proteins too. Finally, storing and reheating your leftovers were discussed. Cooking can be fun and rewarding. Enjoy creating this dish and making it your own! Share your results and tips with others to inspire them too. Your culinary journey starts here.

Welcome to a flavor-packed journey with my Crispy Rice with Spicy Salmon! This dish offers crunchy rice, tender salmon, and a kick of heat. If you love sushi or crave …

Read more

Categories Appetizers

Easy Bang Bang Salmon Bites Simple and Tasty Meal

May 30, 2025 by Chef Owen
- 1 lb salmon fillet, skinless and boneless - 1/4 cup cornstarch - 1/2 teaspoon salt - 1/2 teaspoon black pepper - 1/4 cup mayonnaise - 2 tablespoons sriracha - 1 tablespoon honey - 1 teaspoon lime juice - Chopped green onions - Sesame seeds The main ingredients for Easy Bang Bang Salmon Bites include fresh salmon fillet, cornstarch, salt, and black pepper. The salmon is the star of the dish, so choose quality fillets. The bang bang sauce adds a delightful kick. It uses mayonnaise, sriracha, honey, and lime juice. This blend gives a creamy, spicy, and tangy flavor. You can adjust the sriracha for more or less heat based on your taste. For a beautiful finish, consider optional garnishes like chopped green onions and sesame seeds. They add color and texture, making your meal pop. You can find the Full Recipe for precise measurements and cooking steps. Enjoy making this simple and tasty meal! - Preheat oven to 400°F (200°C). - Cut salmon into 1-inch cubes. Start by heating your oven. This step is key for crispy salmon. Next, take your skinless salmon fillet. Use a sharp knife to cut it into bite-sized cubes. Aim for pieces that are about 1-inch wide. This size ensures even cooking. - Mix cornstarch and seasonings. - Toss salmon pieces in the mixture. In a mixing bowl, combine the cornstarch with salt, black pepper, garlic powder, and paprika. Stir until well mixed. This mix adds a great crunch to the salmon. Now, gently toss the salmon cubes in the cornstarch mix. Make sure each piece is coated well. This step is vital for that crispy texture. - Arrange salmon on a lined baking sheet. - Bake for 12-15 minutes. Lay the coated salmon bites on a baking sheet. Use parchment paper to make cleanup easy. Make sure the pieces are not touching; this helps them cook evenly. Now, slide the baking sheet into the oven. Bake for 12-15 minutes, or until the salmon is cooked through and golden. Keep an eye on them! You want a crispy outside and tender inside. Enjoy your delicious Bang Bang Salmon Bites! You can find the Full Recipe for more details. To get the best crispy salmon bites, follow these tips: - Use parchment paper for easy cleanup. It helps prevent sticking. - Do not overcrowd the baking sheet. This keeps air flowing around the salmon. To make the sauce just right: - Adjust sriracha to your spice preference. Start small if you're unsure! - Whisk thoroughly for a creamy texture. This helps blend the flavors well. Serve these bites in fun ways: - Serve with a fresh salad for crunch and color. - Pair with rice for a complete meal. The rice soaks up the sauce nicely. For the full recipe, check the section above. Enjoy your cooking! {{image_2}} You can change up the main ingredient for fun. - Substitute salmon with shrimp: Shrimp cooks fast and tastes great with bang bang sauce. Just follow the same steps as for salmon. - Use tofu for a vegetarian version: Tofu absorbs flavors well. Cut it into cubes and coat it just like the salmon. Want to make this dish a bit lighter? Here are some ideas. - Swap mayo with Greek yogurt: This switch cuts calories and adds protein. Greek yogurt gives a creamy texture, too. - Reduce honey for lower sugar content: Cutting back on honey helps lower the sugar. You’ll still get tasty flavors without too much sweetness. Boost the taste with some easy tweaks. - Add lime zest to the sauce: A little lime zest brightens the dish and adds a fresh kick. Just grate the peel before mixing the sauce. - Incorporate fresh herbs like cilantro: Fresh herbs add color and flavor. Chopped cilantro works well and makes the dish pop. Store any leftovers in an airtight container. This helps keep them fresh. The salmon bites taste best when consumed within 2-3 days. You can freeze the salmon bites before baking. This allows for easy meals later. Just thaw and bake as needed for convenience. It saves time when you're busy. Use the oven to reheat salmon bites. This way, they stay crispy. Avoid microwaving them for better texture. You want to keep that crunch! Yes, ensure it is fully thawed before preparation. Frozen salmon works, but thaw it overnight in the fridge. This keeps it safe and helps with cooking. The salmon should be opaque and flaky. When you poke it with a fork, it should break apart easily. If it looks bright pink, it needs more time. They pair well with rice, veggies, or a side salad. Rice soaks up the sauce nicely. Fresh veggies add crunch, and a side salad keeps it light. Yes, it can be stored in the fridge for a few days. Just mix the ingredients and put them in a jar. This saves time and adds flavor to your meal. For the complete recipe, check out the Full Recipe. This blog post covered a tasty recipe for Bang Bang Salmon Bites. We reviewed the key ingredients, like salmon, cornstarch, and a homemade bang bang sauce. I shared step-by-step instructions for preparing, coating, and baking the salmon. Tips for achieving crispy bites and variations for extra flavor were included as well. In closing, these salmon bites are quick, easy, and delicious. Try them for your next meal!

Looking for a quick and tasty meal? Try these Easy Bang Bang Salmon Bites! They’re simple to make and bursting with flavor. In this post, I’ll guide you through the …

Read more

Categories Appetizers

How to Make Pistachio Compound Butter Tasty Delight

May 30, 2025 by Chef Owen
- 1 cup unsalted butter, softened - 1/2 cup shelled pistachios, finely chopped - 2 tablespoons honey - 1 teaspoon vanilla extract - Zest of 1 lemon - Pinch of salt - Herbs for additional flavor (e.g., thyme or rosemary) - Other nut alternatives (e.g., almonds or walnuts) To make pistachio compound butter, you need a few key ingredients. Start with one cup of softened unsalted butter. Softening the butter helps it mix well with other ingredients. Next, grab half a cup of shelled pistachios. Chop them finely so they blend nicely into the butter. You’ll also need two tablespoons of honey. This adds a touch of sweetness that balances the nuts. One teaspoon of vanilla extract brings warmth and depth to the flavor. The zest of one lemon adds brightness and freshness. Finally, a pinch of salt enhances all the flavors. If you want to get creative, consider adding herbs like thyme or rosemary for extra flavor. You can also swap in other nuts, like almonds or walnuts, for a different twist on this tasty delight. For the full recipe, you can refer to the steps outlined in the previous section. - Combine 1 cup of softened butter with 2 tablespoons of honey. - Add 1 teaspoon of vanilla extract, the zest of 1 lemon, and a pinch of salt. - Use a hand mixer or spatula to blend until smooth and creamy. - Fold in 1/2 cup of finely chopped pistachios evenly into the butter mixture. - Shape the mixture into a log with your hands. - Roll the mixture in parchment paper to keep it fresh. - Refrigerate for 1 to 2 hours until firm. This step-by-step guide makes it easy to create pistachio compound butter. For the full recipe, check the complete instructions above. Enjoy this delightful spread on toast or with grilled meats! When making pistachio compound butter, mixing is key. You can use a hand mixer or a spatula. If you want a fluffy texture, the hand mixer is great. It blends the butter well. A spatula works too, but it takes more time. Make sure your butter is at room temperature. Cold butter will not mix well. It’s hard to blend, and you may end up with lumps. To present your pistachio compound butter beautifully, use a rustic cutting board. Place the butter in the center. Add a butter knife next to it. Arrange some fresh bread or crackers around it. You can even garnish with whole pistachios and lemon slices. This makes it look inviting and fresh. Pistachio compound butter pairs well with grilled meats too. It adds flavor to chicken or fish. You can also enjoy it on toast or with vegetables. To store your compound butter, wrap it well. Use parchment paper or plastic wrap. This keeps it fresh and prevents freezer burn. You can also use an airtight container. A small glass jar works great for this. Store it in the fridge for up to two weeks. If you want to keep it longer, you can freeze it. Just remember to slice it first. This way, you can take out only what you need. {{image_2}} You can change the flavor of your pistachio compound butter by adding other nuts. Try using almonds or walnuts for a fun twist. Each nut brings its own taste and texture. You can also spice things up by adding a dash of cinnamon or nutmeg. These spices can add warmth and depth to your butter, making it even more delightful. Want to go savory? Add minced garlic or fresh herbs like thyme or rosemary. This makes a great spread for savory dishes. If you're in the mood for sweet, switch out the honey for maple syrup. This gives your butter a rich, sweet flavor that works well on pancakes or waffles. If you need a dairy-free or vegan option, use coconut oil instead of butter. It creates a creamy texture and adds a hint of coconut flavor. For those who are gluten-free, enjoy your compound butter on gluten-free bread or crackers. You can still savor the deliciousness without any worries about gluten! You can use pistachio compound butter in many recipes. It adds a rich flavor to your meals. Try melting it over steamed veggies or grilled meats. It brings a nice nutty note to your dishes. Pistachio compound butter works wonders on pancakes and waffles. Just spread it on warm toast for a tasty treat. It also pairs well with cheese boards. Serve it alongside cheese, fruits, and crackers for a delightful snack. This compound butter shines at holiday meals and dinner parties. It makes any gathering feel fancy. You can even gift it in cute mason jars. Friends and family will love this homemade treat. For complete details, check out the Full Recipe. Pistachio compound butter can last up to two weeks when stored properly. Keep it in an airtight container in the fridge. If you want to extend its life, consider freezing it. Yes, you can freeze pistachio compound butter. Wrap it tightly in plastic wrap or parchment paper, then place it in a freezer bag. It can last for up to three months in the freezer. When you're ready to use it, let it thaw in the fridge overnight. You can use other nuts like almonds, walnuts, or pecans. Each nut brings a unique flavor. Just chop them finely, like you would with pistachios, and mix them in the same way for a delicious twist. To soften butter quickly, cut it into small cubes and let it sit at room temperature for about 10-15 minutes. You can also place it in a microwave for a few seconds, but watch it closely to avoid melting. Softened butter blends better, making your pistachio compound butter creamy and smooth. For a full recipe, check out the details above. In this post, we covered how to make pistachio compound butter. We discussed essential ingredients like butter, pistachios, and honey. You learned step-by-step instructions for mixing, shaping, and chilling the butter. We also shared tips for storage and serving. Pistachio compound butter is a versatile addition to your meals. Use it on bread, grilled meats, or even pancakes. Get creative with flavors by adding herbs or spices. Enjoy exploring different variations for every occasion. Now, make your own and taste the difference!

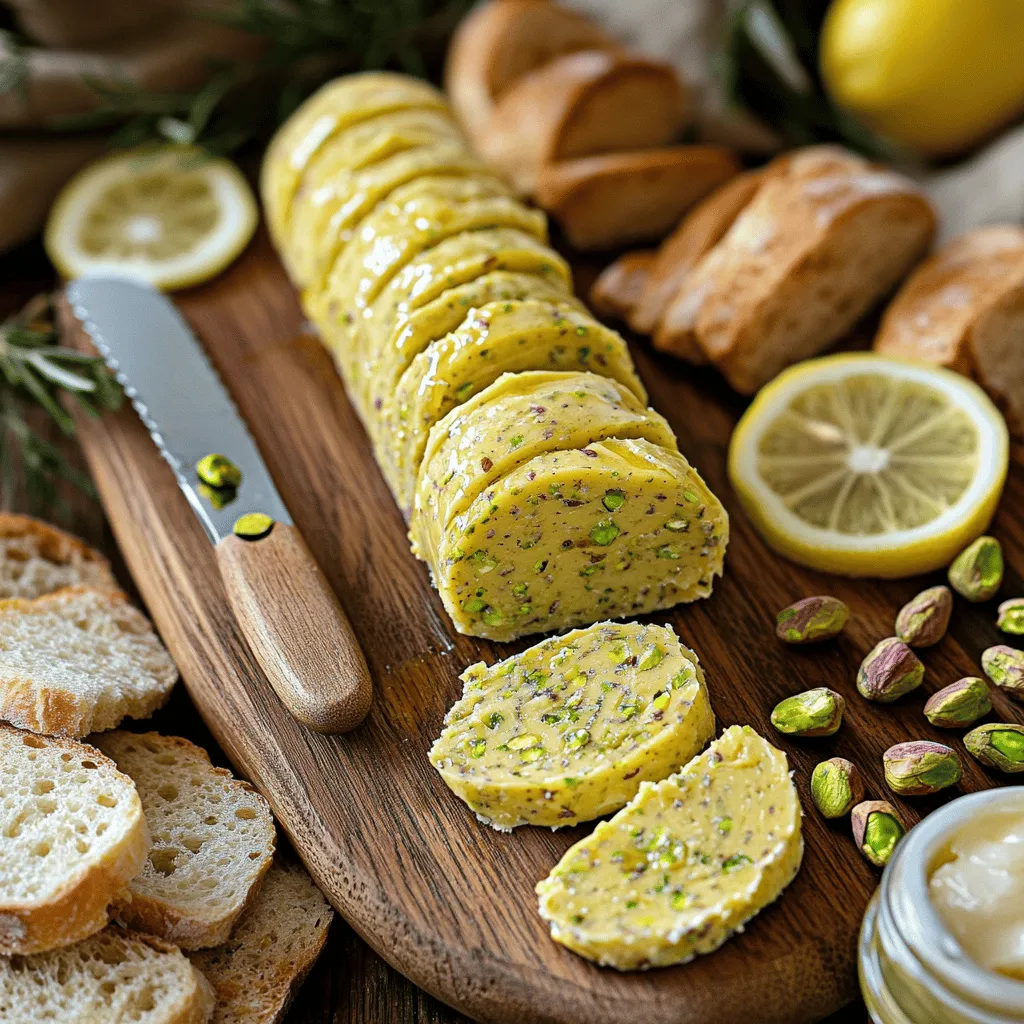
Are you ready to elevate your culinary game? In this blog post, I’ll show you how to make pistachio compound butter that dazzles the taste buds. With just a handful …

Read more

Categories Appetizers
Older posts
Newer posts
← Previous Page1 … Page110 Page111 Page112 … Page125 Next →

THE RECIPE HATCH

Where tasty ideas take flight! 🚀🐣 Fresh, easy recipes hatched daily to make cooking simple and flavorful.

PAGES

Home About Contact Privacy Policy Terms & Conditions Cookie Policy GDPR Policy Copyright Policy Disclaimer

CATEGORIES

Appetizers Desserts Salads Breakfast Dinner

Contact

  • Pinterest
  • Mail
Copyright © 2026 The Recipe Hatch. All rights reserved.