10-Minute Lemon Ricotta Pasta with Spinach Delight
![- 8 oz spaghetti or any pasta of your choice - 1 cup ricotta cheese - 1 cup fresh spinach, roughly chopped - 1 medium lemon, zested and juiced These main ingredients make the dish shine. The spaghetti provides a nice base, while the ricotta adds creaminess. Spinach gives it a fresh touch, and lemon brings bright flavor. - 2 tablespoons olive oil - 2 cloves garlic, minced - Salt and pepper to taste The pantry staples are simple but key. Olive oil adds richness. Garlic gives an aromatic kick. Salt and pepper help balance all the flavors. - Fresh basil, for garnish - Grated Parmesan cheese, for serving (optional) Optional ingredients can enhance your meal. Fresh basil adds color and flavor. Parmesan cheese gives a salty finish. You can use these as you like. For the full recipe, check out [Full Recipe]. This dish comes together quickly, making it perfect for busy nights. Boil a large pot of salted water. Add 8 oz of spaghetti or your favorite pasta. Cook it until al dente, following the package guide. Remember to save 1/2 cup of the pasta water before you drain it. This water helps make the sauce creamy. In a large skillet, heat 2 tablespoons of olive oil over medium heat. Add 2 cloves of minced garlic and cook it for about 1 minute. You want it to smell great without burning. Next, toss in 1 cup of roughly chopped spinach. Cook it until it wilts, which should take about 2-3 minutes. Season it with a pinch of salt and pepper for extra flavor. Lower the heat now. Stir in 1 cup of ricotta cheese, the juice and zest from 1 medium lemon. Mix everything well. Add some of the reserved pasta water to make it creamy. You can add more water if needed. Now, add the drained pasta to the skillet. Gently toss everything together. Make sure the pasta is well-coated in that tasty ricotta-spinach mixture. Taste it and adjust the seasoning with more salt, pepper, or lemon juice if you like. For the full recipe, check the detailed instructions above. To make the best 10-minute lemon ricotta pasta, start by choosing the right pasta. I love using spaghetti, but any pasta works well. The key is to cook it al dente. This gives the dish a nice bite. Next, for a creamy sauce, make sure to reserve some pasta water. This starchy water helps to bind the sauce and pasta. When you mix in the ricotta and lemon, add a bit of this water until you reach that perfect creamy texture. Want to amp up the lemon flavor? Add more zest or a splash of lemon juice. This brightens the dish and makes it pop! Don't be shy with spices either. A pinch of red pepper flakes can add a nice kick. Herbs can elevate your pasta too. Fresh basil is a great choice. You might also try parsley or thyme for different tastes. Just sprinkle them in before serving. Garnishing your dish makes it look fancy. I love adding fresh basil leaves on top. They add color and a nice aroma. If you want, sprinkle some grated Parmesan cheese before serving. It adds richness and a salty bite. Serve in a nice bowl, and your pasta will look as good as it tastes! For more details, check out the Full Recipe. {{image_2}} You can switch out ricotta cheese for cottage cheese or cream cheese. These options offer a different taste and texture. If you want a vegan choice, try silken tofu blended until smooth. For greens, spinach is great, but you can also use kale or arugula. These greens add their own flavor and texture. To make this dish heartier, add grilled chicken or shrimp. Both bring a nice protein boost. If you prefer plant-based protein, try chickpeas or lentils. They mix well with the creamy sauce and keep it filling. You can change the flavor profile by using different citrus. Try lime or orange for a twist. Fresh herbs like parsley or thyme can also enhance the dish. For some heat, add red pepper flakes. It adds a nice kick to the creamy pasta. To keep your pasta fresh, cool it first. Place it in an airtight container. This helps keep the taste and texture. You can store it in the fridge for up to three days. Remember to label it with the date. This way, you won't forget it! When reheating, avoid the microwave if possible. It can dry out your pasta. Instead, use a skillet on low heat. Add a splash of olive oil or a bit of water to help with moisture. Stir it often to warm it evenly. This keeps the pasta creamy and tasty. You can freeze this pasta for future meals. First, let it cool completely. Then, place it in a freezer-safe container. Make sure to leave some space for expansion. It can last up to three months in the freezer. When you're ready to eat, thaw it overnight in the fridge. Reheat it in a skillet with a little olive oil or water for best results. Yes, you can make this dish vegan! To replace the ricotta cheese, use cashew cheese or tofu. Both options give a creamy texture. For the Parmesan, try nutritional yeast. It adds a cheesy flavor without dairy. You can also use a vegan butter or olive oil to sauté the garlic. Lastly, ensure your pasta is egg-free to keep it vegan-friendly. This pasta lasts about 3 to 4 days in the fridge. Store it in an airtight container to keep it fresh. When you want to eat it, check for any signs of spoilage. If it smells off or looks different, it’s best to toss it. Yes, you can use whole wheat or gluten-free pasta! Just cook them according to the package instructions. Whole wheat will add more fiber and a nutty taste. Gluten-free pasta can change the texture slightly, so watch the cooking time to avoid mushiness. Adjust the cooking time as needed for the best results. For the full recipe, check the recipe section above. This blog post covered a delicious pasta dish featuring simple ingredients. We explored the main items like spaghetti, ricotta cheese, and spinach. I shared cooking steps and handy tips to make every bite creamy and tasty. You can also tweak the recipe to fit your taste. Remember, leftovers can be stored well, making it easy to enjoy later. Try new flavors and enjoy your cooking adventure. Cooking should be fun and tasty!](https://therecipehatch.com/wp-content/uploads/2025/06/c4a07444-1665-4989-b093-b017aab77a34.webp)
If you’re craving a quick, fresh dish packed with flavor, you’re in the right place! My 10-Minute Lemon Ricotta Pasta with Spinach Delight is perfect for busy days. With just …
If you’re craving a quick, fresh dish packed with flavor, you’re in the right place! My 10-Minute Lemon Ricotta Pasta with Spinach Delight is perfect for busy days. With just …
![- 1 lb ground chicken (or turkey) - 4 cups coleslaw mix (cabbage and carrots) - 2 green onions, chopped To start your Easy Egg Roll in a Bowl, gather these main ingredients. Ground chicken or turkey gives it a nice protein base. The coleslaw mix adds crunch and flavor. Chopped green onions bring a fresh taste to the dish. - 2 cloves garlic, minced - 1 tablespoon fresh ginger, grated - 3 tablespoons soy sauce (low sodium if preferred) The flavor comes alive with these seasoning ingredients. Minced garlic and grated ginger create a wonderful aroma. Soy sauce adds umami and depth to the overall taste. You can pick low-sodium soy sauce for a healthier option. - 1 teaspoon rice vinegar - 1/2 teaspoon crushed red pepper flakes (optional) - Sesame seeds for garnish (optional) Garnishes can elevate your dish. A dash of rice vinegar adds a tangy kick. If you like heat, sprinkle some crushed red pepper flakes. For a nice touch, top with sesame seeds before serving. For the full recipe, check the section above. Enjoy creating this flavorful weeknight meal! First, heat sesame oil in a large skillet over medium heat. It only takes a minute or two to warm up. Then, add one pound of ground chicken or turkey. Use a spatula to break the meat apart. Cook for about five to seven minutes. You want it browned and fully cooked. This step gives your dish a hearty base. Next, add two cloves of minced garlic and one tablespoon of grated ginger. Stir these in and cook for one to two minutes. You will smell a lovely aroma. This step adds depth and flavor to your dish. Now, stir in four cups of coleslaw mix. Continue to stir for about three to four minutes until it starts to wilt. This mix brings color and crunch. After that, pour in three tablespoons of soy sauce and one teaspoon of rice vinegar. If you like some heat, add half a teaspoon of crushed red pepper flakes. Stir well to combine. Let it cook for another two to three minutes. This is when all the flavors come together. You can find the full recipe to ensure you don’t miss any steps. To make your egg roll in a bowl truly shine, use fresh ingredients. Fresh veggies and herbs bring out the best taste. You can also adjust the soy sauce to fit your liking. If you love a stronger flavor, feel free to add more! Cooking the coleslaw mix until just wilted is key. This keeps veggies crunchy and vibrant. Overcooking can make the dish mushy and sad. Keep an eye on them while cooking. You want that perfect bite! For a beautiful finish, serve your dish with sesame seeds and extra green onions. This adds color and crunch. Drizzle a bit of extra soy sauce before serving for an added burst of flavor. A nice presentation makes every meal feel special! For the complete recipe, check out the [Full Recipe]. {{image_2}} You can easily change the egg roll in a bowl to fit your taste. Here are some fun ideas. You can swap the ground chicken for different meats. Ground beef or pork work well. They add a rich flavor. For a vegetarian option, use tofu. Just press it to remove water and crumble it in the pan. Adding more vegetables can make the dish even better. Bell peppers add a sweet crunch. Snap peas provide a nice snap. Mushrooms bring a deep, earthy flavor. You can mix and match to find your favorite combo. Want to make it sweeter? Add hoisin sauce. It pairs well with the salty soy sauce. You can also try different spices. Five-spice powder adds warmth and depth. Experiment with flavors to make the dish your own. For the full recipe, check out the detailed instructions in the previous section. To keep your egg roll in a bowl fresh, refrigerate it in an airtight container. This way, it will stay tasty. It is best to eat the leftovers within 3-4 days. After that, the flavors may fade and the texture may change. For quick reheating, you can use the microwave. Just warm it until hot. If you want the best texture, reheat it on the stove. This method keeps the veggies crisp and the dish flavorful. You can freeze the egg roll in a bowl if you want to save it for later. Just place it in a freezer-safe container. To enjoy it again, thaw it in the refrigerator overnight before reheating. This way, your meal stays delicious even after freezing. For the full recipe, check out the earlier sections! Yes, ground turkey, beef, or even plant-based proteins work well. Each choice adds a unique taste. For a lighter option, ground turkey is great. If you want something richer, ground beef does the trick. Plant-based proteins can fit right in. Just ensure to cook them until done. Use gluten-free soy sauce alternatives to make it gluten-free. Many brands offer soy sauce made from tamari or coconut aminos. These options give you the same umami flavor without gluten. Check the label to be sure it's safe for your needs. Increase the amount of crushed red pepper flakes or add sliced jalapeños. If you love heat, use fresh jalapeños for a punch. You can also add sriracha or chili paste for extra flavor. Just remember to adjust to your spice level. Serve with steamed rice or as a standalone dish for a lighter meal. If you want a filling option, white or brown rice works best. You can also enjoy it on its own for a quick, healthy dinner. For a crunchy side, try some crispy wontons. For the full recipe, check the main section above. This article covers how to make a delicious Egg Roll in a Bowl. We discussed the main ingredients, step-by-step cooking instructions, and helpful tips for great flavor and texture. Remember, you can adjust the recipe to your taste with various proteins and veggies. Eating well doesn't have to be hard. Give this tasty dish a try, and enjoy the balance of flavor and health! Your kitchen will feel like a restaurant, and your taste buds will thank you.](https://therecipehatch.com/wp-content/uploads/2025/06/a97f1be4-238f-4c0e-9cb5-1d53f20dccbb.webp)
Looking for a quick, tasty weeknight meal? Try my Easy Egg Roll in a Bowl! This dish combines savory ground chicken with crunchy cabbage and carrots. With just a few …
![To make Garlic Parmesan Pasta, you need a few key ingredients. They create a rich and creamy dish. Here’s what you need: - 12 oz fettuccine or spaghetti - 4 tablespoons unsalted butter - 6 cloves garlic, minced - 1 cup heavy cream - 1 cup grated Parmesan cheese - 1 teaspoon salt - 1/2 teaspoon black pepper - 1/4 teaspoon red pepper flakes (optional for heat) - 2 tablespoons fresh parsley, chopped (for garnish) - Extra Parmesan for serving These ingredients work together to give you a savory and satisfying meal. The butter and cream create a smooth sauce that coats the pasta well. You can add more flavors to your Garlic Parmesan Pasta. Here are some great options: - Lemon zest for brightness - Fresh basil for a fragrant touch - Sun-dried tomatoes for a sweet twist - Spinach for a pop of color and nutrition These extras can make your dish even more exciting. Each one adds a unique flavor. You can mix and match based on what you like best. Some kitchen basics can help you make this dish faster. Here are a few staples I recommend: - Olive oil for cooking - Chicken or vegetable broth for depth - Dried Italian herbs like oregano or thyme Having these items on hand lets you whip up Garlic Parmesan Pasta anytime. They add extra flavor and make the process easier. For the full recipe, check out the details above. Enjoy your cooking! First, fill a large pot with water. Add salt and bring it to a boil. Once boiling, add 12 oz of fettuccine or spaghetti. Cook it according to the package instructions until it is al dente. This usually takes about 8-10 minutes. When the pasta is done, save 1 cup of the pasta water. Then, drain the pasta in a colander and set it aside. Next, heat a large skillet over medium heat. Add 4 tablespoons of unsalted butter and let it melt. Once melted, add 6 cloves of minced garlic. Sauté the garlic for 1-2 minutes until it smells really good and turns light golden. Be careful not to burn it! Lower the heat and pour in 1 cup of heavy cream. Let it simmer gently. Gradually stir in 1 cup of grated Parmesan cheese until it melts and becomes smooth. Season the sauce with 1 teaspoon of salt, 1/2 teaspoon of black pepper, and 1/4 teaspoon of red pepper flakes if you like some heat. If the sauce is too thick, add some reserved pasta water until it’s just right. Now, add the cooked pasta to the skillet with the sauce. Toss the pasta well to coat it in the creamy sauce. Cook for another minute so the pasta can absorb some flavors. Remove the skillet from the heat and garnish with 2 tablespoons of chopped fresh parsley and extra Parmesan cheese. For the best taste, serve the pasta right away. You can find the full recipe [Full Recipe]. To make a great sauce, you want balance. If it's too thick, add some pasta water slowly. This helps make it creamy. If it's too thin, let it simmer longer. The goal is a smooth, rich sauce that clings to the pasta. Stir often to avoid burning the garlic. Herbs and spices can change the whole dish. Fresh parsley adds color and a fresh taste. You can also try basil or thyme for a twist. A pinch of red pepper flakes gives heat if you like spice. Taste as you go. This way, you can adjust to your liking. How you serve your pasta matters! Use a large bowl or plate for a nice look. Twirl the pasta with a fork for a fancy touch. Top with extra Parmesan and parsley for color. Adding a lemon wedge on the side can brighten the dish. This makes it pop and look gourmet. Check out the Full Recipe for more tips! {{image_2}} Want to boost your Garlic Parmesan Pasta? Add protein! Chicken, shrimp, or bacon work great. Cook chicken in the skillet before adding garlic. For shrimp, add them after the garlic cooks. Bacon adds a nice crunch. Just cook it until crispy, then mix it in. Each option adds flavor and makes the dish more filling. If you prefer a meatless meal, try some tasty swaps. Use mushrooms for a hearty texture. Sauté them with garlic until tender. You can also add spinach or kale for a pop of color and nutrients. Toss these in with the pasta. They cook quickly and add great flavor. Craving Garlic Parmesan Pasta but need it gluten-free? No problem! Use gluten-free pasta instead of regular. Many brands offer tasty options that hold up well. Cook it just like regular pasta. The sauce remains the same. Just remember to check labels to ensure your ingredients are gluten-free. You can enjoy this dish without worry! For the full recipe, check out the details above. Store any leftover Garlic Parmesan Pasta in an airtight container. Make sure it cools down first. This helps keep the pasta fresh. Place it in the fridge for up to three days. If you want to keep it longer, consider freezing it. To reheat Garlic Parmesan Pasta, use the stove for best results. Heat a skillet over low heat. Add a splash of water or cream to keep it moist. Stir gently until warmed. You can also use the microwave. Just cover the bowl with a lid or a damp paper towel. Heat in short bursts to avoid overcooking. You can freeze Garlic Parmesan Pasta for later use. Allow it to cool completely, then portion it into freezer-safe bags. Remove as much air as possible before sealing. It can last up to two months in the freezer. When you're ready to eat, thaw it in the fridge overnight before reheating. You can use whole milk or half-and-half as a substitute. If you want a lighter option, use a mixture of milk and butter. This mix gives you a creamy feel without being too heavy. If you need a dairy-free choice, try coconut cream or cashew cream. They add a nice flavor and richness. Heavy cream is great, but these options work well too. To add spice, use red pepper flakes in the sauce. Adjust the amount to your taste. You can also add sliced jalapeños or a dash of hot sauce. If you want more heat, try adding spicy sausage or pepperoni. These will give your dish an extra kick. Just remember, spice can easily be adjusted, so start small and add more as needed. Yes, you can use any pasta shape you like! Penne, rigatoni, or even gluten-free pasta work great. The key is to cook it until al dente. This means it should still have a slight bite. Different shapes hold the sauce differently, so feel free to experiment and find your favorite! Garlic Parmesan Pasta goes well with many dishes. A simple green salad with a light dressing is a great choice. Grilled chicken or shrimp adds protein and makes it a full meal. Garlic bread is a classic side that complements the pasta's flavors. For a light touch, serve with steamed veggies like broccoli or asparagus. These sides keep your meal balanced and delicious. For the full recipe, check the previous section. Garlic Parmesan Pasta is simple and full of flavor. We covered essential ingredients, tips, and more. You can adjust this dish to fit any diet, like adding protein or making it gluten-free. Remember these tips for sauce and storage to enjoy your meal later. I hope you feel ready to make your own tasty Garlic Parmesan Pasta today!](https://therecipehatch.com/wp-content/uploads/2025/06/efb3a24e-9381-4442-b30d-5b04f59c67ee.webp)
Are you ready to whip up a dish that’s both rich and simple? Garlic Parmesan Pasta is a crowd-pleaser you’ll love. This recipe is loaded with flavor and takes just …
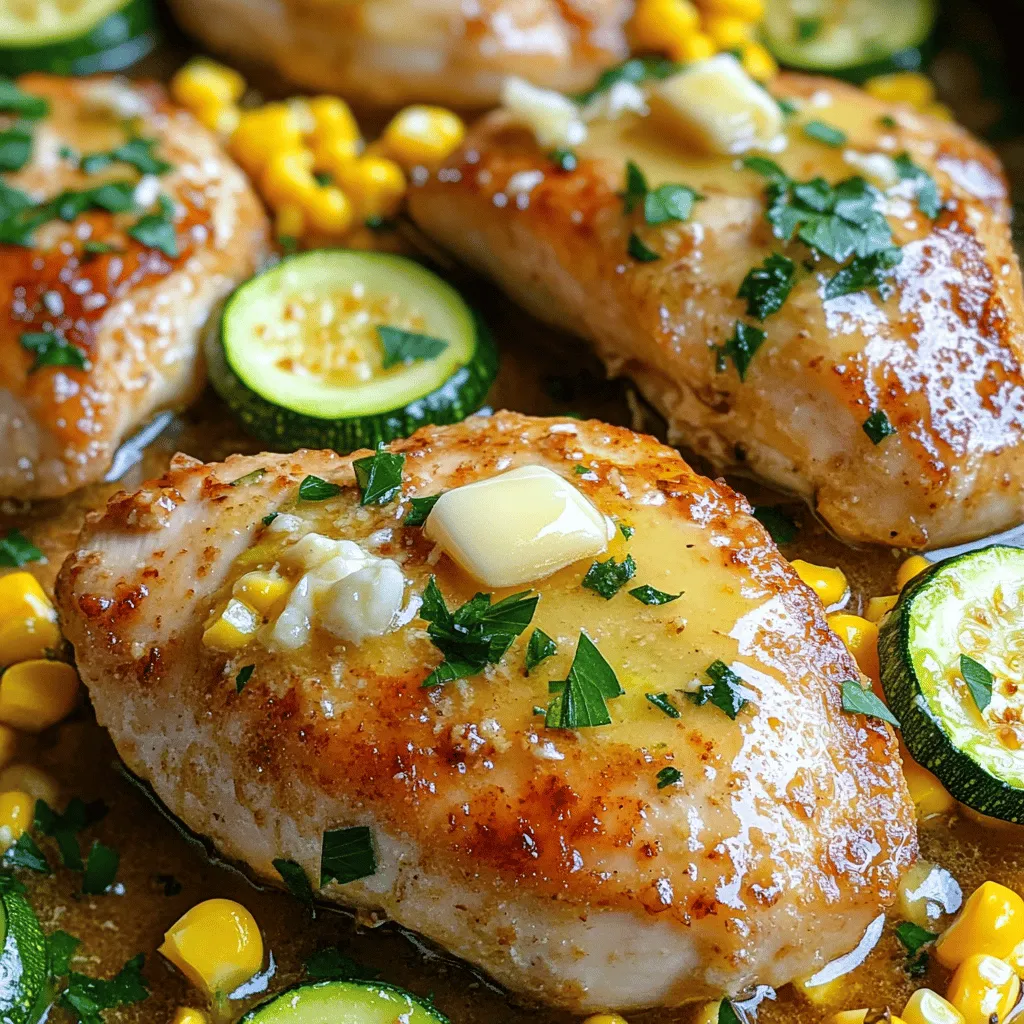
Welcome to my kitchen, where the magic of Garlic Butter Chicken with Zucchini and Corn Delight happens! This dish combines juicy chicken breasts with sweet zucchini and corn, all cooked …
![To make your protein cookie dough, gather these items: - 1 cup almond flour - 1/2 cup vanilla protein powder - 1/4 cup almond butter or peanut butter - 1/4 cup maple syrup or honey - 1/2 teaspoon vanilla extract - 1/4 cup mini dark chocolate chips - Pinch of salt - Optional: 1 tablespoon milk or plant-based milk Feel free to swap ingredients based on your taste or dietary needs. You can use: - Cashew butter instead of almond butter - Honey instead of maple syrup - Whey protein powder instead of plant-based protein - Coconut flour if you want a different texture Understanding the nutrition in your cookie dough helps you make smart choices. - Almond flour: Low in carbs, high in healthy fats, and rich in vitamin E. - Vanilla protein powder: A great source of protein, helping build and repair muscles. - Almond or peanut butter: Offers healthy fats and protein, plus fiber to keep you full. - Maple syrup or honey: Natural sweeteners that provide quick energy. - Vanilla extract: Adds flavor with minimal calories. - Mini dark chocolate chips: A treat that adds antioxidants and a touch of sweetness. - Salt: Enhances flavor and balances sweetness. - Milk or plant-based milk: Adds creaminess and can help with consistency. This protein cookie dough recipe packs a punch in flavor and nutrition. You can enjoy it knowing it satisfies your sweet tooth while fueling your body! For the complete recipe, check out the [Full Recipe]. To make protein cookie dough, start with a big bowl. First, mix 1 cup of almond flour and 1/2 cup of vanilla protein powder. Use a whisk to break up any lumps. Next, add 1/4 cup of almond butter and 1/4 cup of maple syrup. Mix until it looks crumbly. Then, add 1/2 teaspoon of vanilla extract and a pinch of salt. Keep mixing until the dough starts to form. If it's too dry, add 1 tablespoon of milk. This helps bring it all together. Finally, fold in 1/4 cup of mini dark chocolate chips. Your cookie dough is almost ready! Mixing is key to a great dough. Start with the dry ingredients before adding the wet ones. This helps everything blend well. Make sure to scrape the sides of the bowl. This way, you won't miss any dry spots. If you want extra flavor, try adding a bit more vanilla extract. It gives a nice taste boost. Be gentle when folding in the chocolate chips. You want them to stay whole for that yummy bite. Chilling the dough is super important. Place it in the fridge for about 30 minutes. This makes it firm and easier to scoop or shape. If you skip this step, it may be too soft to handle. While it chills, clean up your workspace. When the time is up, you can shape the dough into balls or leave it scoopable. Enjoy it as a treat or snack! For the full recipe, check the details above. To get the right texture, start by mixing the dry ingredients. Use almond flour and protein powder. If the dough feels too dry, add a little milk. This helps make it soft and smooth. You want it to be easy to scoop or roll into balls. The goal is a dough that holds together but isn’t sticky. To make your protein cookie dough even better, try adding fun flavors. Mix in a pinch of cinnamon or nutmeg for warmth. You can also add crushed nuts or dried fruits for crunch. If you love chocolate, double the mini dark chocolate chips! Each change makes the dough taste unique and special. Many people skip chilling the dough. This step is key for great texture. Chilling helps the dough firm up, making it easier to scoop. Another mistake is adding too much liquid at once. Start with a small amount and add more as needed. Lastly, be careful not to overmix. Gentle folding keeps the dough light and fluffy. For the full recipe, check out the Protein-Packed Cookie Dough Bliss ! {{image_2}} You can make protein cookie dough fun by adding flavors. Try mixing in different ingredients to find your favorite. Here are some ideas: - Chocolate Mint: Add 1/2 teaspoon of mint extract and some crushed mint leaves. - Cinnamon Roll: Mix in 1 teaspoon of cinnamon and some chopped pecans. - Peanut Butter Banana: Stir in mashed banana and extra peanut butter for a yummy twist. - Coconut Delight: Add unsweetened shredded coconut for a tropical taste. You can easily change the recipe to suit your needs. Here are some modifications: - Nut-Free: Use sunflower seed butter instead of almond or peanut butter. - Vegan: Replace honey with maple syrup or agave nectar. - Gluten-Free: Stick with almond flour, as it is naturally gluten-free. - Low-Carb: Use a low-carb protein powder and reduce maple syrup for less sugar. Protein cookie dough isn’t just a snack. You can use it in many ways: - Topping for Yogurt: Scoop some dough on top of Greek yogurt for added protein. - Energy Bites: Shape the dough into small balls for easy, on-the-go snacks. - Ice Cream Mix-In: Fold the dough into your favorite ice cream for a special treat. - Dessert Bars: Press the dough into a pan, bake briefly, and cut into bars. Feel free to explore these variations and find what you love most! For the complete recipe, check out the [Full Recipe]. Store your protein cookie dough in an airtight container. This keeps it fresh and tasty. You can also wrap it tightly in plastic wrap. Make sure it is well-sealed to avoid drying out. Place it in the fridge if you plan to eat it within a week. If you want to save it longer, consider freezing it. To freeze your protein cookie dough, first shape it into balls. Arrange the balls on a baking sheet. Freeze them for about 30 minutes until firm. Then, transfer the frozen balls into a freezer-safe bag. Label the bag with the date. This way, you can enjoy a quick treat anytime! When stored in the fridge, protein cookie dough lasts about one week. In the freezer, it stays good for about three months. Always check for any changes in smell or texture before eating. Freshness keeps your treat tasting great! For the full recipe, refer to the earlier section. Protein cookie dough is a tasty snack made with healthy ingredients. It uses protein powder, nut butter, and almond flour. This mix gives you a sweet treat that's also filling. You can eat it raw or use it in recipes. It’s a great way to enjoy cookie dough without the guilt. Yes, you can eat protein cookie dough raw! It is safe because it does not contain eggs. The almond flour and protein powder are safe to eat. Many people love eating it straight from the bowl. Just make sure to keep it chilled for the best texture. You can find protein cookie dough in health food stores. Many grocery stores carry it in the snack aisle. You can also buy it online from various brands. Look for options with natural ingredients for the best taste. Protein cookie dough is healthier than regular cookie dough. It has more protein and fewer sugars. Regular cookie dough often has lots of butter and sugar. Protein cookie dough gives you energy and helps build muscle. It’s a smart choice for a snack! Protein in snacks helps you feel full longer. It supports muscle growth and repair. Eating protein can also help with weight management. Snacks high in protein keep your energy levels steady. They are great for after workouts or busy days. You now know all about protein cookie dough. We covered the key ingredients, their nutrition, and how to mix them perfectly. I shared tips to avoid common mistakes and added fun flavor ideas. I also explained how to store your dough for later and answered common questions. Remember, you can enjoy this treat in many ways. It’s nutritious, adaptable, and easy to make. Use this knowledge to create delicious snacks that fit your needs. Enjoy your baking!](https://therecipehatch.com/wp-content/uploads/2025/06/f218aa95-bf5f-4dc1-815b-9d6b99a614c3.webp)
Looking for a tasty way to boost your protein intake? You’ll love this Protein Cookie Dough! It’s simple, quick, and totally delicious. In this guide, I’ll share key ingredients, easy …
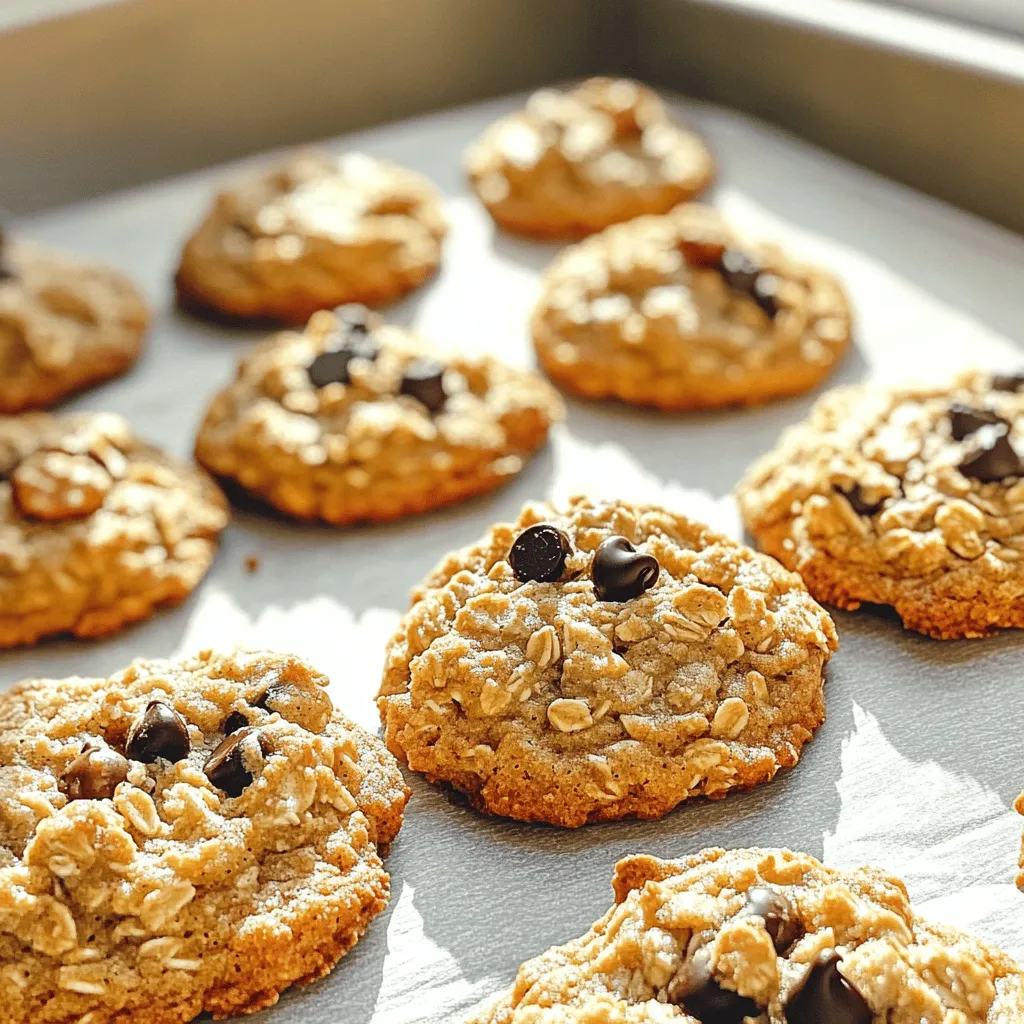
Looking for a quick and tasty treat? These savory Banana Oatmeal Cookies are the answer! With just a few simple ingredients, you can whip up a batch that’s both healthy …
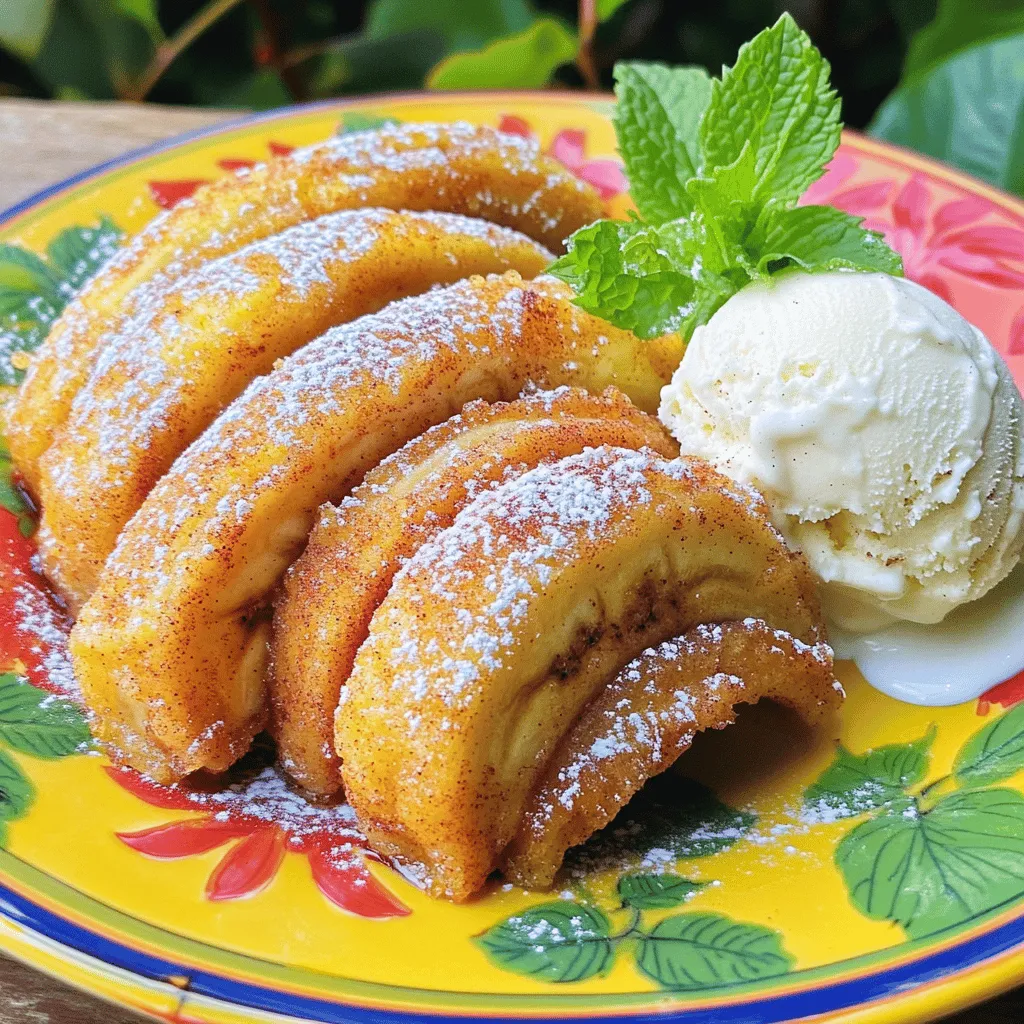
Are you ready to indulge in a sweet treat that will make your taste buds dance? Fried cinnamon bananas are the answer! With just a few simple ingredients, you can …
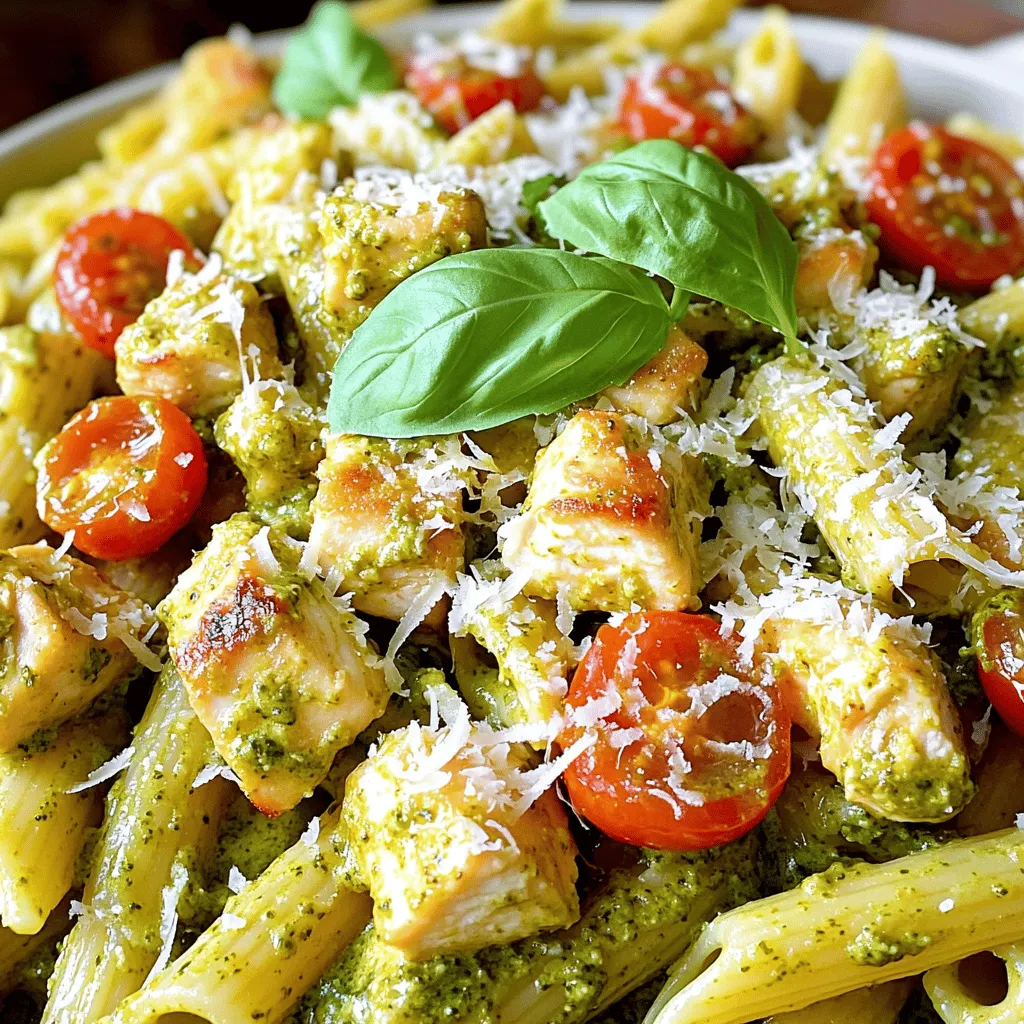
If you’re looking for a simple, tasty dinner, Creamy Chicken Pesto Pasta is the answer. This dish combines tender chicken, smooth cream, and fresh basil pesto for a weeknight meal …
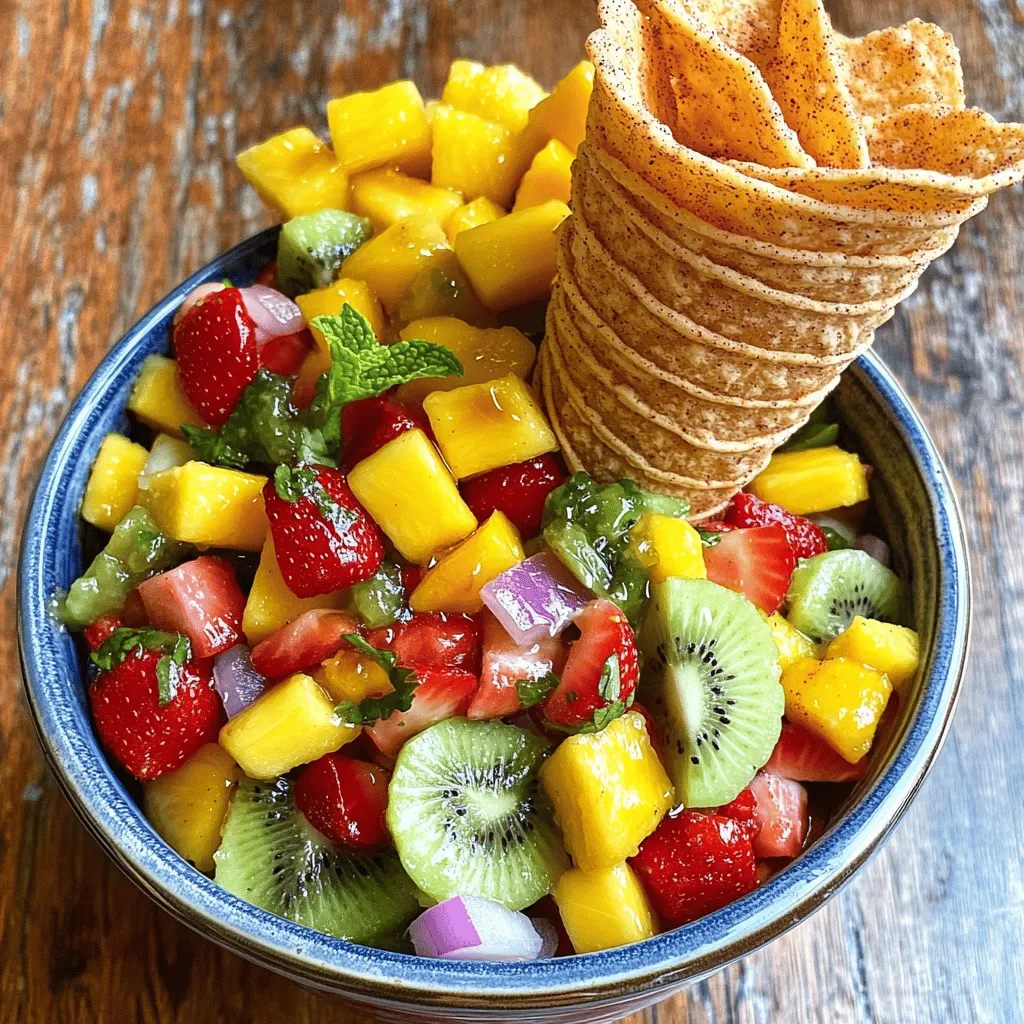
Are you ready to elevate your snack game? This Fruit Salsa with Cinnamon Sugar Tortilla Chips is the perfect blend of fresh flavors and sweet crunch. Imagine biting into juicy …
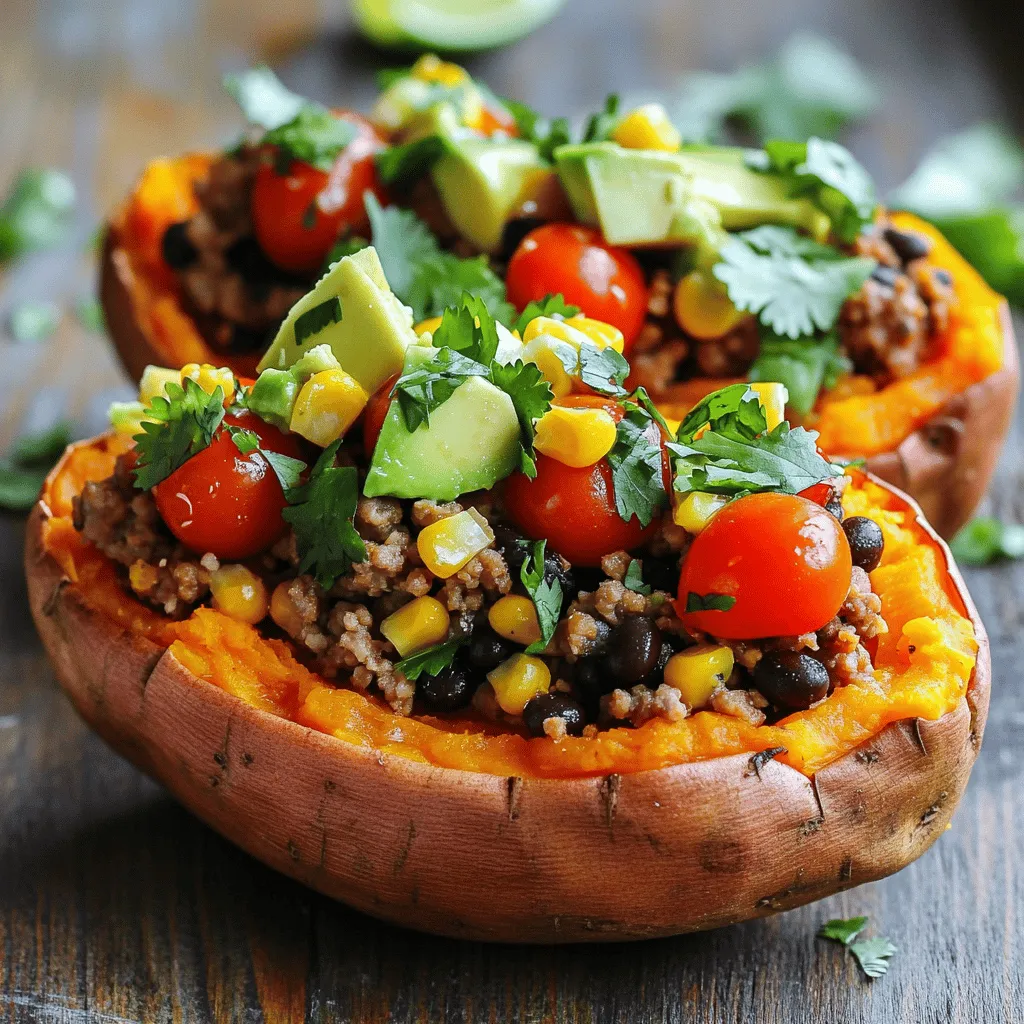
Looking for a tasty and healthy meal? These Taco Stuffed Sweet Potatoes are here to save the day! You’ll blend the rich flavors of tacos with the goodness of sweet …