Tasty Baked Cod in Coconut Lemon Cream Sauce Delight
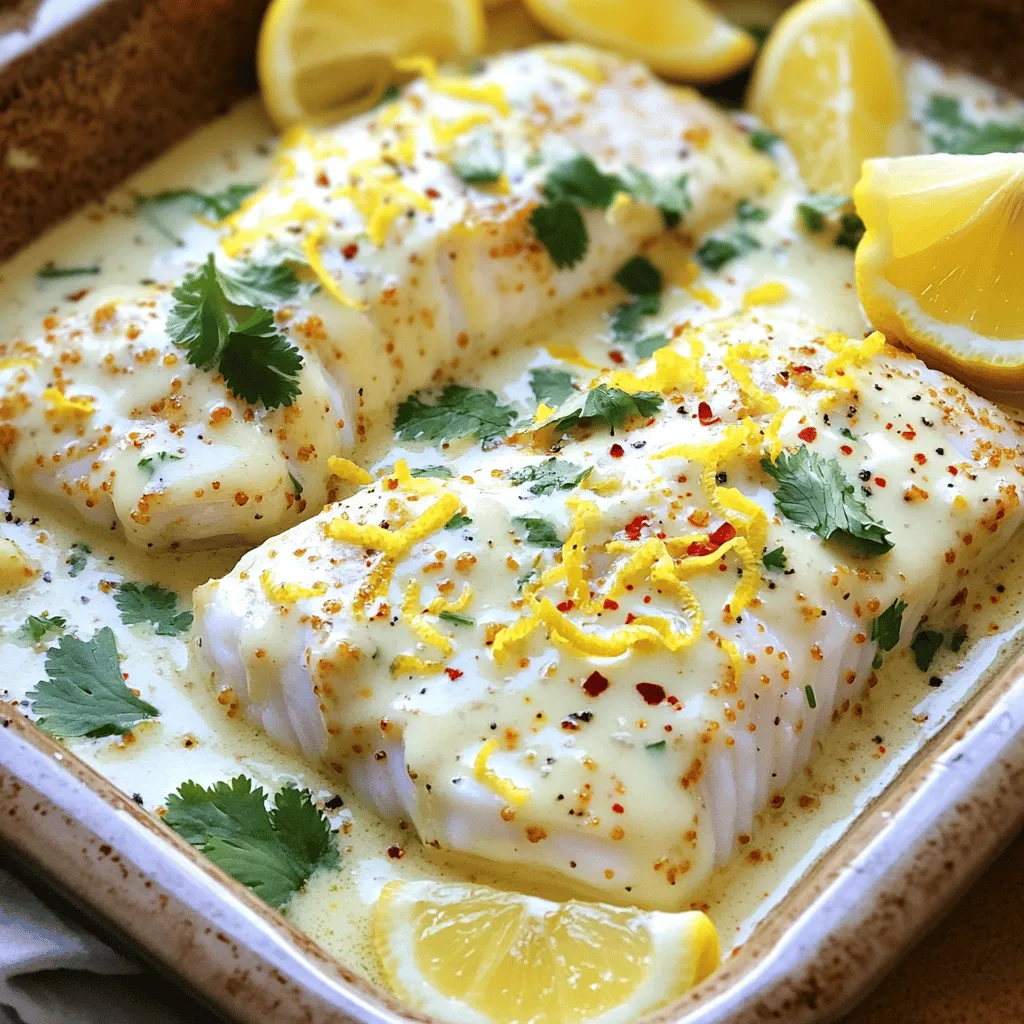
Are you ready to delight your taste buds with a light, flavorful dish? My Tasty Baked Cod in Coconut Lemon Cream Sauce offers an easy way to impress family and …
Are you ready to delight your taste buds with a light, flavorful dish? My Tasty Baked Cod in Coconut Lemon Cream Sauce offers an easy way to impress family and …
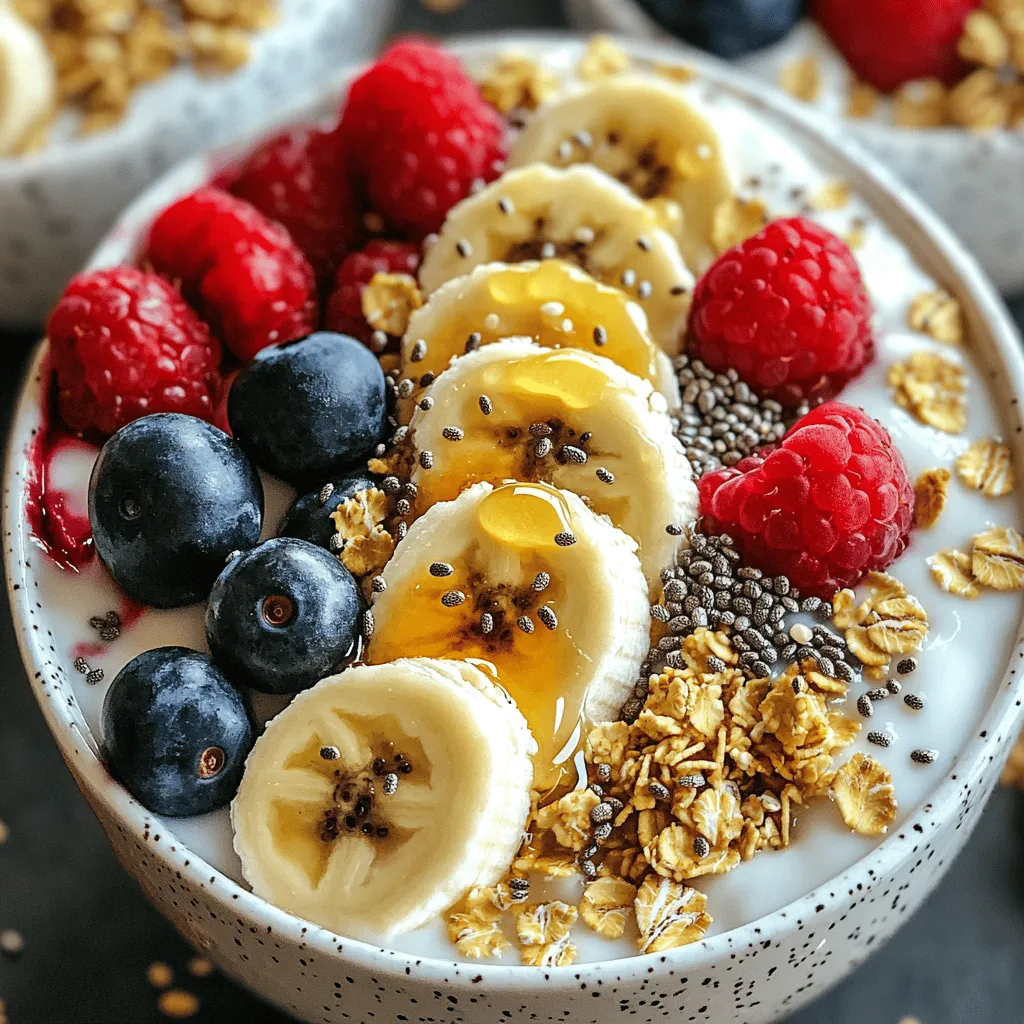
Mornings can be chaotic, and finding time for a healthy breakfast often feels impossible. That’s where my 10-minute grab-and-go breakfast bowls come in! These easy bowls are packed with energy …
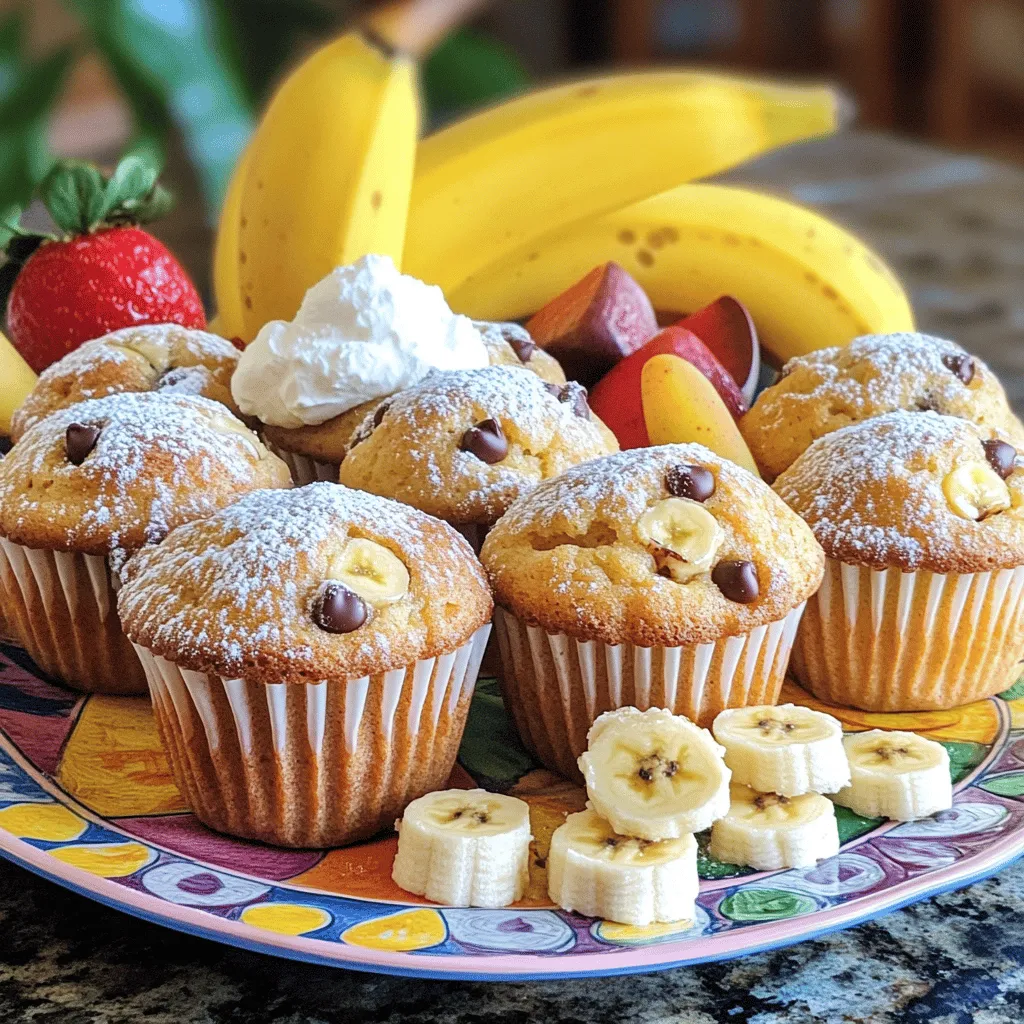
Are you craving a quick and tasty treat? These 30-Minute Moist Banana Cream Cheese Muffins are just what you need! With moist texture and rich flavor, they make a perfect …
![To make these healthy meal prep breakfast bowls, you will need the following: - 1 cup quinoa, rinsed - 2 cups vegetable broth or water - 4 large eggs - 1 cup cherry tomatoes, halved - 1 cup black beans, drained and rinsed - 1 avocado, diced - 1 cup kale, chopped - 1 tablespoon olive oil - 1 teaspoon garlic powder - 1 teaspoon paprika - Salt and pepper to taste - Fresh cilantro for garnish These ingredients work well together. They bring flavor and nutrition to your breakfast bowls. Each serving of these breakfast bowls offers great nutrients. Here’s a quick look at the nutrition: - Calories: 400 - Protein: 22g - Carbohydrates: 55g - Fat: 14g - Fiber: 12g These bowls provide a balanced meal. They keep you full and ready for the day. You can customize your bowls with these swaps: - Quinoa: Use brown rice or farro if you prefer. - Eggs: Try tofu for a vegan option. - Kale: Spinach or Swiss chard works great too. - Black beans: Chickpeas or lentils can be used instead. - Cherry tomatoes: Diced bell peppers or zucchini offer a different taste. - Avocado: Try Greek yogurt for creaminess without the fat. These swaps keep your bowls exciting and fresh. You can change flavors based on what you like. For the full recipe, check the details above. To make these breakfast bowls easy, gather all your ingredients first. You want to have everything ready before you start cooking. This helps save time and keeps you organized. You will need quinoa, eggs, veggies, and spices. 1. Start by rinsing 1 cup of quinoa under cold water. This removes the bitter coating. 2. In a saucepan, bring 2 cups of vegetable broth or water to a boil. Add the rinsed quinoa. 3. Reduce the heat to low, cover, and let it simmer for 15 minutes. The quinoa will be fluffy and ready. 4. While the quinoa cooks, preheat your oven to 375°F (190°C). Line a baking sheet with parchment paper. 5. Halve 1 cup of cherry tomatoes and place them on the baking sheet. Drizzle with 1 tablespoon of olive oil and sprinkle with garlic powder, paprika, salt, and pepper. 6. Roast the tomatoes for 15 minutes, until they are soft and slightly caramelized. 7. In a large pan, heat a drizzle of olive oil over medium heat. Add 1 cup of chopped kale and sauté for 3-5 minutes until it wilts. Season with salt and pepper before removing it from heat. 1. In another saucepan, bring water to a gentle simmer. 2. Crack 4 large eggs into the water one at a time. 3. Poach the eggs for 3-4 minutes. The whites should set, but the yolks stay runny. 4. Carefully remove the eggs with a slotted spoon and set them aside. Now, your quinoa, veggies, and eggs are ready. You can put everything together to build your Healthy Meal Prep Breakfast Bowls. Follow the [Full Recipe] for the final assembly. To save time, cook in batches. Make a big pot of quinoa. Use it for multiple meals. Prepare your veggies in advance. Wash and chop them, then store in the fridge. This keeps them fresh and ready to use. If you roast veggies, do it all at once. You can use them throughout the week. Use good broth or stock for cooking quinoa. It adds depth to the flavor. Season your veggies well with salt and pepper. Adding herbs, like thyme or rosemary, can boost taste. When you roast tomatoes, try using balsamic vinegar for extra sweetness. A sprinkle of lemon juice over the finished bowl brightens up all the flavors. Layer your ingredients in the right order. Start with quinoa at the bottom. This keeps it from getting soggy. Add black beans next, followed by sautéed kale. Then, top with roasted tomatoes and avocado. Place the poached egg on top last. This way, the yolk stays intact and looks great. Use clear containers to show off your colorful bowls. This makes them more appealing to eat. For the complete recipe, check out Healthy Meal Prep Breakfast Bowls. {{image_2}} You can switch up the base of your breakfast bowls. Quinoa is great, but you can use brown rice or farro too. These grains offer different tastes and textures. If you want a low-carb option, try cauliflower rice. It adds a nice crunch and is light on calories. You can add many proteins to your breakfast bowls. If you don’t like eggs, try scrambled tofu or chickpeas. Both options are tasty and keep your meal filling. For toppings, think about your favorites. Fresh fruits like berries or bananas can add sweetness. Nuts and seeds also add crunch and healthy fats. Use seasonal ingredients for the best flavors. In spring, toss in asparagus or radishes. Summer is great for zucchini and bell peppers. In fall, think about sweet potatoes or butternut squash. Winter brings hearty greens like spinach or Swiss chard. Using what’s in season can make your bowls even more delicious and fresh. For a full recipe, check out Healthy Meal Prep Breakfast Bowls. To keep your healthy meal prep breakfast bowls fresh, store them in the fridge. Use airtight containers to prevent moisture loss. Make sure the bowls cool down before sealing them. This helps keep the flavors intact. I recommend using your breakfast bowls within 4 to 5 days for the best taste and quality. Choosing the right containers makes meal prep easier. I like glass containers because they are durable and safe for the microwave. They also help you see the food inside. BPA-free plastic containers are another good option. Look for containers that are leak-proof to avoid spills. Label each container with the date for easy tracking. When you're ready to enjoy your breakfast bowl, reheat it in the microwave. Heat it for 1 to 2 minutes, stirring halfway through. This ensures even heating. If using the oven, preheat it to 350°F (175°C) and bake for about 10 minutes. Add a splash of water to keep it moist. If you want it to taste fresh, you can add a bit more avocado or herbs after reheating. For the full recipe, check out Healthy Meal Prep Breakfast Bowls. Yes, you can easily make these bowls vegan. Replace the eggs with tofu or chickpeas. Tofu can be scrambled or cubed for a protein boost. Chickpeas add a nice texture and flavor. You can also skip the eggs and add more veggies, like spinach or mushrooms. Use plant-based toppings and dressings to keep it fresh. The goal is to keep the meal tasty and filling. Breakfast bowls last about 4 to 5 days in the fridge. Store them in airtight containers to keep them fresh. For the best taste, eat them within this time. If you notice any changes in smell or texture, it’s best to toss them. To enjoy them longer, you can freeze the bowls. Just remember to thaw them overnight before reheating. If you want to swap quinoa, try brown rice or farro. Both options have great texture and nutrition. You could also use oats for a different flavor. Another choice is couscous, which cooks quickly. Each base adds its own twist to the bowls. Feel free to experiment with what you have on hand. For a low-carb option, try cauliflower rice. It’s light and still satisfying. In this post, we've explored healthy meal prep breakfast bowls. We covered key ingredients, their nutrition, and substitutions. You learned step-by-step how to prepare and cook quinoa, veggies, and poach eggs. I shared tips to save time and boost flavor while assembling your bowls. We also discussed variations to keep meals interesting and how to store them properly. Eating healthy can be simple and fun. You have the tools now to enjoy tasty breakfast bowls every day. Enjoy creating your own delicious and nutritious meals!](https://therecipehatch.com/wp-content/uploads/2025/06/93c4137b-f181-4bae-8e58-5e30c16ddbe7.webp)
Are you tired of rushing through breakfast every morning? Healthy Meal Prep Breakfast Bowls are your solution for quick and delicious mornings! In this guide, I’ll show you how to …
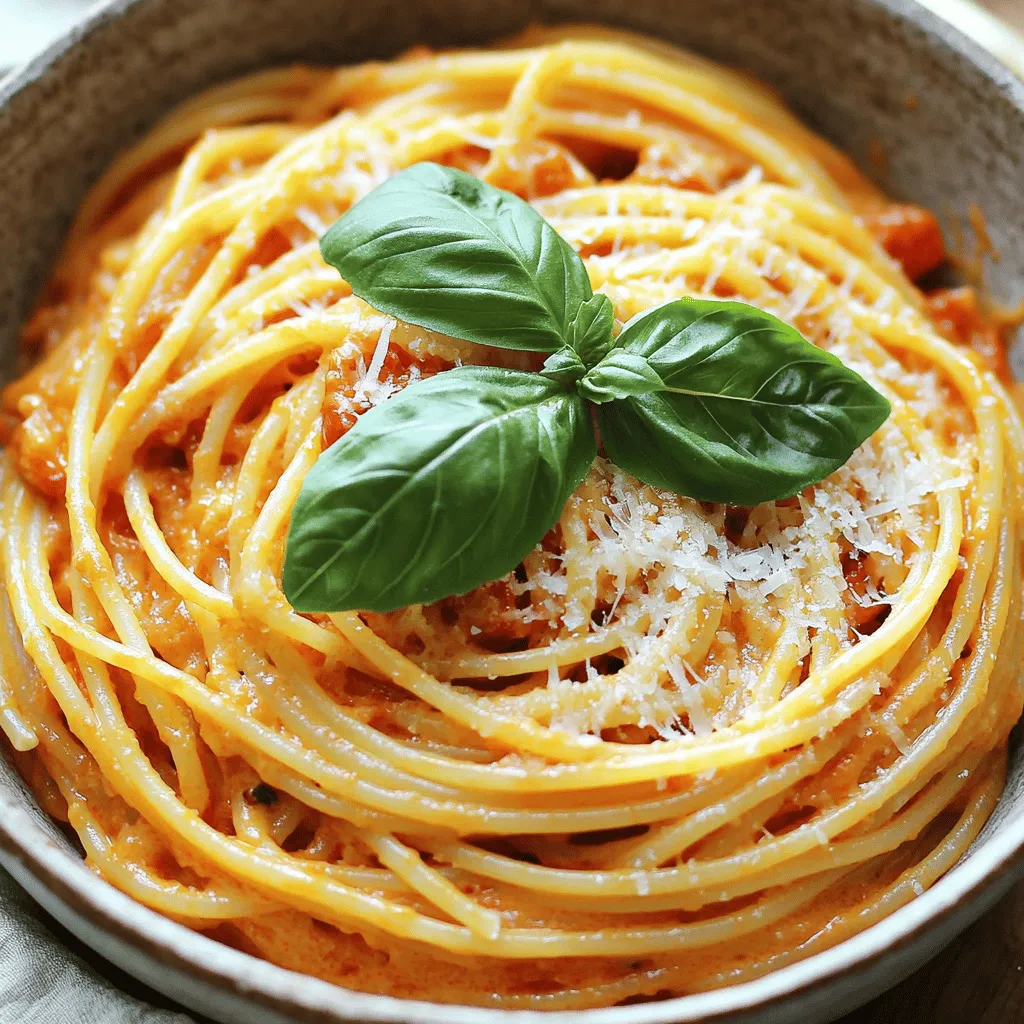
Looking for a quick, delicious dinner that your family will love? Try my Super Easy Creamy Tomato Pasta! With just a few basic ingredients, you can whip up a dish …
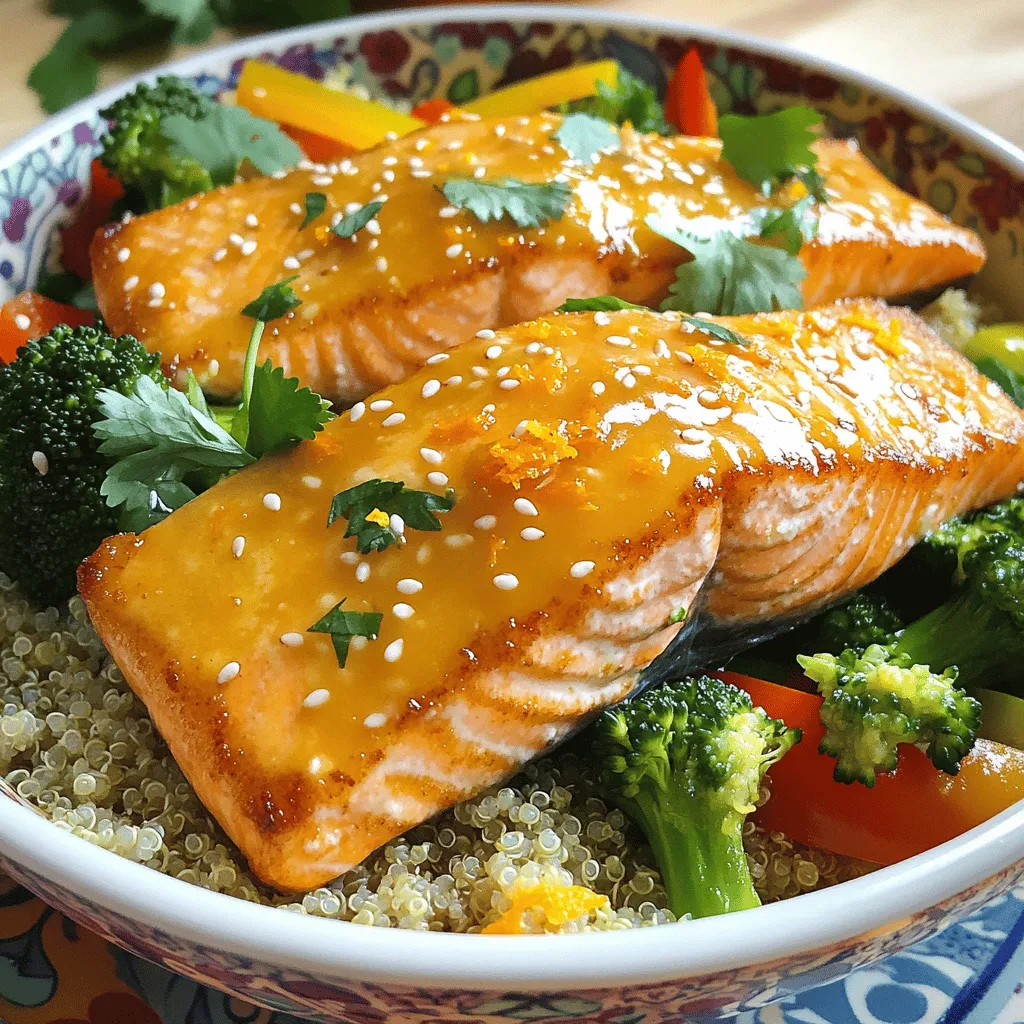
Looking for a tasty, healthy meal? Try my Crispy Orange Salmon Bowls! This dish combines fresh salmon, vibrant veggies, and a zesty orange sauce. It’s easy to make and packed …
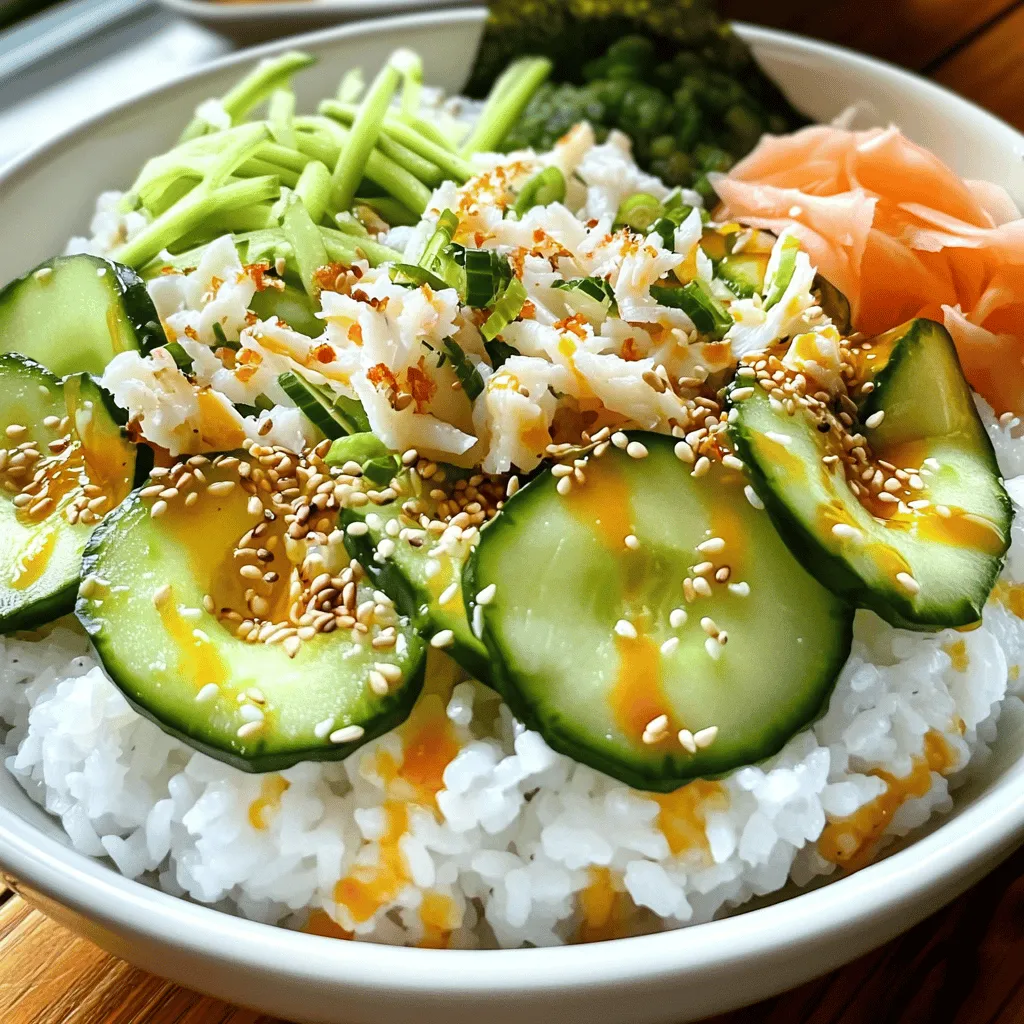
Craving a tasty treat that’s also easy to make? Say hello to California Roll Sushi Bowls! This recipe combines fresh ingredients and vibrant flavors, all in one bowl. You’ll learn …
. 1. Preheating the oven: Start by preheating your oven to 400°F (200°C). This step is key for a great bake. 2. Preparing the chicken mixture: In a large bowl, mix the diced chicken thighs, chipotle sauce, olive oil, cumin, smoked paprika, garlic powder, onion powder, salt, and pepper. Make sure to coat the chicken pieces well. 3. Add the pineapple: Gently fold in the diced pineapple. This adds sweetness and balances the spice from the chipotle. 4. Spread on the sheet pan: Pour the chicken and pineapple mix onto a lined baking sheet. Spread it out in one layer. This helps cook the chicken evenly. 1. Roasting in the oven: Bake the chicken and pineapple for 20-25 minutes. Stir halfway through. The chicken should be cooked through and have a nice caramelized look. 2. Warming the tortillas: While the chicken roasts, wrap 8 corn tortillas in aluminum foil. Place them in the oven for the last 5-10 minutes. This warms them up nicely. 1. Filling the tortillas: Once the chicken is done, take a warm tortilla and add a generous scoop of the chicken and pineapple mix. 2. Adding garnishes: Top with fresh cilantro, avocado slices if you want, and a squeeze of lime juice for extra flavor. Serve right away for the best taste! For the full recipe, check out the details above. How long to marinate the chicken? I recommend marinating the chicken for at least 30 minutes. This time lets the flavors soak in. You can marinate for up to 2 hours for even more taste. What to avoid when marinating? Avoid using acidic ingredients like lemon juice for too long. They can break down the chicken and make it mushy. Stick to spices and herbs for a great flavor boost. Ensuring even cooking To ensure even cooking, spread the chicken and pineapple mixture in a single layer. This allows hot air to circulate and cook everything well. Stir halfway through to mix the flavors. Adjusting spice levels If you want more heat, add extra chipotle sauce. Start with a little, then taste. You can always add more, but you can’t take it away! Pairing with sides These tacos pair well with simple sides like black beans or a fresh salad. A side of corn salsa adds a nice crunch too. Best drinks to serve For drinks, try a refreshing limeade or a light beer. Both options complement the flavors in the tacos nicely. Enjoy your meal! {{image_2}} Alternative proteins You can swap chicken for other proteins. Try shrimp or pork for a new twist. Tofu works well for a plant-based option. Each protein brings its own flavor and texture. Other fruit options If you want to change the fruit, use mango or peach. Both add sweetness and freshness. You can also try diced bell peppers for a crunchy texture. Gluten-free tortillas Choose corn tortillas for a gluten-free option. They have great flavor and hold up well. Look for brands labeled gluten-free to ensure safety. Vegan alternatives To make this dish vegan, use jackfruit or tempeh. Season them like the chicken. This keeps the bold flavors while making it suitable for everyone. Different sauces to use Explore different sauces for variety. Try BBQ sauce for a smoky taste. Salsa verde can add a fresh, tangy kick. Additional spices for more heat Want more spice? Add extra chipotle sauce or a pinch of cayenne. You can also use fresh jalapeños for a zesty boost. Adjust the heat to your liking. Feel free to explore these variations to make your Sheet Pan Chicken Chipotle Pineapple Tacos even more exciting! For the full recipe, check out the instructions above. To store leftovers, let the chicken mixture cool. Place it in an airtight container. You can keep it in the fridge for up to three days. This helps keep the flavors fresh. To freeze the tacos, first let the chicken mixture cool completely. Next, scoop the mixture into freezer bags or containers. Label them with the date. You can freeze them for up to three months. When ready to eat, thaw the mixture overnight in the fridge. Reheat it in a skillet over medium heat until hot. You can repurpose the chicken mixture in many ways. Try making taco salads. Just add mixed greens, beans, and your favorite toppings. This way, you can enjoy a fresh meal while minimizing waste. Marinate the chicken for at least 30 minutes. This time allows the flavors to soak in well. For best results, leave it for up to two hours. If you’re short on time, even a quick 15-minute soak helps. Yes, you can use chicken breasts or thighs. Thighs are juicier, but breasts work too. Just cut them into bite-sized pieces for even cooking. If you prefer dark meat, thighs are your best choice. To add more heat, increase the chipotle sauce. You can also add diced jalapeños or chili powder. A sprinkle of cayenne pepper gives a fiery kick. Just remember to taste as you go! These tacos pair well with rice or beans. A simple salad adds freshness. You can also serve them with corn on the side. For toppings, try diced onions, cheese, or sour cream. Yes! Swap the chicken for black beans or tofu. Grill some veggies like bell peppers and onions for extra flavor. You can still use the same spices for a tasty kick. Just follow the Full Recipe for a delicious meal. These tacos blend simple ingredients like chicken, pineapple, and tortillas for great flavor. We covered everything from seasoning the chicken to choosing toppings like cilantro and lime. Remember marinating tips to enhance taste. You can also adapt this recipe for vegan options or other proteins. With proper storage methods, you can enjoy leftovers in fun ways. Get creative by trying different sauces or spices to suit your taste. You now have all you need to make tasty tacos. Enjoy making them!](https://therecipehatch.com/wp-content/uploads/2025/06/abb47537-639d-410b-9cd0-c1509e6abaa3.webp)
Get ready for a taste explosion with my Sheet Pan Chicken Chipotle Pineapple Tacos! This dish combines juicy chicken, sweet pineapple, and spicy chipotle sauce for a flavor that sings. …
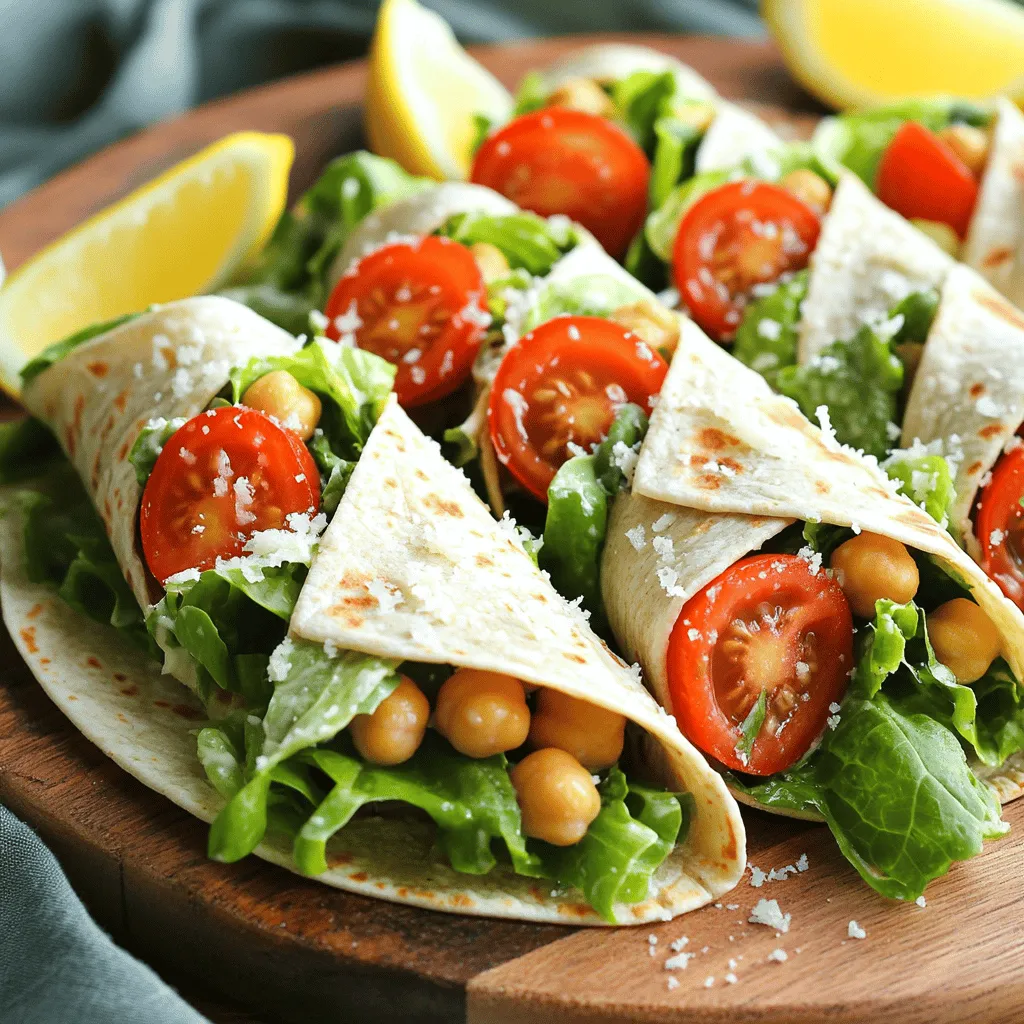
Looking for a tasty and healthy meal idea? Try Chickpea Caesar Salad Wraps! Packed with protein, fresh veggies, and creamy dressing, these wraps are a great swap for your traditional …
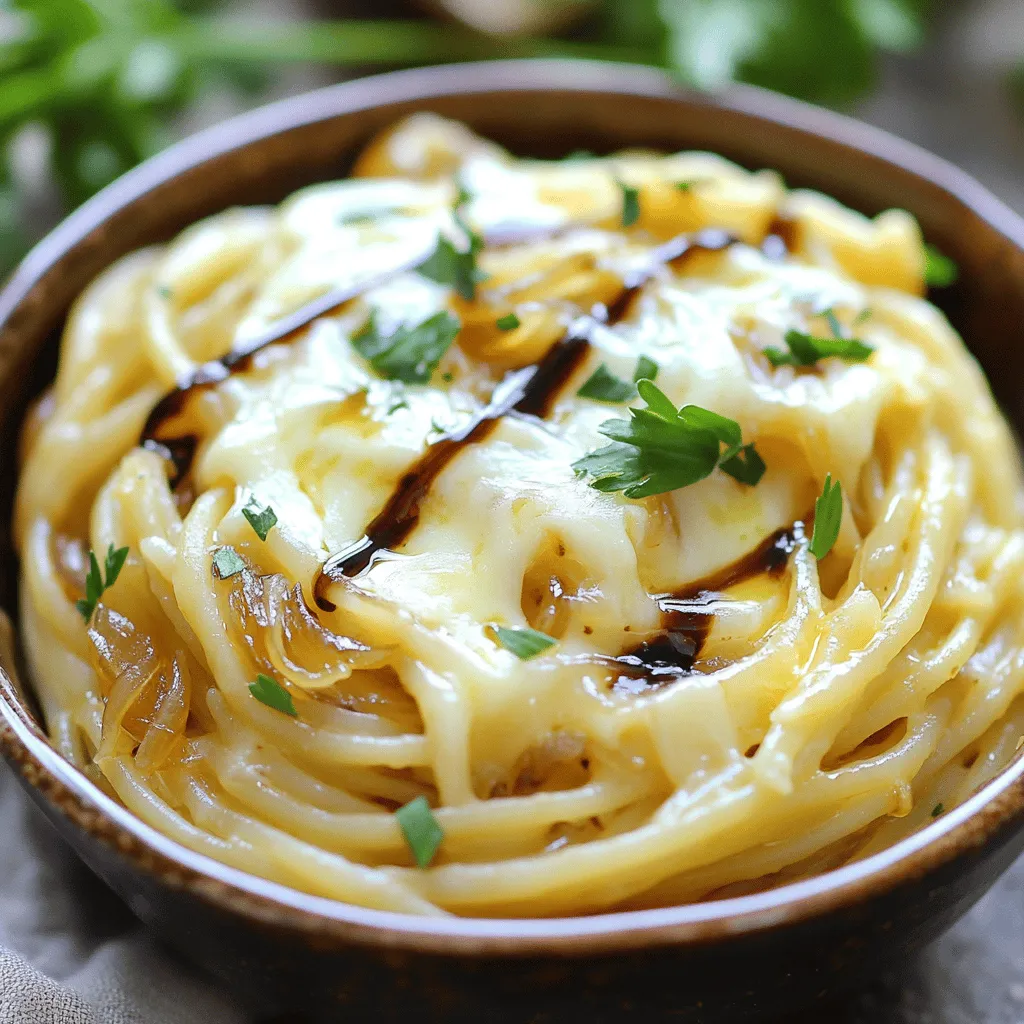
Welcome to the world of comfort food with my One Pot French Onion Pasta! This easy dish combines rich, caramelized onions with tender pasta, making it a satisfying meal for …