
Fall is the perfect time for cozy treats, and this Apple Cider Cheesecake is a standout! It combines sweet apples and warm spices for a dessert that’s rich and creamy. With my easy step-by-step guide, you’ll create a show-stopping cake that impresses everyone. Whether you’re hosting a gathering or craving a slice at home, this recipe will bring the flavors of autumn right to your table. Let’s dive in!
Ingredients
Full Recipe Overview
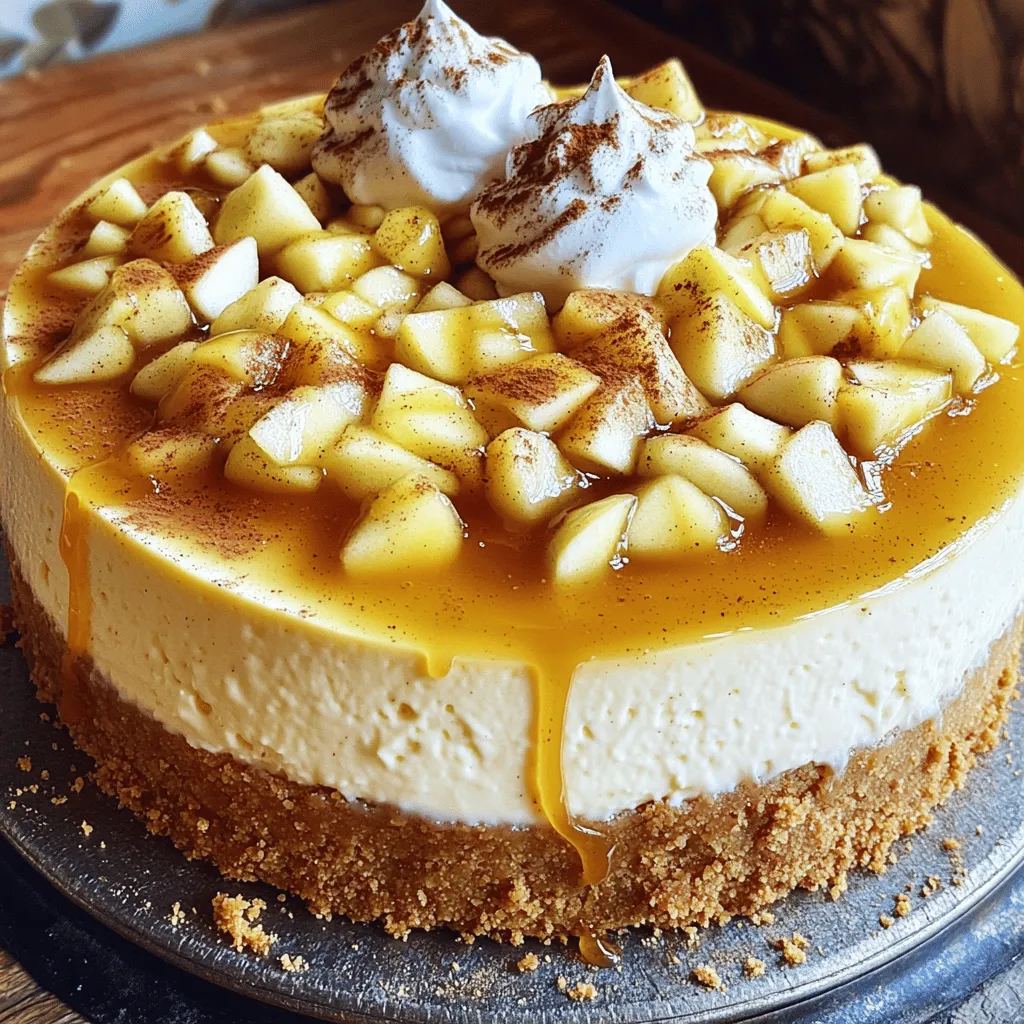
This apple cider cheesecake is perfect for fall. It combines sweet apples and rich cream cheese. You will need simple ingredients to create this tasty dessert.
Detailed Ingredients List
Here’s what you’ll need:
– 1 ½ cups graham cracker crumbs
– ½ cup unsalted butter, melted
– 1 tablespoon sugar
– 3 (8 oz) packages cream cheese, softened
– 1 cup sugar
– 1 teaspoon vanilla extract
– ½ cup apple cider
– 3 large eggs
– 1 teaspoon ground cinnamon
– ¼ teaspoon ground nutmeg
– 2 cups diced apples (preferably Honeycrisp or Granny Smith)
– 1 tablespoon lemon juice
Essential Tools Needed
To make this cheesecake, gather these tools:
– A 9-inch springform pan
– Mixing bowls
– Hand mixer
– Spatula
– Measuring cups and spoons
– Knife for slicing apples
– Oven
These tools help you prepare and bake the cheesecake easily. Follow the full recipe for best results.
Step-by-Step Instructions
Prepping the Oven and Crust
First, set your oven to 325°F (160°C). This is the right temperature for baking. While it warms up, grab a medium bowl. In it, mix together the graham cracker crumbs, melted butter, and 1 tablespoon of sugar. Stir until it’s all combined. Next, take a 9-inch springform pan and press the mixture firmly into the bottom. This will create a nice, even crust. Bake the crust in the oven for about 10 minutes. You want it set and lightly golden. Once done, take it out and let it cool.
Making the Cheesecake Filling
Now, let’s make the filling! In a large mixing bowl, beat the softened cream cheese with a hand mixer. You want it smooth and creamy. Gradually add in 1 cup of sugar. Keep blending until it’s all mixed well. Next, add the vanilla extract and apple cider. Then, crack in the eggs one at a time. Be sure to beat well after each one. Now, mix in the ground cinnamon and nutmeg for that warm, cozy flavor.
Once that’s done, gently fold in your diced apples. Drizzle lemon juice over them to stop browning. This helps keep your apples fresh and bright. Finally, pour this cheesecake filling over your cooled crust. Smooth out the top with a spatula to make it nice and even.
Baking and Cooling the Cheesecake
It’s time to bake! Place the cheesecake in your oven for about 55-60 minutes. You want the edges to be set, but the center should still jiggle slightly. This means it’s just right. When the time is up, turn off the oven and crack the door open. Let the cheesecake cool in there for an hour. After that, let it cool to room temperature. Then, move it to the fridge. It needs to chill for at least 4 hours, or overnight, to fully set.
Once it’s ready, run a knife around the edge of the pan and release it. Slice your cheesecake and enjoy! For an extra treat, top it with whipped cream or caramel sauce. You can find the Full Recipe for more details.
Tips & Tricks
How to Ensure a Creamy Texture
To get a creamy texture, use room temperature cream cheese. Cold cream cheese makes lumps. Beat it well until smooth before adding other ingredients. Mix slowly when adding eggs. This keeps air out, leading to a better texture. Lastly, bake at low heat. This helps the cheesecake cook evenly without cracking.
Common Mistakes to Avoid
Avoid overmixing your batter. Too much mixing adds air and can cause cracks. Don’t skip the cooling step in the oven. This prevents sudden temperature changes that can harm the cheesecake. Also, ensure your apples are diced small. Large pieces can affect the texture and bite.
Best Practices for Serving
Chill the cheesecake for at least four hours before serving. This helps the flavors meld and the texture set. When slicing, use a warm knife for clean cuts. You can top slices with whipped cream or caramel for extra flavor. Lastly, serve with a side of fresh apples for a fun touch. For the complete recipe, check out the Full Recipe link.
Variations
Flavor Enhancements: Spices and Add-ins
You can make your apple cider cheesecake even better with some twists. Adding more spices can deepen the flavor. Try adding ground ginger or allspice for a warm kick. You can also mix in some chopped nuts like walnuts or pecans for a crunchy texture. Dried cranberries can add a sweet-tart surprise.
Dietary Adjustments: Gluten-Free, Vegan Options
Want a gluten-free version? Just swap the graham cracker crumbs for gluten-free ones. Be sure to check the labels to find the right brand. For a vegan option, use dairy-free cream cheese and a flax egg instead of regular eggs. This will help you enjoy this dessert without missing out.
Presentation Ideas for Special Occasions
Presentation matters, especially for special events. You can serve the cheesecake in individual cups for a fun twist. Top each cup with a sprinkle of cinnamon and a slice of apple. Another idea is to drizzle caramel sauce over the whole cheesecake before serving. This will make it look fancy and delicious.
For the full recipe, check out the detailed instructions above. Enjoy creating your unique apple cider cheesecake!
Storage Info
How to Store Apple Cider Cheesecake
To keep your apple cider cheesecake fresh, store it in the fridge. Place it in an airtight container or cover it tightly with plastic wrap. This will help it stay moist. It will last for about 4 to 5 days. If you want to keep it longer, consider freezing it.
Freezing Instructions for Long-Term Storage
If you want to freeze your cheesecake, follow these steps. First, let the cheesecake cool completely. Then, wrap it tightly in plastic wrap. After that, place it in a freezer-safe container. It can stay in the freezer for up to 2 months. When ready to eat, thaw it in the fridge overnight.
Reheating Tips for Optimal Flavor
To enjoy your cheesecake again, you may want to reheat it slightly. Remove it from the fridge and let it sit at room temperature for about 30 minutes. This helps bring back its creamy texture. You can also warm individual slices in the microwave for 10-15 seconds. This will enhance the flavors and make it taste fresh.
FAQs
Can I use a different type of apple?
Yes, you can use other apple types. Some great choices are Fuji, Gala, or Braeburn. Each type brings a unique flavor. Your cheesecake will taste different based on the apples you choose. If you like sweeter apples, pick Fuji. If you prefer tartness, go for Granny Smith. This flexibility lets you customize the dessert to your taste.
How long does the cheesecake need to chill?
After baking, the cheesecake needs at least four hours to chill. However, chilling it overnight is best. This helps the flavors blend and the texture set perfectly. If you cut it too soon, the slices may crumble. Waiting gives you clean, beautiful slices when serving.
Can I make this cheesecake ahead of time?
Absolutely! Making this cheesecake ahead is a smart choice. You can prepare it one or two days in advance. Just store it in the fridge until you’re ready to serve. This makes it a perfect dessert for parties or family gatherings. For the best flavor, allow it to sit in the fridge overnight. You will love how it tastes! Check out the Full Recipe for all the details on making this delicious treat.
This blog post guided you through making a delicious apple cider cheesecake. We covered the main ingredients, essential tools, and step-by-step instructions. You learned about tips for a creamy texture and the common mistakes to avoid. We also explored tasty variations and how to properly store your cheesecake. Remember, using the right ingredients and following these tips will lead to a tasty treat. Enjoy making your cheesecake, and share it with family and friends. Happy baking!
