Craving a sweet treat without the heat? You’ll love these No-Bake S’mores Cheesecake Cups! They’re simple, fun, and packed with all the classic s’mores flavors. Plus, you don’t need to turn on the oven! In this guide, I will walk you through the easy ingredients, step-by-step instructions, and some clever tips to make your dessert shine. Get ready to impress your friends and family with this delightful no-bake treat!
Ingredients
List of Essential Ingredients
To make No-Bake S’mores Cheesecake Cups, gather these key items:
– 1 cup graham cracker crumbs
– 1/4 cup unsweetened cocoa powder
– 1/3 cup sugar
– 1/2 cup unsalted butter, melted
– 16 oz cream cheese, softened
– 1 cup powdered sugar
– 1 teaspoon vanilla extract
– 1 cup heavy whipping cream
– 1 cup mini marshmallows
– 1/2 cup chocolate chips (semi-sweet or milk chocolate)
Optional Toppings and Variations
You can add fun toppings to your cheesecake cups. Here are some ideas:
– Extra mini marshmallows for a fluffy touch
– Chocolate shavings for a gourmet look
– Toasted mini marshmallows for a campfire vibe
– Crushed graham crackers for extra crunch
Substitutions for Common Ingredients
If you need to swap ingredients, try these options:
– Use vegan cream cheese for a dairy-free version.
– Replace heavy cream with coconut cream for a lighter option.
– Substitute cane sugar with coconut sugar for a different flavor.
– Use gluten-free graham crackers for a gluten-free dessert.
Step-by-Step Instructions
Preparing the Crust
Start by gathering your ingredients. You will need graham cracker crumbs, cocoa powder, sugar, and melted butter. In a mixing bowl, combine the graham cracker crumbs, cocoa powder, and sugar. Mix these dry ingredients well. Then, pour in the melted butter and stir until it resembles wet sand. This texture is key for a good crust. Next, divide the crust mixture into small dessert cups. Use about one tablespoon per cup. Press down firmly to create an even layer. This crust will be a strong base for your cheesecake.
Making the Cheesecake Mixture
Now, let’s make the cheesecake! In a large bowl, beat the softened cream cheese with an electric mixer. Mix until it is smooth and creamy. Gradually add the powdered sugar and vanilla extract. Keep mixing until you have a creamy mixture with no lumps. In another bowl, whip the heavy cream. You want it to form stiff peaks. This whipped cream will make your cheesecake fluffy. Gently fold the whipped cream into the cream cheese mixture. Be careful not to deflate it. Finally, add the mini marshmallows and chocolate chips. Stir until well mixed.
Assembling the Cups
It’s time to assemble! Spoon the cheesecake mixture over the crust in each cup. Fill them to the top for a nice finish. Make sure each cup has a good amount of the light cheesecake layer. This is where the magic happens. The combination of crust and cheesecake will create a delightful treat.
Chilling Process
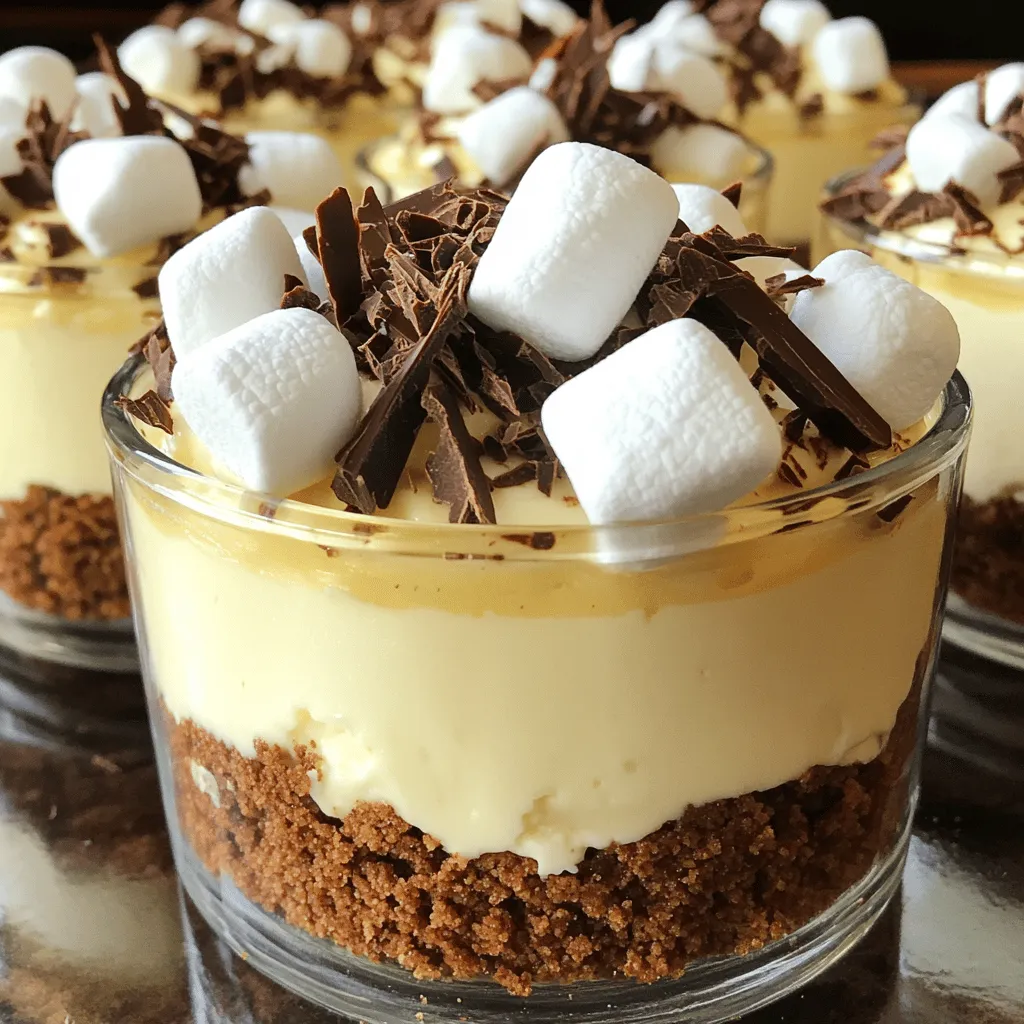
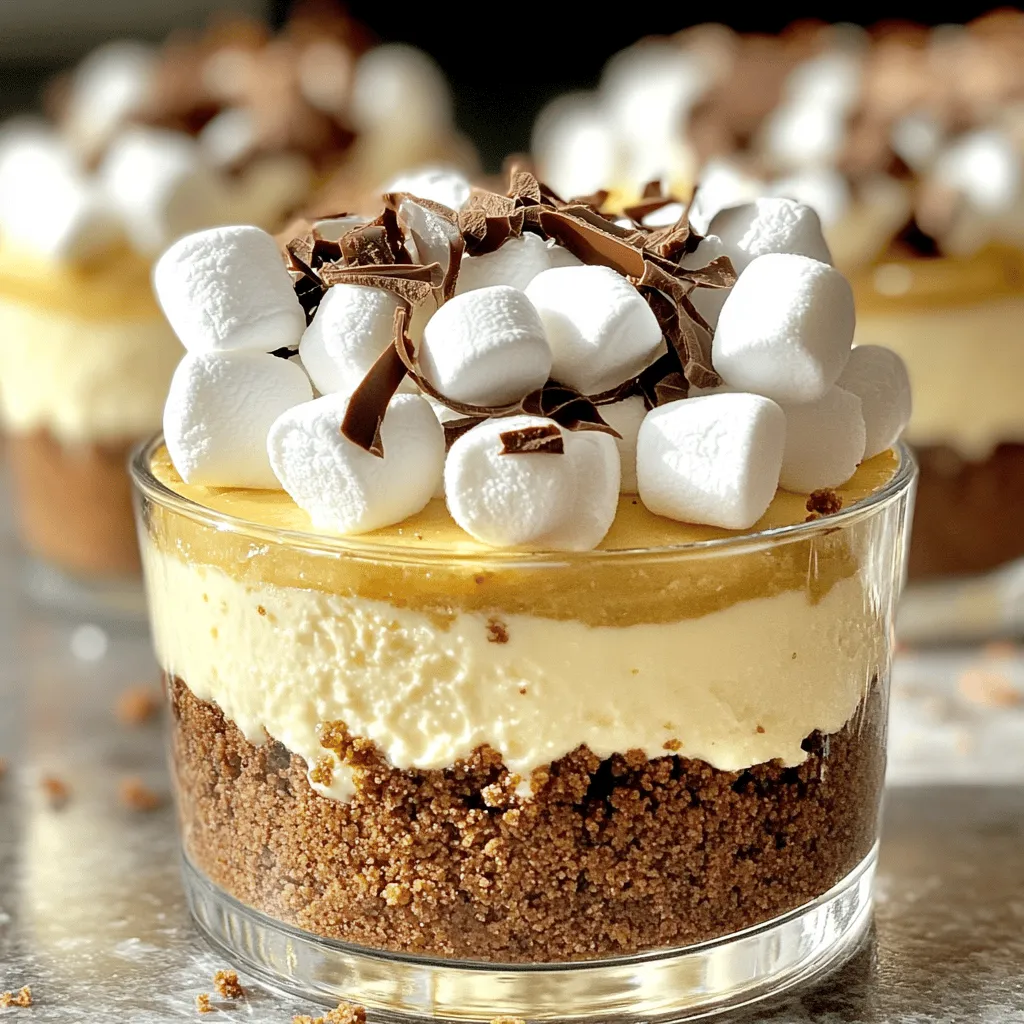
After you have filled the cups, it’s time for the chilling process. Place the cheesecake cups in the refrigerator. Let them chill for at least 2-3 hours. This step is crucial. It helps the cheesecake set properly. Once they are set, you can decorate them with extra mini marshmallows and chocolate shavings. For a fun twist, toast some mini marshmallows with a kitchen torch before topping your cups. This will give them a delicious, smoky flavor.
Tips & Tricks
Achieving the Perfect Cheesecake Texture
To get a smooth, creamy cheesecake, use softened cream cheese. Cold cream cheese will not mix well. Beat it until it is fluffy. Adding whipped cream makes your cheesecake light and airy. Fold it gently into the cream cheese mixture. Avoid over-mixing, as this can make it dense.
Storing the Cheesecake Cups
Keep your cheesecake cups in the fridge. Use an airtight container to prevent them from drying out. They will stay fresh for up to three days. If you want to keep them longer, try freezing them. Use plastic wrap and foil to wrap each cup tightly.
Serving Suggestions
Serve your cheesecake cups chilled for the best taste. Top them with extra mini marshmallows and chocolate shavings. For a fun twist, toast the marshmallows before adding them. This adds a smoky flavor. You can serve these cups at parties or as a sweet treat after dinner. They are sure to impress everyone!
Variations
Flavored Cheesecake Options
You can switch up the cheesecake flavor easily. Try adding different extracts. For a lemon twist, use lemon extract instead of vanilla. For chocolate lovers, add cocoa powder to the cheesecake mix. You could even use peanut butter for a nutty flavor. Just remember, adjust the sugar to balance the taste.
Different Crust Ideas
While graham cracker crust is classic, you can explore other options. Use crushed Oreos for a rich, chocolatey base. For a nutty crunch, try ground almonds or pecans mixed with butter. If you prefer a gluten-free option, use gluten-free graham crackers or almond flour. Each crust will give your dessert a unique twist.
Unique Topping Suggestions
Toppings can make your dessert pop! Besides marshmallows and chocolate shavings, try crushed candies or nuts. Caramel drizzle can add sweetness and flair. You could also use fresh berries for a fruity kick. Get creative with your toppings to match your taste and style!
Storage Info
How to Store Leftover Cheesecake Cups
Store your leftover cheesecake cups in the fridge. Use an airtight container to keep them fresh. If you layer them with parchment paper, it helps prevent sticking. They will stay good for about 3-5 days. Always cover them well to keep out air and moisture.
Freezing Instructions
You can freeze these cheesecake cups if you want to save some for later. Just make sure they are in a freezer-safe container. Wrap each cup in plastic wrap before placing them in the container. They will last for about 1-2 months in the freezer. When you are ready to eat them, thaw them in the fridge overnight.
Best Practices for Keeping Fresh
To keep your cheesecake cups fresh, avoid adding toppings until you serve them. This way, the marshmallows and chocolate shavings won’t get soggy. If you notice any extra moisture in the container, pat it dry gently. This helps keep the texture perfect. Always check for any signs of spoilage before eating.
FAQs
Can I use a different type of chocolate?
Yes, you can use any chocolate you like. Dark chocolate adds a rich taste. Milk chocolate gives a sweeter flavor. You can even use white chocolate for a fun twist. Just be sure to chop it into small pieces for easy mixing.
How long do the cheesecake cups last in the fridge?
These cheesecake cups last for about 3 to 5 days in the fridge. Keep them in a sealed container to stay fresh. If you want to enjoy them later, make sure they are well covered. The longer they sit, the softer the crust may become.
Is it possible to make this recipe gluten-free?
Yes, you can make this recipe gluten-free! Use gluten-free graham crackers or a similar substitute for the crust. Check the labels to ensure they are truly gluten-free. This way, you can still enjoy the same great taste without the gluten.
What can I substitute for cream cheese?
If you need a substitute for cream cheese, try Greek yogurt. It gives a creamy texture and tangy taste. Another option is mascarpone cheese, which is richer and sweeter. Silken tofu also works for a dairy-free choice. Just blend it until smooth before mixing.
You now know how to make amazing cheesecake cups. We discussed essential ingredients, step-by-step instructions, and helpful tips. You can try different flavors and toppings to make them your own. Remember to store your leftovers right to keep them fresh. This dessert is fun, easy, and perfect for any occasion. Enjoy your cheesecake cups and let your creativity shine!
