Looking for a warm, hearty meal that hits the spot? Classic chili delivers flavorful comfort in every bite! This dish combines rich ground beef (or a plant-based alternative) with fresh vegetables, beans, and a special blend of spices. In this post, I’ll guide you through easy steps to create your own bowl of chili bliss, packed with tips and variations to suit your taste. Let’s dive in!
Ingredients
Main Ingredients
– 1 lb ground beef or plant-based alternative
– 1 medium onion, diced
– 2 cloves garlic, minced
– 1 bell pepper, diced
– 1 can (14.5 oz) diced tomatoes
– 1 can (15 oz) kidney beans, drained and rinsed
– 1 can (15 oz) black beans, drained and rinsed
– 1 can (8 oz) tomato sauce
Classic chili starts with hearty ingredients. The ground beef gives it a rich flavor. If you prefer a plant-based option, use lentils or a meat substitute.
Next, add vegetables. Diced onions and bell peppers add sweetness and crunch. Garlic adds a lovely aroma and depth. You can mix colors of bell peppers for a fun touch.
Beans are key. Kidney beans and black beans boost protein and fiber. Diced tomatoes and tomato sauce create a thick base. They add moisture and tang.
Spices and Seasonings
– 2 tablespoons chili powder
– 1 teaspoon cumin
– 1 teaspoon smoked paprika
– 1/2 teaspoon cayenne pepper
– Salt and pepper to taste
Spices bring chili to life. Chili powder is a must for warmth. Cumin adds earthiness, while smoked paprika gives depth. For heat, add cayenne pepper, adjusting to your taste. Salt and pepper enhance all the flavors.
Optional Toppings
– Fresh cilantro, chopped
– Sour cream
– Shredded cheese
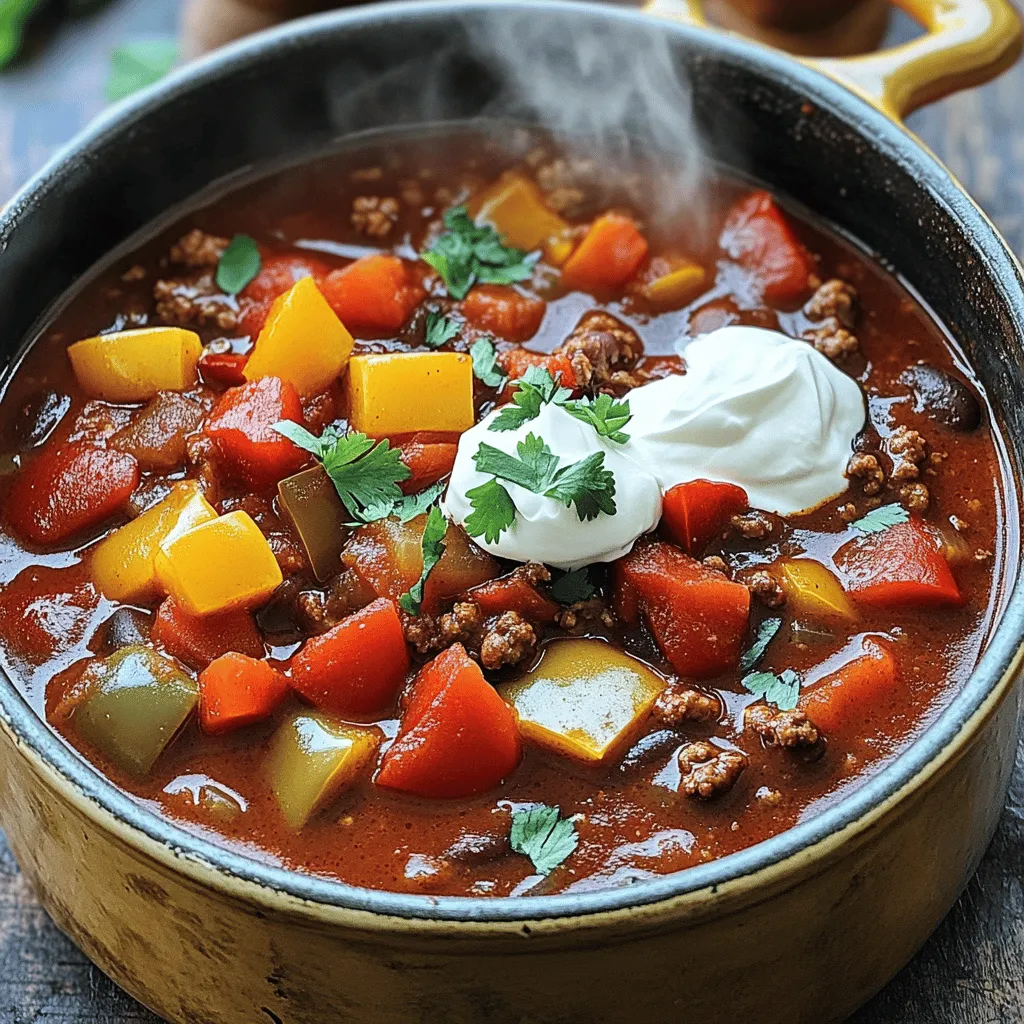
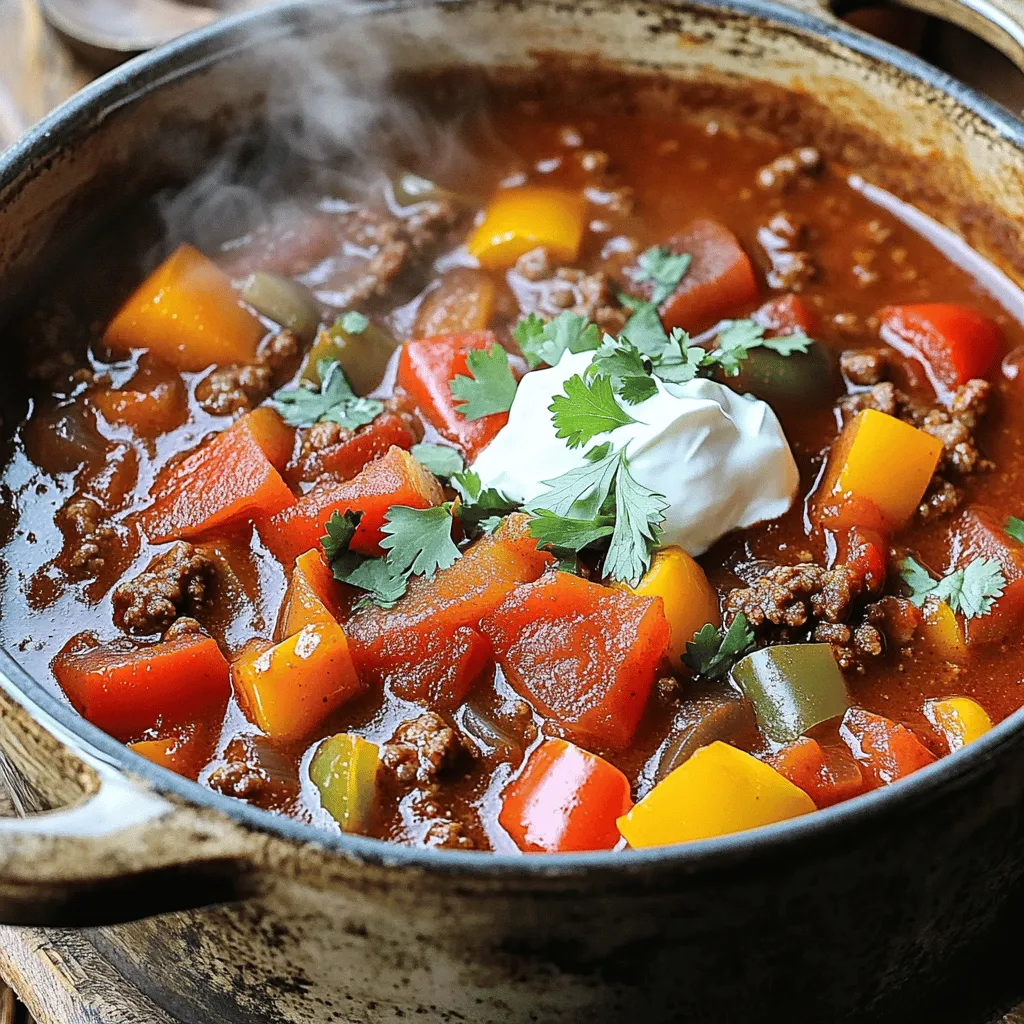
Toppings make chili special. Fresh cilantro adds brightness. Sour cream brings creaminess and cools the spice. Shredded cheese adds richness. Serve these on the side for a fun DIY experience!
Step-by-Step Instructions
Preparation Steps
– Heat 2 tablespoons of olive oil in a large pot over medium heat.
– Add 1 diced onion and 1 diced bell pepper. Sauté until the onion turns clear, about 5 minutes.
– Stir in 2 minced garlic cloves and cook for 1 more minute until it smells good.
– Add 1 pound of ground beef (or a plant-based option) to the pot. Brown the meat for 6 to 8 minutes. Drain any fat if needed.
Cooking the Chili
– Combine the sautéed vegetables and meat with 1 can of diced tomatoes, 1 can of kidney beans, 1 can of black beans, and 1 can of tomato sauce in the pot.
– Add 2 tablespoons of chili powder, 1 teaspoon of cumin, 1 teaspoon of smoked paprika, and 1/2 teaspoon of cayenne pepper. Don’t forget salt and pepper to taste.
– Mix it all well. Bring the chili to a gentle simmer, then lower the heat. Cover the pot and let it cook for at least 30 minutes, stirring now and then. For more flavor, simmer for up to 1 hour.
Final Touches
– Before serving, taste your chili. Adjust the seasoning if needed.
– Serve it hot, topped with fresh cilantro, sour cream, and shredded cheese if you like. Enjoy your bowl of comfort!
Tips & Tricks
Best Practices for Flavor
Simmering chili brings out its rich taste. Let it cook slowly. This helps all the flavors mix well. A good simmer time is at least 30 minutes. If you have time, an hour is even better.
Adjusting seasoning is very important. Always taste your chili before serving. You might need more salt, pepper, or spices. Every batch can be a bit different.
Cooking Methods
You can cook chili on the stovetop or in a slow cooker. Stovetop cooking is quicker. It allows you to enjoy your chili faster. A slow cooker makes it easy to set and forget. Just let it cook while you go about your day.
To make chili in an Instant Pot, start with sautéing the veggies and meat first. Then add the rest of the ingredients. Set it to cook on high pressure for about 20 minutes. Release the pressure, and your chili is ready!
Presentation Tips
Garnishing chili makes it look great. Fresh cilantro adds a pop of color. You can also top it with sour cream or shredded cheese. These toppings add creaminess and flavor.
Serve chili with cornbread or tortilla chips. These sides are perfect for scooping up the chili. You can also pair chili with a simple salad for a fresh contrast.
Variations
Dietary Alternatives
You can easily change classic chili to fit your needs. If you like a vegetarian or vegan dish, swap the ground beef for a plant-based option. Lentils or mushrooms add a nice texture and flavor. For a gluten-free chili, make sure your spices and canned goods are labeled gluten-free. Most beans and tomatoes are safe to use.
Spice Levels
Adjusting the heat in your chili is simple. Start with less cayenne pepper if you prefer a milder taste. You can always add more later. Want more heat? Add some diced jalapeños or a splash of hot sauce. Corn can also bring a sweet crunch and balance the spice.
Regional Twists
Chili changes by region. Texas-style chili often uses only meat and spices, skipping the beans. Cincinnati chili is sweet and served over spaghetti. If you want a Mexican twist, add ingredients like corn, cilantro, or lime juice. Each version has its own charm, so feel free to experiment!
Storage Info
Storing Leftovers
After you enjoy your chili, store leftovers right away. Let it cool down first. Place it in a sealed container. This keeps the chili fresh and safe. Store it in the fridge. Classic chili lasts about 3 to 4 days.
Freezing Chili
Freezing chili is easy and a smart choice. First, let it cool completely. Then, pour it into freezer-safe bags or containers. Remove as much air as you can. Label the bags with the date. Chili can stay frozen for about 3 to 6 months.
When you want to eat it, thaw it in the fridge overnight. To reheat, you can use the stove or microwave. Stir it well while heating to ensure it warms evenly.
Using Leftover Chili
Got leftover chili? Great! You can make many fun dishes. Add chili to nachos for a tasty snack. Use it as a topping on baked potatoes. You can also mix it into pasta for a quick meal. Chili makes a delicious base for chili cheese fries too. There are endless ways to enjoy leftover chili!
FAQs
What is the best type of meat for classic chili?
Ground beef is the most common choice for classic chili. It gives the dish a rich, hearty flavor. If you want a different taste, try ground turkey or chicken. Both options are leaner but still tasty. For a meat-free option, use lentils or a plant-based ground substitute. These alternatives add protein and flavor without meat.
Can I make chili ahead of time?
Yes, making chili ahead of time is great! It allows the flavors to mix and deepen. Chili actually tastes better the next day, so it’s perfect for meal prep. Just store it in the fridge for up to three days. If you want to keep it longer, freeze it. It can last up to six months in the freezer.
How to thicken chili if it’s too thin?
If your chili is too thin, you have a few options. You can simmer it longer, which helps reduce the liquid. Another way is to mash some beans and stir them in. This adds body and keeps the flavor strong. You can also add a bit of cornmeal or masa harina. This thickens without changing the taste much.
We explored how to make delicious chili through simple steps. You learned about essential ingredients, spices, and cooking methods. I shared tips for enhancing flavors and presented variations to suit different diets. Storing and using leftovers can add value to your meals too.
Remember, making chili is about personal taste. Don’t be afraid to try new ingredients or adjust heat levels. With practice, your chili can be your signature dish. Enjoy the journey of creating your perfect bowl!
