Craving a sweet treat without the fuss? I have just the solution! My No Bake Oreo Cheesecake Cups are delightfully simple and perfect for any occasion. With just a few ingredients and easy steps, you’ll create a creamy, dreamy dessert that will impress your friends and family. Ready to dive into this delicious recipe? Let’s get started on making your new favorite treat!
Ingredients
List of Ingredients for No Bake Oreo Cheesecake Cups
To make No Bake Oreo Cheesecake Cups, you need these simple ingredients:
– 16 Oreo cookies, crushed (plus extra for garnish)
– 2 tablespoons unsalted butter, melted
– 1 (8 oz) package cream cheese, softened
– 1/2 cup powdered sugar
– 1 teaspoon vanilla extract
– 1 cup heavy cream
– 1/2 cup sour cream
– Pinch of salt
Measurements and Substitutions
When measuring your ingredients, precision matters. Use a kitchen scale for accuracy. If you don’t have a scale, measuring cups work well too. You can swap out the sour cream for Greek yogurt if you want a tangy twist. For a lighter version, choose low-fat cream cheese and heavy cream. The taste will change a bit but still be yummy!
Tips for Selecting Quality Ingredients
Always pick fresh ingredients. Check the cream cheese for a smooth texture and no lumps. When choosing Oreos, look for a box that’s not damaged. Ensure the heavy cream is fresh and has not been opened for long. Fresh ingredients make a big difference in taste. When you buy butter, go for unsalted for better control over the flavor. Happy baking!
Step-by-Step Instructions
Preparing the Oreo Crust
To make the crust, you need 16 Oreo cookies and 2 tablespoons of melted butter. Start by crushing the Oreo cookies in a bowl. You can use a rolling pin or a food processor. Make sure they are fine crumbs. Then, mix the crumbs with the melted butter. Stir until every crumb is coated.
Next, take your serving cups. Spoon about 1.5 tablespoons of the Oreo mixture into each cup. Press it down firmly. This will help the crust hold its shape later.
Making the Cheesecake Filling
Now, let’s make the cheesecake filling. Grab an 8 oz package of softened cream cheese. In a large bowl, beat the cream cheese with a hand mixer. Mix until it is smooth and creamy.
Gradually add 1/2 cup of powdered sugar, 1 teaspoon of vanilla extract, and a pinch of salt. Keep mixing until everything is well blended.
In another bowl, whip 1 cup of heavy cream. Beat it until stiff peaks form. This means the cream should stand up when you lift the beaters. Gently fold this whipped cream into the cream cheese mixture. Be careful not to deflate the whipped cream. Finally, stir in 1/2 cup of sour cream until just mixed.
Assembling the Cups and Chilling
Now it’s time to assemble your cheesecake cups. Spoon the cheesecake filling over the Oreo crust in each cup. Smooth the top with a spatula or the back of a spoon.
Once filled, cover the cups with plastic wrap. Refrigerate them for at least 4 hours. For the best flavor, let them chill overnight.
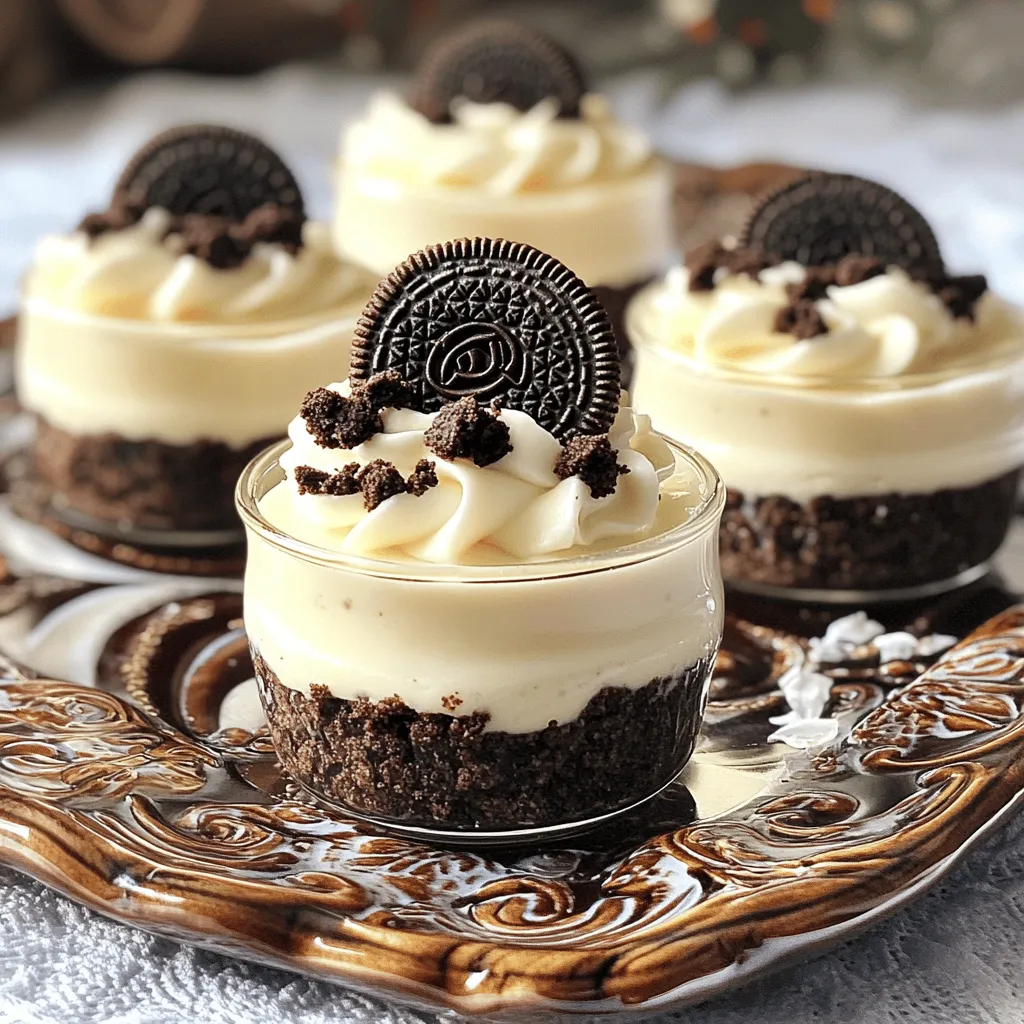
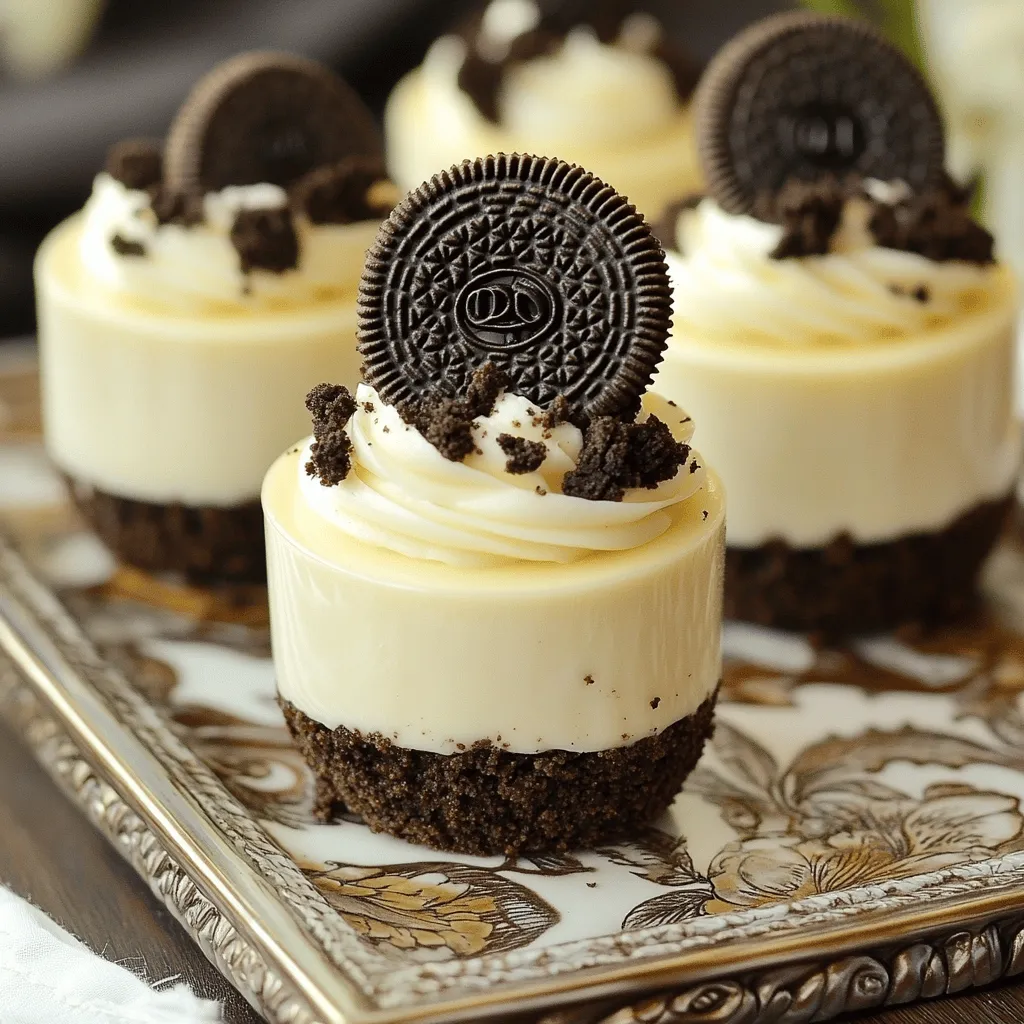
Before serving, top each cup with crushed Oreo cookies for garnish. You can also add a whole Oreo cookie on top for a special touch. Enjoy your delightful treat!
Tips & Tricks
Best Practices for Cream Cheese Mixture
Use softened cream cheese for the best texture. You can leave it out for 30 minutes before mixing. This step makes it easier to blend. Beat it until it is smooth with no lumps. This creates a creamy filling. Gradually add the powdered sugar and vanilla. Mixing slowly helps keep it fluffy. Always remember to add a pinch of salt for balance. It makes a big difference in flavor.
How to Achieve Perfect Whipped Cream
Chill your mixing bowl and beaters before you start. Cold tools help the cream whip better. Pour the heavy cream into the bowl and beat on medium speed. Keep whipping until stiff peaks form. This means the cream holds its shape well. Be careful not to over-whip, or it may turn grainy. Gently fold the whipped cream into the cream cheese mixture. This keeps the filling light and airy.
Serving Suggestions to Impress Guests
Serve the cheesecake cups on a pretty tray. You can use mini spoons for a cute touch. For extra flair, top each cup with a whole Oreo or some fresh berries. Crushed Oreos on top add a nice crunch and look great. You can also drizzle chocolate sauce on top for more flavor. These small details make your dessert stand out and delight your guests.
Variations
Flavor Variations
You can change the flavor of your No Bake Oreo Cheesecake Cups. For a minty twist, use mint Oreo cookies instead of regular ones. This gives a fresh taste that pairs well with the cream cheese. You can also try peanut butter. Just mix in some creamy peanut butter into the cheesecake filling. It adds a nutty flavor that chocolate lovers will enjoy. Want a fruity touch? Add some crushed strawberries or raspberries to the filling. This gives a bright and fun flavor that balances well with the rich cheesecake.
Healthier Substitutions
If you want a lighter version, swap out regular cream cheese for low-fat cream cheese. You can also use Greek yogurt in place of sour cream. This adds protein while keeping it creamy. Instead of heavy cream, try using whipped coconut cream for a dairy-free option. You can also use sugar substitutes like stevia or monk fruit sweetener in place of powdered sugar. These changes help make your dessert a bit healthier without losing flavor.
Different Serving Containers
The way you serve your cheesecake cups can change the whole vibe. Mason jars are great for a cute, rustic look. They are also easy to stack and store. Small dessert glasses add a touch of elegance when serving guests. If you want a fun twist, use clear plastic cups for parties. This makes cleanup easy. No matter what container you choose, make sure it is clear so the layers show. This adds to the visual appeal of your delicious treats.
Storage Info
How to Store Leftover Cheesecake Cups
To keep your No Bake Oreo Cheesecake Cups fresh, store them in the fridge. Use an airtight container to prevent them from drying out. If you have plastic wrap, cover each cup tightly. This way, they stay moist and tasty for a longer time.
Freezing Tips for Grocery Storage
Freezing these cheesecake cups is a great way to save them for later. First, make sure they are fully chilled. Then, place each cup in a freezer-safe bag. Remove as much air as you can. This helps to stop freezer burn. When you’re ready to eat, let them thaw in the fridge overnight.
Shelf Life and Best Practices for Enjoying Later
These cheesecake cups can last up to five days in the fridge. For the best taste, enjoy them within the first three days. If frozen, plan to eat them within three months. Always check for any change in texture or smell before enjoying, just to be safe.
FAQs
Can I make No Bake Oreo Cheesecake Cups ahead of time?
Yes, you can make these cheesecake cups a day in advance. This treat tastes even better after chilling overnight. The flavors mix well, creating a rich taste. Just cover them tightly with plastic wrap. They will stay fresh in the fridge.
How long do these cheesecake cups last in the fridge?
These cheesecake cups last up to four days in the fridge. Keep them sealed to avoid absorbing other odors. If they look or smell off, toss them. Always trust your senses for safety.
Can I use different cookies for the crust?
Absolutely! You can swap Oreo cookies for other cookies. Try chocolate wafers, graham crackers, or even vanilla cookies. Each type will add a unique flavor. Just crush them and follow the same steps. Get creative and have fun!
You now have the tools to make No Bake Oreo Cheesecake Cups. We covered all the ingredients, tools, and steps. You learned tips to pick quality items and best practices for a creamy filling. Try the fun flavor variations for a personal touch. Store leftovers correctly, so they stay fresh. With these ideas, you can impress guests and enjoy tasty treats anytime. Now, it’s time to gather your ingredients and start making these easy, delicious cups!
