If you crave something rich and delicious, then you’re in the right place! This Decadent Black Forest Cake recipe is simple to follow and perfect for any occasion. With layers of moist chocolate cake, sweet cherries, and creamy whipped topping, you’ll find an easy joy in every bite. Let’s dive into the world of baking and create a show-stopping dessert that will impress everyone. Ready to start? Let’s go!
Ingredients
List of Ingredients for Decadent Black Forest Cake
To make a perfect Black Forest Cake, gather these ingredients:
– 2 cups all-purpose flour
– 1 ¾ cups granulated sugar
– ¾ cup unsweetened cocoa powder
– 1 ½ teaspoons baking powder
– 1 ½ teaspoons baking soda
– 1 teaspoon salt
– 2 large eggs
– 1 cup whole milk
– ½ cup vegetable oil
– 2 teaspoons vanilla extract
– 1 cup boiling water
– 2 cups heavy cream
– ¼ cup powdered sugar
– 1 teaspoon vanilla extract (for cream)
– 1 jar (12 oz) sour cherries, drained (reserve juice)
– Dark chocolate shavings for garnish
– Maraschino cherries for decoration
Optional Toppings and Garnishes
For a special touch, consider these optional toppings:
– Fresh berries like strawberries or raspberries
– Chopped nuts, such as walnuts or almonds
– A drizzle of chocolate sauce
– Mint leaves for a pop of color
Suggested Tools and Equipment for Baking
Having the right tools makes baking easier. Here’s what you need:
– Two 9-inch round cake pans
– Mixing bowls
– Electric mixer
– Sifter
– Wire rack for cooling
– Spatula for spreading cream
– Measuring cups and spoons
This list will help you gather everything for your Decadent Black Forest Cake. Enjoy the baking process!
Step-by-Step Instructions
Prepping the Cake Batter
To start, we need to make the cake batter. First, preheat your oven to 350°F (175°C). Grease and flour two 9-inch round cake pans. In a large bowl, sift together the flour, sugar, cocoa powder, baking powder, baking soda, and salt. This helps mix everything well. Next, add the eggs, milk, vegetable oil, and vanilla extract. Beat this mix with an electric mixer on medium speed for about 2 minutes. It should look smooth and creamy. Finally, carefully stir in the boiling water. The batter will be thin, but that’s okay!
Baking the Cake Layers
Once your batter is ready, pour it evenly into the prepared pans. Bake in your preheated oven for 30 to 35 minutes. To check if they’re done, insert a toothpick into the center. If it comes out clean, your cakes are ready! After baking, let the cakes cool in the pans for 10 minutes. Then, transfer them to a wire rack to cool completely. This cooling step is crucial for a great texture.
Assembling the Black Forest Cake
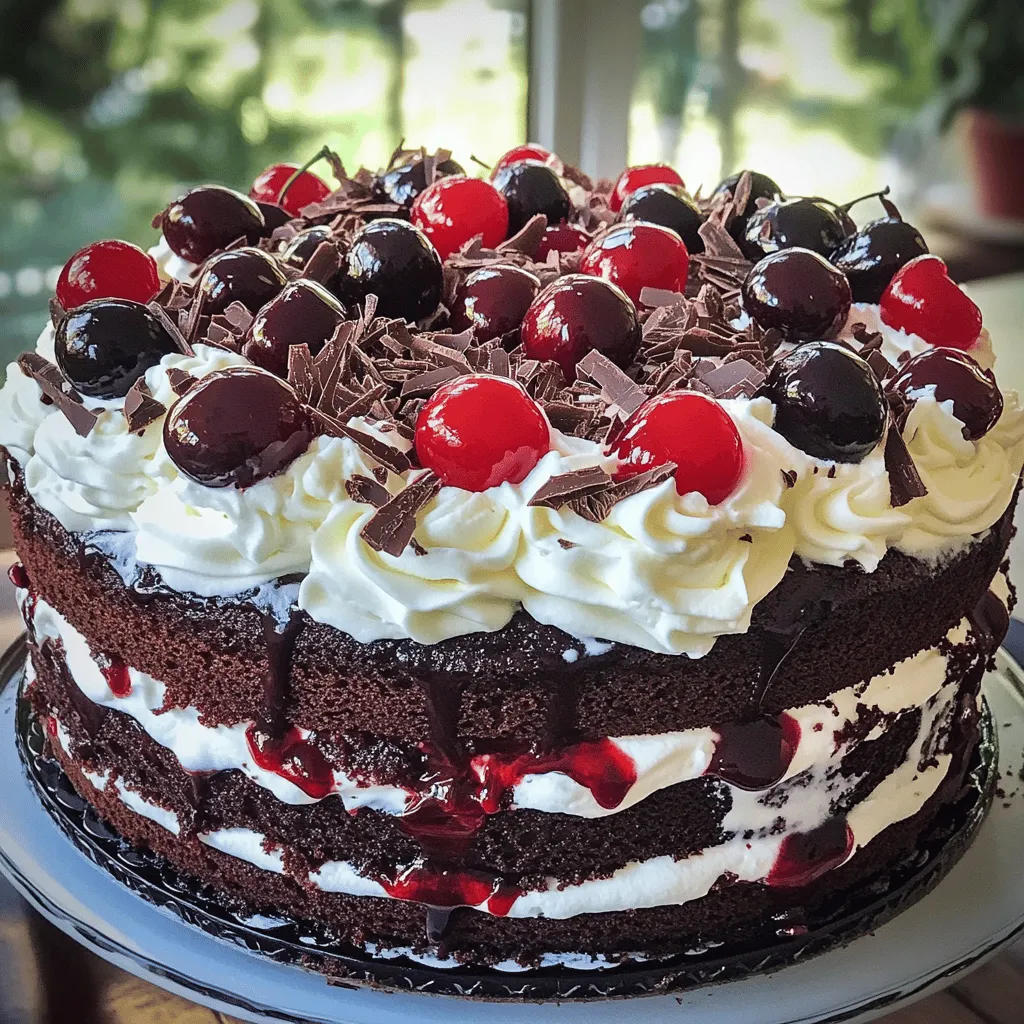
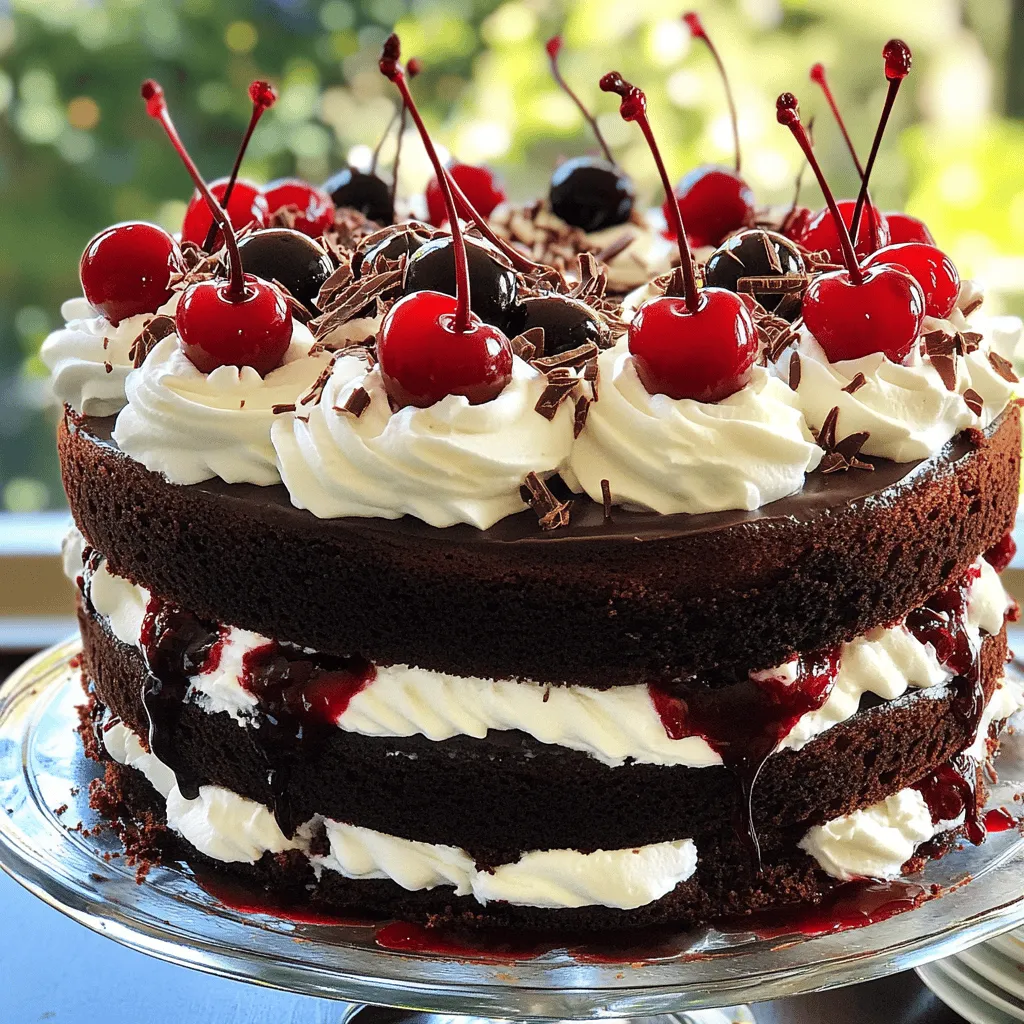
Now comes the fun part: assembling your cake! Once the cakes are cool, slice each one in half horizontally. This will give you four layers. Place one layer on a serving plate. Soak it lightly with some reserved cherry juice. Next, spread a layer of whipped cream on top and sprinkle some drained cherries over it. Repeat this for the next two layers. Finally, for the top layer, spread whipped cream and decorate with chocolate shavings and maraschino cherries. Your Black Forest Cake is now ready to enjoy! For a detailed list of ingredients, check out the Full Recipe.
Tips & Tricks
Achieving the Perfect Cake Texture
To get a soft and moist cake, use room temperature ingredients. This helps the batter mix better. Always sift your flour and cocoa powder. This adds air and lightens the texture. When mixing, don’t overbeat. Just mix until combined. Overmixing can make the cake dense.
Tips for Whipping Cream
Chill your mixing bowl and beaters before whipping cream. Cold tools help the cream whip up faster. Use heavy cream for the best results. Start at a low speed, then increase to medium. Watch for soft peaks. This means it is ready. If you beat too long, it can turn to butter.
How to Properly Soak Cake Layers
Soaking the cake layers keeps them moist. Use the reserved cherry juice from your sour cherries. Brush it lightly on each layer. Don’t soak too much, or the cake will be soggy. Aim for just enough juice to enhance flavor. This step adds a nice cherry taste to every bite.
Explore the full recipe for more delicious details!
Variations
Gluten-Free Black Forest Cake Option
You can make a gluten-free version of Black Forest cake. Use almond flour or a gluten-free blend. This helps keep the cake moist and tasty. Make sure to check that all your ingredients, like cocoa powder, are gluten-free. Follow the same steps in the recipe. The taste will still be rich and delicious.
Vegan Black Forest Cake Recipe
To make a vegan Black Forest cake, swap eggs with flaxseed or applesauce. Use almond milk or any plant-based milk instead of whole milk. Replace vegetable oil with coconut oil or applesauce. For whipped cream, use coconut cream instead of heavy cream. This version is just as tasty and perfect for everyone.
Alternative Toppings and Flavor Enhancements
You can switch up the toppings on your Black Forest cake. Try using fresh raspberries or strawberries for a twist. Add a splash of almond extract to the whipped cream for a different flavor. You can also use white chocolate shavings instead of dark chocolate. These small changes can make a big difference and keep the cake exciting. For the full recipe, check out the detailed steps above.
Storage Info
How to Store Leftover Cake
To keep your leftover Black Forest cake fresh, wrap it well. Use plastic wrap or aluminum foil. Store it in the fridge. It will stay tasty for up to four days. Make sure to cover the cake layers to keep them moist.
Freezing Black Forest Cake
You can freeze Black Forest cake if you have extra. First, let the cake cool completely. Slice it if you prefer single pieces. Wrap each slice in plastic wrap, then place them in a freezer-safe bag. You can freeze it for up to three months. When you’re ready to eat, just thaw it in the fridge overnight.
Best Practices for Reheating Cake
When reheating, take care to keep the cake moist. The best way is to use the microwave. Place a slice on a microwave-safe plate. Cover it with a damp paper towel. Heat for 10-15 seconds, checking often. You want it warm, not hot. Enjoy your cake with a touch of fresh whipped cream on top for a treat.
FAQs
How long can I store a Black Forest Cake?
You can store a Black Forest Cake for about 3 to 5 days in the fridge. Make sure to cover it well with plastic wrap or place it in an airtight container. The whipped cream may lose some fluffiness over time, but the flavor stays great. If you want to keep it longer, consider freezing it. Wrap individual slices tightly in plastic wrap and then in foil. This way, it can last up to 3 months.
Can I use a different fruit instead of cherries?
Yes, you can use other fruits! Raspberries or strawberries work well in this cake. They add a nice tartness that complements the rich chocolate. Make sure to adjust the sweetness of the whipped cream if needed. You can also blend the fruits into a puree for a different texture. Just keep in mind the fruit should not be too juicy, as it may make the cake soggy.
What is the origin of Black Forest Cake?
Black Forest Cake comes from Germany. Its name is derived from the Black Forest region, known for its dense woods and cherry trees. The cake is traditionally made with layers of chocolate sponge, cherries, and whipped cream. It first appeared in the early 20th century. The drink Kirsch, a cherry brandy, is often used to soak the cake layers, adding a unique flavor. This cake has become a favorite worldwide for its rich taste and stunning look.
You learned how to create a delicious Black Forest Cake. We covered ingredients, step-by-step baking, and helpful tips. You also saw fun variations and how to store your cake. Remember, baking is about experimenting and enjoying the process. Whether you follow my tips or try your twist, have fun making this tasty treat! Your cake can impress and delight anyone. Dive into the fun of baking, and enjoy each layer of flavor.
