 for more ideas and instructions! To keep your French butter cake fresh, store it in an airtight container. This helps retain moisture and flavor. If you do not have a container, wrap it tightly in plastic wrap. Keep the cake at room temperature for up to three days. If you want to keep it longer, refrigeration is an option. Just note that the cake might dry out a bit in the fridge. You can freeze this cake for later use. First, let the cake cool completely. Then, wrap it in plastic wrap and aluminum foil. This double-layer helps prevent freezer burn. The cake can last in the freezer for up to three months. When you are ready to enjoy it, move it to the fridge overnight to thaw. If you want it faster, leave it at room temperature for a few hours. If you want to enjoy warm cake, reheating is easy. Place a slice in the microwave for about 10-15 seconds. This warms the cake without drying it out. You can also use the oven. Preheat it to 350°F (175°C) and heat the cake in a foil-covered dish for about 10-15 minutes. This method keeps the cake moist and tasty. This cake can last up to five days. Store it in an airtight container at room temperature. If you want to keep it fresh longer, place it in the fridge. However, this may change the cake's texture a bit. You can also freeze the cake for up to three months. Just wrap it well in plastic wrap and foil. To enjoy it later, let it thaw in the fridge overnight. Yes, you can make this cake a day before your event. It tastes great even after a night of resting. Just let it cool completely. Then, wrap it in plastic wrap to keep it moist. You can also prepare the batter a few hours ahead. Just keep it in the fridge and bake it when you are ready. This will save time and let you enjoy the fun of your gathering. If your cake sinks in the middle, it may be due to overmixing. Mixing too much can add air, making the cake rise, then collapse. Also, ensure your oven is at the right temperature. An oven that is too hot can cause the cake to rise too fast. If your cake still sinks, try using less baking powder next time. This way, you can avoid the issue and enjoy a perfect cake. You now know the main ingredients needed for a delicious cake, from butter to eggs. I shared useful tips to enhance flavor and ensure even baking. You learned how to store and freeze your cake, plus how to tackle common baking issues. Remember, baking should be fun and creative. Experiment with flavors and variations to make it your own. With these steps and insights, you can bake a fantastic cake that impresses everyone. Enjoy your tasty creations!](https://therecipehatch.com/wp-content/uploads/2025/07/f7d89e5b-54f0-412e-a6ae-bd09f23e49b5.webp)
Welcome to the world of baking bliss with my Ridiculously Easy French Butter Cake Delight Recipe! If you crave a rich, buttery treat that’s simple to make, you’ve come to the right place. I’ll guide you step-by-step through a delightful process that even beginners can master. Let’s explore the key ingredients, straightforward instructions, and fun tips that will make your baking experience a joy. Get ready to impress everyone with this tasty cake!
Ingredients
When making Ridiculously Easy French Butter Cake, you’ll need some key ingredients. Each one plays a big role in creating that moist and rich flavor.
Main Ingredients
– 1 cup (2 sticks) unsalted butter, melted
– 1 cup granulated sugar
– 4 large eggs
– 1 teaspoon vanilla extract
These main ingredients form the base of the cake. Unsalted butter gives a rich taste. Granulated sugar adds sweetness, while eggs help bind everything. Vanilla extract brings a warm aroma and flavor.
Dry Ingredients
– 2 cups all-purpose flour
– 1 teaspoon baking powder
– 1/2 teaspoon salt
The dry ingredients are just as important. All-purpose flour gives structure, while baking powder helps the cake rise. Salt enhances the flavors, making everything more balanced.
Optional Add-ins
– Zest of 1 lemon (optional)
– Powdered sugar for dusting (optional)
For a twist, you can add lemon zest. It adds a bright flavor that pairs well with the cake. Dusting with powdered sugar gives a nice finish. It makes the cake look more appealing and adds a bit of sweetness.
You can find the full recipe and instructions to create your own cake. Enjoy baking!
Step-by-Step Instructions
Preparation
– Preheat your oven to 350°F (175°C).
– Grease a 9-inch round cake pan and line the bottom with parchment paper.
– In a large mixing bowl, pour in the melted butter and sugar.
– Whisk them together until they blend well and look creamy.
– Add the eggs one by one, mixing after each.
– Stir in the vanilla extract and lemon zest if you want a fresh taste.
Combine Ingredients
– In another bowl, whisk together the flour, baking powder, and salt.
– Gradually add the dry mix to the wet mix.
– Use a spatula to fold gently.
– Stop when you see a few streaks of flour. Overmixing can make the cake tough.
Baking
– Pour the batter into the prepared cake pan.
– Use a spatula to smooth the top.
– Bake for 40-45 minutes. The cake is done when it is golden brown.
– Insert a toothpick into the center; it should come out clean.
– Let the cake cool in the pan for 10 minutes.
– Carefully move it to a wire rack to cool completely.
For the full recipe, don’t forget to check out the complete guide.
Tips & Tricks
Baking Techniques
To ensure even baking, always preheat your oven. This helps the cake rise well. Use an oven thermometer to check the right temperature. Place your cake in the center of the oven for the best heat flow.
Do not overmix your batter. Overmixing can make the cake dense. Mix until you see no dry flour. A few lumps are okay, as they will bake out.
Flavor Enhancements
Adding citrus zest can brighten the cake’s flavor. Lemon or orange zest gives a fresh twist. Just a teaspoon can make a big difference. You can also try using different extracts. Almond or coconut extract adds a unique taste.
Presentation Suggestions
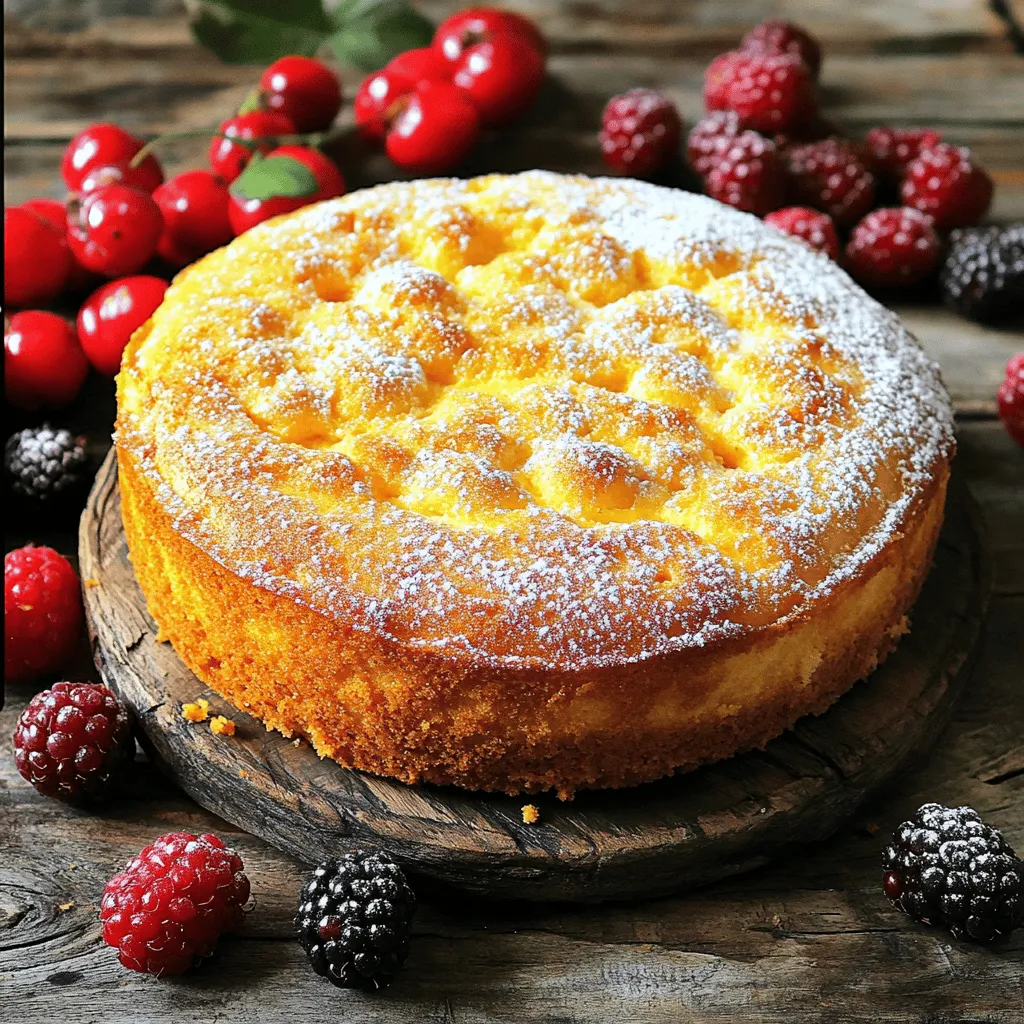
For elegant serving, dust the cooled cake with powdered sugar. This adds a lovely touch. You can serve it with fresh berries or a dollop of whipped cream. They make the cake look fancy and taste great. For a colorful pop, use mixed fruits on the side.
Variations
Flavor Variations
You can easily switch up the flavor of your French butter cake. Here are two tasty options:
– Chocolate French butter cake: Add 1/2 cup of cocoa powder to the dry mix. This gives the cake a rich chocolate flavor. You can also use chocolate chips for an extra treat.
– Almond-flavored cake: Swap the vanilla extract for almond extract. This gives the cake a nutty taste. You can also add slivered almonds for a nice crunch.
Dietary Adjustments
Not everyone can enjoy the same cake. Here are ways to make it more inclusive:
– Gluten-free options: Use a gluten-free flour blend instead of all-purpose flour. This keeps the texture nice while making it safe for those with gluten issues. Just ensure your baking powder is also gluten-free.
– Vegan substitutions: Replace the eggs with flax eggs. Mix 1 tablespoon of ground flaxseed with 2.5 tablespoons of water for each egg. Use a vegan butter for the same creamy texture.
Seasonal Adaptations
You can make this cake fit any season with a few fun changes:
– Fall-themed additions: Add spices like cinnamon or nutmeg to the batter. This gives a warm flavor perfect for autumn. You can also include grated apple for added moisture.
– Summer fruit pairings: Top the cake with fresh berries or peaches. You can also fold in diced peaches into the batter for a juicy surprise.
Explore the [Full Recipe](#) for more ideas and instructions!
Storage Info
Best Storage Practices
To keep your French butter cake fresh, store it in an airtight container. This helps retain moisture and flavor. If you do not have a container, wrap it tightly in plastic wrap. Keep the cake at room temperature for up to three days. If you want to keep it longer, refrigeration is an option. Just note that the cake might dry out a bit in the fridge.
Freezing Tips
You can freeze this cake for later use. First, let the cake cool completely. Then, wrap it in plastic wrap and aluminum foil. This double-layer helps prevent freezer burn. The cake can last in the freezer for up to three months. When you are ready to enjoy it, move it to the fridge overnight to thaw. If you want it faster, leave it at room temperature for a few hours.
Reheating the Cake
If you want to enjoy warm cake, reheating is easy. Place a slice in the microwave for about 10-15 seconds. This warms the cake without drying it out. You can also use the oven. Preheat it to 350°F (175°C) and heat the cake in a foil-covered dish for about 10-15 minutes. This method keeps the cake moist and tasty.
FAQs
How long does the cake last?
This cake can last up to five days. Store it in an airtight container at room temperature. If you want to keep it fresh longer, place it in the fridge. However, this may change the cake’s texture a bit. You can also freeze the cake for up to three months. Just wrap it well in plastic wrap and foil. To enjoy it later, let it thaw in the fridge overnight.
Can I make this cake in advance?
Yes, you can make this cake a day before your event. It tastes great even after a night of resting. Just let it cool completely. Then, wrap it in plastic wrap to keep it moist. You can also prepare the batter a few hours ahead. Just keep it in the fridge and bake it when you are ready. This will save time and let you enjoy the fun of your gathering.
What can I do if my cake sinks in the middle?
If your cake sinks in the middle, it may be due to overmixing. Mixing too much can add air, making the cake rise, then collapse. Also, ensure your oven is at the right temperature. An oven that is too hot can cause the cake to rise too fast. If your cake still sinks, try using less baking powder next time. This way, you can avoid the issue and enjoy a perfect cake.
You now know the main ingredients needed for a delicious cake, from butter to eggs. I shared useful tips to enhance flavor and ensure even baking. You learned how to store and freeze your cake, plus how to tackle common baking issues. Remember, baking should be fun and creative. Experiment with flavors and variations to make it your own. With these steps and insights, you can bake a fantastic cake that impresses everyone. Enjoy your tasty creations!
 for more ideas and instructions! To keep your French butter cake fresh, store it in an airtight container. This helps retain moisture and flavor. If you do not have a container, wrap it tightly in plastic wrap. Keep the cake at room temperature for up to three days. If you want to keep it longer, refrigeration is an option. Just note that the cake might dry out a bit in the fridge. You can freeze this cake for later use. First, let the cake cool completely. Then, wrap it in plastic wrap and aluminum foil. This double-layer helps prevent freezer burn. The cake can last in the freezer for up to three months. When you are ready to enjoy it, move it to the fridge overnight to thaw. If you want it faster, leave it at room temperature for a few hours. If you want to enjoy warm cake, reheating is easy. Place a slice in the microwave for about 10-15 seconds. This warms the cake without drying it out. You can also use the oven. Preheat it to 350°F (175°C) and heat the cake in a foil-covered dish for about 10-15 minutes. This method keeps the cake moist and tasty. This cake can last up to five days. Store it in an airtight container at room temperature. If you want to keep it fresh longer, place it in the fridge. However, this may change the cake's texture a bit. You can also freeze the cake for up to three months. Just wrap it well in plastic wrap and foil. To enjoy it later, let it thaw in the fridge overnight. Yes, you can make this cake a day before your event. It tastes great even after a night of resting. Just let it cool completely. Then, wrap it in plastic wrap to keep it moist. You can also prepare the batter a few hours ahead. Just keep it in the fridge and bake it when you are ready. This will save time and let you enjoy the fun of your gathering. If your cake sinks in the middle, it may be due to overmixing. Mixing too much can add air, making the cake rise, then collapse. Also, ensure your oven is at the right temperature. An oven that is too hot can cause the cake to rise too fast. If your cake still sinks, try using less baking powder next time. This way, you can avoid the issue and enjoy a perfect cake. You now know the main ingredients needed for a delicious cake, from butter to eggs. I shared useful tips to enhance flavor and ensure even baking. You learned how to store and freeze your cake, plus how to tackle common baking issues. Remember, baking should be fun and creative. Experiment with flavors and variations to make it your own. With these steps and insights, you can bake a fantastic cake that impresses everyone. Enjoy your tasty creations!](https://therecipehatch.com/wp-content/uploads/2025/07/f7d89e5b-54f0-412e-a6ae-bd09f23e49b5-300x300.webp)