![To make crispy baked chicken tenders, you will need these key ingredients: - 1 lb chicken breast, cut into strips - 1 cup buttermilk - 1 cup all-purpose flour - 1 cup Panko breadcrumbs - 1 teaspoon garlic powder - 1 teaspoon onion powder - 1 teaspoon smoked paprika - 1/2 teaspoon cayenne pepper (optional for heat) - Salt and pepper to taste - Cooking spray or olive oil for drizzling You can swap some ingredients if needed. Here are a few options: - Instead of buttermilk, use plain yogurt or milk with a bit of lemon juice. - Use whole wheat flour in place of all-purpose flour for a healthier option. - If you don’t have Panko breadcrumbs, regular breadcrumbs work too but may be less crunchy. - For a spicy kick, add more cayenne pepper or use a different spice blend like chili powder. When selecting chicken, freshness is key. Here’s how to ensure you get the best: - Look for chicken with a pink color and no dark spots. - Check the sell-by date to ensure it’s fresh. - Choose chicken that feels firm to the touch. - Avoid chicken that has a strong odor; this can indicate spoilage. - If possible, buy chicken from a local butcher or trusted source for quality and taste. By using these tips and ingredients, you set yourself up for success in making crispy baked chicken tenders. Start by cutting your chicken breast into strips. Aim for uniform sizes to cook evenly. Place the strips in a bowl and cover them with buttermilk. Make sure they’re fully submerged. This step adds flavor and tenderness. Let the chicken marinate in the fridge for at least 30 minutes. If you have time, overnight soaking works best for deep flavor. For the breading, you need three bowls. In the first bowl, mix flour with garlic powder, onion powder, smoked paprika, salt, and pepper. This blend gives a nice taste. In the second bowl, pour in the Panko breadcrumbs. Panko adds crunch, making your chicken extra crispy. Remove the chicken from the buttermilk. Let the excess drip off. First, coat each strip in the flour mix. Then, dip it in Panko, pressing down to help it stick. Place the coated strips on a baking sheet lined with parchment paper. Preheat your oven to 400°F (200°C). This temperature helps the chicken cook fast and get crisp. Lightly spray or drizzle the top of the tenders with cooking spray or olive oil. This adds even more crunch. Bake for 15-20 minutes, flipping halfway through. Check that they turn golden brown and reach an internal temperature of 165°F (75°C). Let them cool for a minute before serving. This ensures they stay crispy. For the full recipe, check out the instructions earlier. To get that perfect crunch, use Panko breadcrumbs. They are lighter and crispier than regular breadcrumbs. You should also coat the tenders well. Make sure to press the breadcrumbs onto the chicken. This way, they stick better and give you a nice texture when baked. For the best results, use cooking spray or olive oil. I recommend using an oil spray for a fine mist. This helps the tenders get crispy without soaking them in oil. If you prefer, drizzle a little olive oil on top. Just don’t overdo it; too much oil can lead to greasy chicken. To avoid soggy tenders, keep the chicken strips spaced out on the baking sheet. If they touch, steam builds up and makes them soggy. Also, bake them on parchment paper to allow airflow. This keeps the bottoms nice and dry. Lastly, flipping them halfway through ensures even crispiness all around. {{image_2}} You can elevate your crispy baked chicken tenders with fun flavors. Try adding herbs or spices to the breading mix. Here are some ideas: - Italian Twist: Add dried oregano, basil, and Parmesan cheese to the Panko. - Buffalo Kick: Mix hot sauce into the buttermilk for a spicy soak. - Sweet and Spicy: Blend honey and sriracha for a tasty glaze. These additions can make your tenders stand out. Experiment to find what you love best! If you need gluten-free chicken tenders, I have you covered. Substitute all-purpose flour with almond flour or a gluten-free blend. Use gluten-free Panko breadcrumbs instead of regular ones. This way, you can still enjoy crispy tenders without the gluten. You can cook chicken tenders in an air fryer or oven. Both methods work well, but they give different results. - Air Fryer: This method cooks faster and gives a crispier texture. Set it to 400°F (200°C) and cook for 10-15 minutes. Flip halfway for even browning. - Oven: Baking is simple and perfect for larger batches. Preheat to 400°F (200°C) and bake for 15-20 minutes. Flip them halfway for great color. Choose the method that suits your kitchen setup and time. Both ways will yield delicious chicken tenders. For the complete recipe, check out the [Full Recipe]. You can store leftover chicken tenders easily. Let them cool down first. Place them in an airtight container. Keep them in the fridge for up to three days. Make sure to cover them well to avoid moisture loss. This helps keep the tenders crispy for your next meal. To reheat your chicken tenders, use an oven for best results. Preheat your oven to 375°F (190°C). Place the tenders on a baking sheet. Bake for about 10 minutes or until they are hot. This keeps them crispy. You can also use a microwave, but the tenders may get soggy. If you choose the microwave, heat them for 1-2 minutes, checking often. If you want to save the chicken tenders for later, freezing works great. First, let them cool completely. Then, wrap each tender in plastic wrap. Place the wrapped tenders in a freezer bag. Squeeze out any air before sealing. They can stay in the freezer for up to three months. When you are ready to eat, thaw them in the fridge overnight. Then reheat as mentioned above for a tasty meal. For the full recipe, check the earlier section. Yes, you can use chicken thighs. They have more fat, which adds flavor. Thighs stay juicy and tender while cooking. Cut them into strips, just like breasts. Adjust cooking time slightly if needed, as thighs may take a minute longer to cook through. To keep the coating on, follow a few steps. First, marinate the chicken in buttermilk. This helps the coating stick. Next, press the breadcrumbs firmly onto the chicken. Finally, avoid flipping the tenders too soon while baking. Let them cook until golden brown for the best hold. Many sauces go great with chicken tenders. Here are some tasty options: - Honey mustard - BBQ sauce - Ranch dressing - Sweet and sour sauce - Buffalo sauce Each sauce adds a unique flavor. Try different ones to find your favorite! For the full recipe, check out the detailed instructions above. In this blog post, I covered key aspects of making chicken tenders. We explored the best ingredients, how to prep and bake them for crispiness, and tips for flavor. I also shared storage ideas and answered common questions. Remember, choosing fresh chicken and using the right cooking method can make a big difference. Experiment with flavors and cooking options to find what you love. With these steps, you’ll enjoy tender, crunchy chicken every time.](https://therecipehatch.com/wp-content/uploads/2025/06/a3c19570-4025-40c0-a01f-0cd3feee943d.webp)
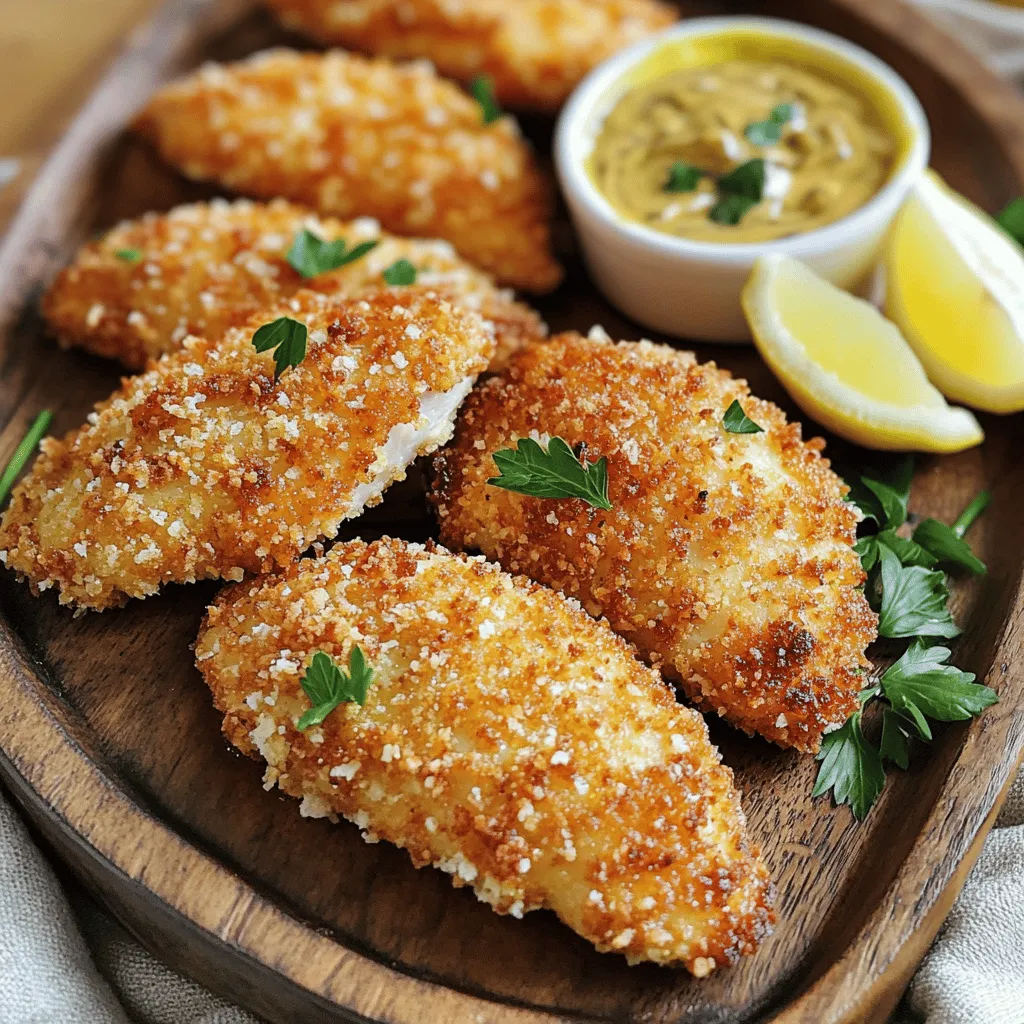
Are you ready to make crispy baked chicken tenders that will wow your taste buds? I’ve got an easy and fast recipe that’s perfect for busy weeknights or fun gatherings. You’ll find everything from essential ingredients to tips for that perfect crunch. Even if you’ve never cooked chicken tenders before, I’ll guide you step-by-step. Let’s dive in and make a dish everyone will love!
Ingredients
Full List of Ingredients
To make crispy baked chicken tenders, you will need these key ingredients:
– 1 lb chicken breast, cut into strips
– 1 cup buttermilk
– 1 cup all-purpose flour
– 1 cup Panko breadcrumbs
– 1 teaspoon garlic powder
– 1 teaspoon onion powder
– 1 teaspoon smoked paprika
– 1/2 teaspoon cayenne pepper (optional for heat)
– Salt and pepper to taste
– Cooking spray or olive oil for drizzling
Ingredient Substitutions
You can swap some ingredients if needed. Here are a few options:
– Instead of buttermilk, use plain yogurt or milk with a bit of lemon juice.
– Use whole wheat flour in place of all-purpose flour for a healthier option.
– If you don’t have Panko breadcrumbs, regular breadcrumbs work too but may be less crunchy.
– For a spicy kick, add more cayenne pepper or use a different spice blend like chili powder.
Tips for Choosing Fresh Chicken
When selecting chicken, freshness is key. Here’s how to ensure you get the best:
– Look for chicken with a pink color and no dark spots.
– Check the sell-by date to ensure it’s fresh.
– Choose chicken that feels firm to the touch.
– Avoid chicken that has a strong odor; this can indicate spoilage.
– If possible, buy chicken from a local butcher or trusted source for quality and taste.
By using these tips and ingredients, you set yourself up for success in making crispy baked chicken tenders.
Step-by-Step Instructions
Prepping the Chicken Strips
Start by cutting your chicken breast into strips. Aim for uniform sizes to cook evenly. Place the strips in a bowl and cover them with buttermilk. Make sure they’re fully submerged. This step adds flavor and tenderness. Let the chicken marinate in the fridge for at least 30 minutes. If you have time, overnight soaking works best for deep flavor.
Breading Process Explained
For the breading, you need three bowls. In the first bowl, mix flour with garlic powder, onion powder, smoked paprika, salt, and pepper. This blend gives a nice taste. In the second bowl, pour in the Panko breadcrumbs. Panko adds crunch, making your chicken extra crispy. Remove the chicken from the buttermilk. Let the excess drip off. First, coat each strip in the flour mix. Then, dip it in Panko, pressing down to help it stick. Place the coated strips on a baking sheet lined with parchment paper.
Baking Tips for Crispiness
Preheat your oven to 400°F (200°C). This temperature helps the chicken cook fast and get crisp. Lightly spray or drizzle the top of the tenders with cooking spray or olive oil. This adds even more crunch. Bake for 15-20 minutes, flipping halfway through. Check that they turn golden brown and reach an internal temperature of 165°F (75°C). Let them cool for a minute before serving. This ensures they stay crispy. For the full recipe, check out the instructions earlier.
Tips & Tricks
Achieving Perfect Crunch
To get that perfect crunch, use Panko breadcrumbs. They are lighter and crispier than regular breadcrumbs. You should also coat the tenders well. Make sure to press the breadcrumbs onto the chicken. This way, they stick better and give you a nice texture when baked.
Recommended Cooking Spray or Oil Options
For the best results, use cooking spray or olive oil. I recommend using an oil spray for a fine mist. This helps the tenders get crispy without soaking them in oil. If you prefer, drizzle a little olive oil on top. Just don’t overdo it; too much oil can lead to greasy chicken.
How to Avoid Soggy Tenders
To avoid soggy tenders, keep the chicken strips spaced out on the baking sheet. If they touch, steam builds up and makes them soggy. Also, bake them on parchment paper to allow airflow. This keeps the bottoms nice and dry. Lastly, flipping them halfway through ensures even crispiness all around.
Variations
Flavor Additions for Extra Taste
You can elevate your crispy baked chicken tenders with fun flavors. Try adding herbs or spices to the breading mix. Here are some ideas:
– Italian Twist: Add dried oregano, basil, and Parmesan cheese to the Panko.
– Buffalo Kick: Mix hot sauce into the buttermilk for a spicy soak.
– Sweet and Spicy: Blend honey and sriracha for a tasty glaze.
These additions can make your tenders stand out. Experiment to find what you love best!
Gluten-Free Options
If you need gluten-free chicken tenders, I have you covered. Substitute all-purpose flour with almond flour or a gluten-free blend. Use gluten-free Panko breadcrumbs instead of regular ones. This way, you can still enjoy crispy tenders without the gluten.
Cooking Methods: Air Fryer vs. Oven
You can cook chicken tenders in an air fryer or oven. Both methods work well, but they give different results.
– Air Fryer: This method cooks faster and gives a crispier texture. Set it to 400°F (200°C) and cook for 10-15 minutes. Flip halfway for even browning.
– Oven: Baking is simple and perfect for larger batches. Preheat to 400°F (200°C) and bake for 15-20 minutes. Flip them halfway for great color.
Choose the method that suits your kitchen setup and time. Both ways will yield delicious chicken tenders. For the complete recipe, check out the [Full Recipe].
Storage Info
Storing Leftovers Properly
You can store leftover chicken tenders easily. Let them cool down first. Place them in an airtight container. Keep them in the fridge for up to three days. Make sure to cover them well to avoid moisture loss. This helps keep the tenders crispy for your next meal.
Reheating Instructions
To reheat your chicken tenders, use an oven for best results. Preheat your oven to 375°F (190°C). Place the tenders on a baking sheet. Bake for about 10 minutes or until they are hot. This keeps them crispy. You can also use a microwave, but the tenders may get soggy. If you choose the microwave, heat them for 1-2 minutes, checking often.
Freezing for Later Use
If you want to save the chicken tenders for later, freezing works great. First, let them cool completely. Then, wrap each tender in plastic wrap. Place the wrapped tenders in a freezer bag. Squeeze out any air before sealing. They can stay in the freezer for up to three months. When you are ready to eat, thaw them in the fridge overnight. Then reheat as mentioned above for a tasty meal. For the full recipe, check the earlier section.
FAQs
Can I use chicken thighs instead of breasts?
Yes, you can use chicken thighs. They have more fat, which adds flavor. Thighs stay juicy and tender while cooking. Cut them into strips, just like breasts. Adjust cooking time slightly if needed, as thighs may take a minute longer to cook through.
How do I prevent the coating from falling off?
To keep the coating on, follow a few steps. First, marinate the chicken in buttermilk. This helps the coating stick. Next, press the breadcrumbs firmly onto the chicken. Finally, avoid flipping the tenders too soon while baking. Let them cook until golden brown for the best hold.
What dipping sauces pair well with chicken tenders?
Many sauces go great with chicken tenders. Here are some tasty options:
– Honey mustard
– BBQ sauce
– Ranch dressing
– Sweet and sour sauce
– Buffalo sauce
Each sauce adds a unique flavor. Try different ones to find your favorite! For the full recipe, check out the detailed instructions above.
In this blog post, I covered key aspects of making chicken tenders. We explored the best ingredients, how to prep and bake them for crispiness, and tips for flavor. I also shared storage ideas and answered common questions.
Remember, choosing fresh chicken and using the right cooking method can make a big difference. Experiment with flavors and cooking options to find what you love. With these steps, you’ll enjoy tender, crunchy chicken every time.
![To make crispy baked chicken tenders, you will need these key ingredients: - 1 lb chicken breast, cut into strips - 1 cup buttermilk - 1 cup all-purpose flour - 1 cup Panko breadcrumbs - 1 teaspoon garlic powder - 1 teaspoon onion powder - 1 teaspoon smoked paprika - 1/2 teaspoon cayenne pepper (optional for heat) - Salt and pepper to taste - Cooking spray or olive oil for drizzling You can swap some ingredients if needed. Here are a few options: - Instead of buttermilk, use plain yogurt or milk with a bit of lemon juice. - Use whole wheat flour in place of all-purpose flour for a healthier option. - If you don’t have Panko breadcrumbs, regular breadcrumbs work too but may be less crunchy. - For a spicy kick, add more cayenne pepper or use a different spice blend like chili powder. When selecting chicken, freshness is key. Here’s how to ensure you get the best: - Look for chicken with a pink color and no dark spots. - Check the sell-by date to ensure it’s fresh. - Choose chicken that feels firm to the touch. - Avoid chicken that has a strong odor; this can indicate spoilage. - If possible, buy chicken from a local butcher or trusted source for quality and taste. By using these tips and ingredients, you set yourself up for success in making crispy baked chicken tenders. Start by cutting your chicken breast into strips. Aim for uniform sizes to cook evenly. Place the strips in a bowl and cover them with buttermilk. Make sure they’re fully submerged. This step adds flavor and tenderness. Let the chicken marinate in the fridge for at least 30 minutes. If you have time, overnight soaking works best for deep flavor. For the breading, you need three bowls. In the first bowl, mix flour with garlic powder, onion powder, smoked paprika, salt, and pepper. This blend gives a nice taste. In the second bowl, pour in the Panko breadcrumbs. Panko adds crunch, making your chicken extra crispy. Remove the chicken from the buttermilk. Let the excess drip off. First, coat each strip in the flour mix. Then, dip it in Panko, pressing down to help it stick. Place the coated strips on a baking sheet lined with parchment paper. Preheat your oven to 400°F (200°C). This temperature helps the chicken cook fast and get crisp. Lightly spray or drizzle the top of the tenders with cooking spray or olive oil. This adds even more crunch. Bake for 15-20 minutes, flipping halfway through. Check that they turn golden brown and reach an internal temperature of 165°F (75°C). Let them cool for a minute before serving. This ensures they stay crispy. For the full recipe, check out the instructions earlier. To get that perfect crunch, use Panko breadcrumbs. They are lighter and crispier than regular breadcrumbs. You should also coat the tenders well. Make sure to press the breadcrumbs onto the chicken. This way, they stick better and give you a nice texture when baked. For the best results, use cooking spray or olive oil. I recommend using an oil spray for a fine mist. This helps the tenders get crispy without soaking them in oil. If you prefer, drizzle a little olive oil on top. Just don’t overdo it; too much oil can lead to greasy chicken. To avoid soggy tenders, keep the chicken strips spaced out on the baking sheet. If they touch, steam builds up and makes them soggy. Also, bake them on parchment paper to allow airflow. This keeps the bottoms nice and dry. Lastly, flipping them halfway through ensures even crispiness all around. {{image_2}} You can elevate your crispy baked chicken tenders with fun flavors. Try adding herbs or spices to the breading mix. Here are some ideas: - Italian Twist: Add dried oregano, basil, and Parmesan cheese to the Panko. - Buffalo Kick: Mix hot sauce into the buttermilk for a spicy soak. - Sweet and Spicy: Blend honey and sriracha for a tasty glaze. These additions can make your tenders stand out. Experiment to find what you love best! If you need gluten-free chicken tenders, I have you covered. Substitute all-purpose flour with almond flour or a gluten-free blend. Use gluten-free Panko breadcrumbs instead of regular ones. This way, you can still enjoy crispy tenders without the gluten. You can cook chicken tenders in an air fryer or oven. Both methods work well, but they give different results. - Air Fryer: This method cooks faster and gives a crispier texture. Set it to 400°F (200°C) and cook for 10-15 minutes. Flip halfway for even browning. - Oven: Baking is simple and perfect for larger batches. Preheat to 400°F (200°C) and bake for 15-20 minutes. Flip them halfway for great color. Choose the method that suits your kitchen setup and time. Both ways will yield delicious chicken tenders. For the complete recipe, check out the [Full Recipe]. You can store leftover chicken tenders easily. Let them cool down first. Place them in an airtight container. Keep them in the fridge for up to three days. Make sure to cover them well to avoid moisture loss. This helps keep the tenders crispy for your next meal. To reheat your chicken tenders, use an oven for best results. Preheat your oven to 375°F (190°C). Place the tenders on a baking sheet. Bake for about 10 minutes or until they are hot. This keeps them crispy. You can also use a microwave, but the tenders may get soggy. If you choose the microwave, heat them for 1-2 minutes, checking often. If you want to save the chicken tenders for later, freezing works great. First, let them cool completely. Then, wrap each tender in plastic wrap. Place the wrapped tenders in a freezer bag. Squeeze out any air before sealing. They can stay in the freezer for up to three months. When you are ready to eat, thaw them in the fridge overnight. Then reheat as mentioned above for a tasty meal. For the full recipe, check the earlier section. Yes, you can use chicken thighs. They have more fat, which adds flavor. Thighs stay juicy and tender while cooking. Cut them into strips, just like breasts. Adjust cooking time slightly if needed, as thighs may take a minute longer to cook through. To keep the coating on, follow a few steps. First, marinate the chicken in buttermilk. This helps the coating stick. Next, press the breadcrumbs firmly onto the chicken. Finally, avoid flipping the tenders too soon while baking. Let them cook until golden brown for the best hold. Many sauces go great with chicken tenders. Here are some tasty options: - Honey mustard - BBQ sauce - Ranch dressing - Sweet and sour sauce - Buffalo sauce Each sauce adds a unique flavor. Try different ones to find your favorite! For the full recipe, check out the detailed instructions above. In this blog post, I covered key aspects of making chicken tenders. We explored the best ingredients, how to prep and bake them for crispiness, and tips for flavor. I also shared storage ideas and answered common questions. Remember, choosing fresh chicken and using the right cooking method can make a big difference. Experiment with flavors and cooking options to find what you love. With these steps, you’ll enjoy tender, crunchy chicken every time.](https://therecipehatch.com/wp-content/uploads/2025/06/a3c19570-4025-40c0-a01f-0cd3feee943d-300x300.webp)